8 controlling a remote rs-232 device, Controlling a remote rs-232 device, Figure 9: cascading up to eight vp-81ksi devices – Kramer Electronics VP-81KSi User Manual
Page 19: Figure 9
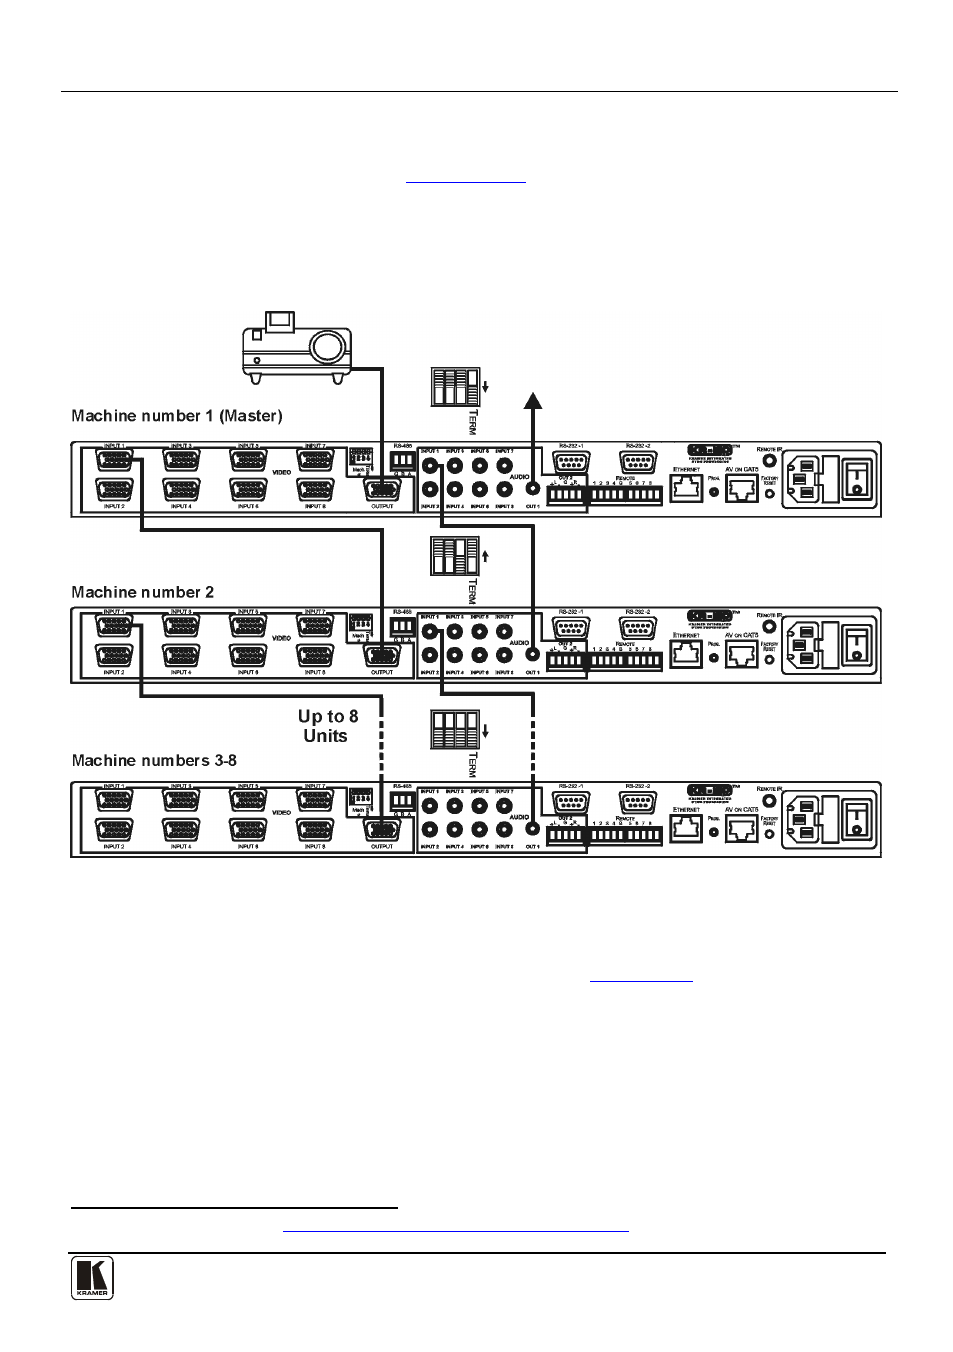
Connecting the VP-81KSi 8x1 UXGA/Audio STEP-IN Switcher
15
Note: Audio connections must follow the same connection scheme as the video
connections.
4. Set the DIP-switches (see
Section 6.6.1
The first device is machine number 1 (Master) and the following seven
devices are machine numbers 2 to 8
) as follows:
Terminate the first and last physical devices, that is, terminate machine
numbers 1 and 8. Ensure that all other devices are unterminated
Figure 9: Cascading up to Eight VP-81KSi Devices
Note: The video acceptor must be connected to the Master output. The outputs of
all other devices may be connected to any input on the subsequent device.
For operation of cascaded VP-81KSi devices, see
Section 7.4
6.8 Controlling a Remote RS-232 Device
Use the Kramer K-Config software
A computer running the K-Config software can be connected to the VP-81KSi via
either the RS-232-1 serial or the Ethernet ports.
to define macros sent from the RS-232-2 port
to remote RS-232 serial devices (for example, a projector). For instructions on
using the K-Config software, see the K-Config software guide.
1 Download the latest version fro