Figure 3: connecting the vp-81ksi, Figure 3 – Kramer Electronics VP-81KSi User Manual
Page 13
Connecting the VP-81KSi 8x1 UXGA/Audio STEP-IN Switcher
9
6
Connecting the VP-81KSi 8x1 UXGA/Audio STEP-IN Switcher
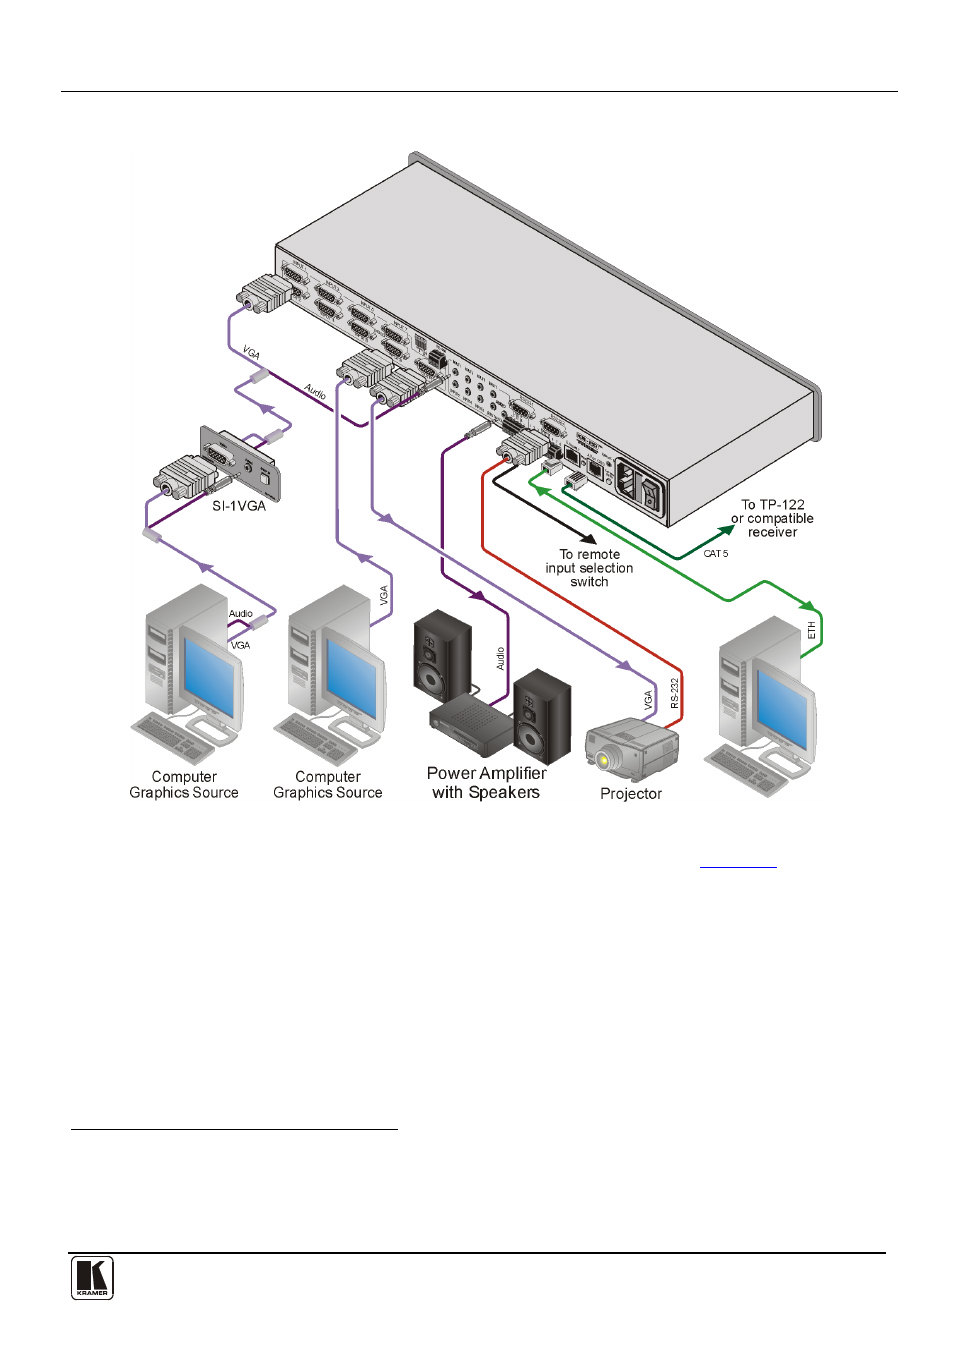
Figure 3: Connecting the VP-81KSi
To connect
the VP-81KSi, as illustrated in the example in
1. Connect up to eight
SI-1VGA Remote Step-in Panels to the VP-81KSi
15-pin HD VIDEO INPUT connectors
2. Connect up to eight WUXGA computer graphics sources to the SI-1VGA
15-pin HD video connectors.
and to the 3.5mm mini jacks (from 1
to 8).
3. Connect up to eight unbalanced audio sources to the 3.5mm mini jack audio
connectors on the SI-1VGA panels.
4. Connect the 15-pin HD VIDEO OUTPUT connector to a WUXGA acceptor
(for example, a projector).
1 Be sure that the power is switched off on each device before connecting it to your VP-81KSi. After connecting all the devices to your
VP-81KSi, switch on the power of the VP-81KSi, and then switch on the power of each device
2 You do not have to connect all the inputs
3 The cable used must connect all 15 pins