4 connecting the av on cat 5 twisted pair output, 5 connecting to the vp-81ksi via the rs232 port, Connecting the av on cat 5 twisted pair output – Kramer Electronics VP-81KSi User Manual
Page 16: Connecting to the vp-81ksi via the rs-232 port, Figure 7: connecting the si-1vga, Figure 7
KRAMER: SIMPLE CREATIVE TECHNOLOGY
Connecting the VP-81KSi 8x1 UXGA/Audio STEP-IN Switcher
12
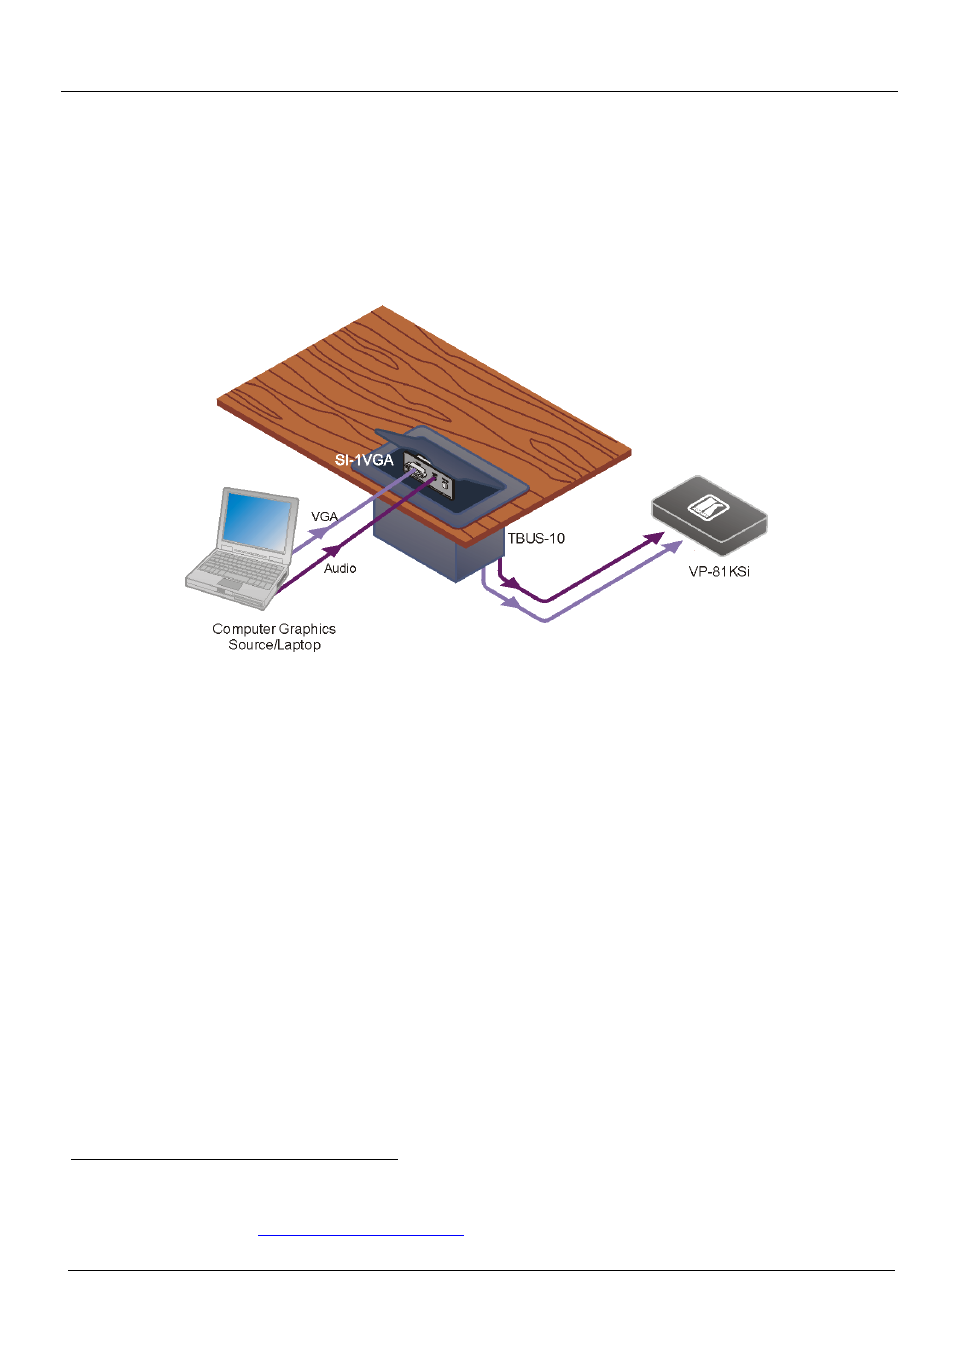
2. Using a 15-pin HD (male to male) cable
3. Using an audio cable with 3.5mm mini jacks at both ends
, connect the 15-pin HD connector
on the rear of the SI-1VGA to the corresponding input on the rear of the
VP-81KSi.
4. Repeat steps 2 and 3 for each SI-1VGA remote step-in module.
, connect the
3.5mm mini connector on the rear of the SI-1VGA to the corresponding audio
input on the rear of the VP-81KSi.
Figure 7: Connecting the SI-1VGA
6.4 Connecting the AV ON CAT 5 Twisted Pair Output
You can connect the VP-81KSi to any compatible Kramer TP (Twisted Pair)
receiver, for example, TP-120 (no audio) or TP-122 (with audio).
For further details, refer to the relevant TP receiver user manual
6.5 Connecting to the VP-81KSi via the RS-232 Port
.
You can connect to the VP-81KSi via an RS-232 connection using, for example, a
PC.
To connect to the VP-81KSi via RS-232:
•
Connect the RS-232 9-pin D-sub rear panel port on the VP-81KSi unit via a
9-wire straight cable (pin 2 to pin 2, pin 3 to pin 3, pin 5 to pin 5) to the
RS-232 9-pin D-sub port on your PC
1 For example, Kramer C-GM/GM
2 For example, Kramer C-A35M/A35M
3 Available for download fro