Mittaus, Yksittäinen mittaus】 【jatkuva mittaustoiminto – Nikon COOLSHOT User Manual
Page 107
212
213
Fi
En
Jp
Fr
Es
Pt
Ru
Se
Nl
De
It
Dk
Pl
Hu
Cz
No
Ro
Fi
En
Jp
Fr
Es
Pt
Ru
Se
Nl
De
It
Dk
Pl
Hu
Cz
No
Ro
Measurement
1. Press the POWER button for power-on.
(Power turns off 8 seconds after the last
operation.)
Immediately after power-on.
(Initializing)
Stand-by.
3. Press POWER button once to start single measurement.
Measuring.
4. After measurement, “distance” or “fail to measure” indicator are displayed for 8 seconds, then power turns off. If you press the POWER
button during power-on (while the internal display is lit), another single measurement starts.
Failure to measure or
unable to measure distance.
Displays the measured
figure. (Target 1)
Displays the measured
figure. (Target 2)
3. Keep pressing POWER button to start continuous measurement up to 20 seconds. The internal display shows “distance” and
“fail to measure” indicator alternately.
Note: Laser irradiaton mark is blinking during the measurement.
Note: If you stop pressing the button, the continuous measuremen stops
Target focusing.
2. Aim at the target
.
Position the target at the center of the reticle
[Single measurement]
Failure to measure or
unable to measure distance.
Upward measurement.
Downward measurement.
Displays the measured figure.
[Continuous measurement]
4. After continuous measurement, the measure results are displayed for 8 seconds, then power turns off. If you press the POWER
button during power-on (while the internal display is lit), another measrement starts.
Mittaus
Huomautus — ohjainten, säätimien tai toimintojen käyttäminen muuhun
tarkoitukseen tai muulla kuin tässä esitetyllä tavalla voi altistaa säteilylle.
1. Valmistelut
Asenna paristo paristolokeroon. (Katso "Pariston vaihto")
2. Kuminen silmäsuppilo
Etäisyysmittaria voi käyttää sekä silmälasien kanssa että ilman.
3. Diopterin säätö
Säädä diopteria selkeän kuvan saamiseksi nestekidenäyttöön.
Kierrä diopterin säätörengasta ensin vastapäivään, kunnes se pysähtyy. Kytke sitten
virta päälle painamalla POWER ON/Measurement -painiketta. Varmista, että sisäinen
näyttö on päällä. Katso kohdetta okulaarien läpi ja kierrä diopterin säätörengasta
myötäpäivään, kunnes näyttö tarkentuu.
Jos säätörengasta kierretään liikaa, säädä sitä vastapäivään kääntämällä.
Jos diopterin säätö ei vastaa paljaan silmän näkötarkkuutta, kohteeseen
tähtääminen oikein ei ehkä ole mahdollista.
4. Mittaus käynnissä
Ennen mittausta on varmistettava jokaisen toimintatilan (Mittaustilan näyttö/
Esivalintatila/Etäisyyden näyttöyksikkö) asetukset.
* Lue kustakin osasta lisää toimintatilan asettamisesta.
1. Kytke virta päälle (ja varmista,
että sisäinen näyttö on päällä).
2. Tähtää kohteeseen.
Sijoita kohde ristikon keskelle.
Heti virran päällekytkennän
jälkeen (Alustus)
Valmiustila
Tähtäys kohteeseen
(Automaattinen virrankatkaisu
tapahtuu noin 8 sekunnin kuluttua)
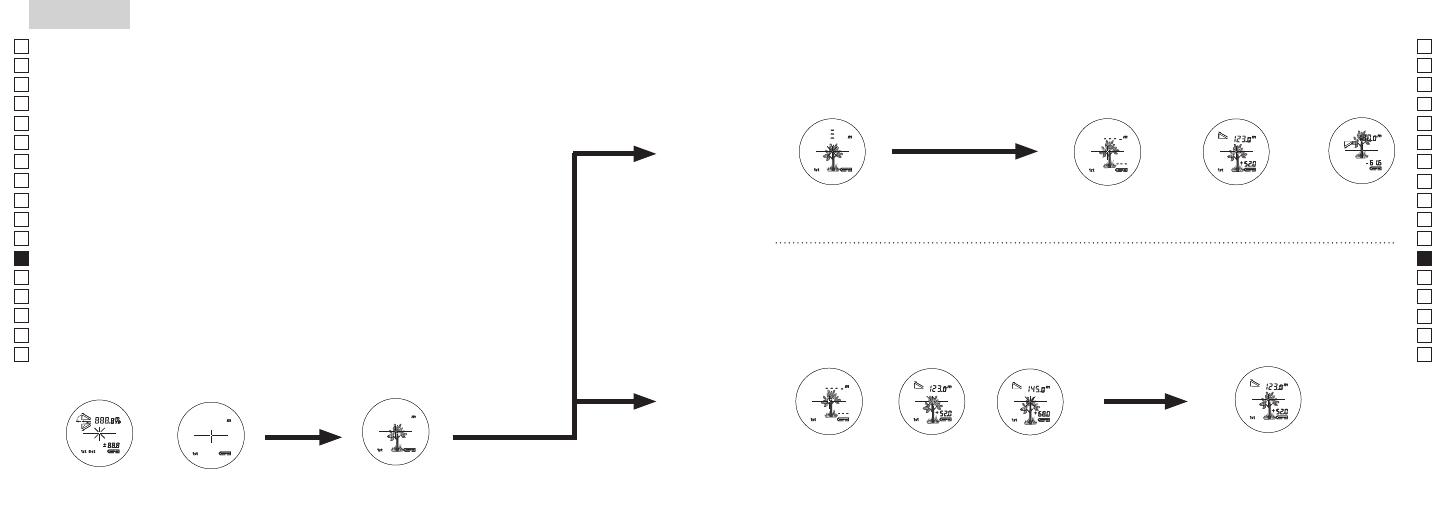
【Yksittäinen mittaus】
【Jatkuva mittaustoiminto】
3. Paina POWER ON/Measurement
-painiketta kerran yksittäisen
mittauksen käynnistämiseksi.
Measurement
1. Press the POWER button for power-on.
(Power turns off 8 seconds after the last
operation.)
Immediately after power-on.
(Initializing)
Stand-by.
3. Press POWER button once to start single measurement.
Measuring.
4. After measurement, “distance” or “fail to measure” indicator are displayed for 8 seconds, then power turns off. If you press the POWER
button during power-on (while the internal display is lit), another single measurement starts.
Failure to measure or
unable to measure distance.
Displays the measured
figure. (Target 1)
Displays the measured
figure. (Target 2)
3. Keep pressing POWER button to start continuous measurement up to 20 seconds. The internal display shows “distance” and
“fail to measure” indicator alternately.
Note: Laser irradiaton mark is blinking during the measurement.
Note: If you stop pressing the button, the continuous measuremen stops
Target focusing.
2. Aim at the target
.
Position the target at the center of the reticle
[Single measurement]
Failure to measure or
unable to measure distance.
Upward measurement.
Downward measurement.
Displays the measured figure.
[Continuous measurement]
4. After continuous measurement, the measure results are displayed for 8 seconds, then power turns off. If you press the POWER
button during power-on (while the internal display is lit), another measrement starts.
4. Mittauksen jälkeen "epäonnistunut mittaus" -merkintä tai "mitattu etäisyys"
näkyy näytöllä 8 sekunnin ajan, jonka jälkeen virta kytkeytyy pois päältä.
Jos painat POWER ON/Measurement -painiketta virran ollessa päällä (kun
sisäinen näyttö on aktiivinen), uusi yksittäinen mittaus alkaa.
3. Painamalla ja pitämällä painettuna POWER ON/Measurement
-painiketta käynnistyy jatkuva mittaus noin 8 sekunniksi.
Sisäisellä näytöllä näkyy "epäonnistunut mittaus" ja
"mittausetäisyys" vuorotellen
* Lasersäteilyn merkintä vilkkuu mittauksen ajan.
* Jos nostat sormesi painikkeelta, jatkuva mittaus keskeytyy.
"Mittaus epäonnistui"
tai "etäisyyttä ei voi
mitata".
Näyttää mitatun
kuvan (kohde 1)
Näyttää mitatun
kuvan (kohde 2)
4. Jatkuvan mittauksen jälkeen lopulliset mittaustulokset (mitattu
etäisyys) näkyvät näytöllä 8 sekunnin ajan, minkä jälkeen virta
kytkeytyy pois päältä.
Jos painat POWER ON/Measurement -painiketta virran ollessa
päällä (kun sisäinen näyttö on aktiivinen), uusi mittaus alkaa.
Kun esim. golfkentällä mitataan etäisyyttä lipputankoon, käytä
lähimmän kohteen esivalintatilaa. Skannaa lipputankoa jatkuvalla
mittauksella mittaamisen helpottamiseksi. Jos käyttäjän ja
lipputangon välissä ei ole esteitä, pienin näytettävä lukema on
käyttäjän ja lipputangon välinen etäisyys.
Mittaus käynnissä
"Mittaus epäonnistui" tai
"etäisyyttä ei voi mitata".
Mittaus ylöspäin
Mittaus alaspäin
Näyttää mitatun kuvan