Completing the installation, Draining the system, Periodic maintenance – Swiftech H20 120 R3A User Manual
Page 14: Iii. draining the system, Iv. periodic maintenance
Copyright Swiftech 2004 – All rights reserved – Last revision date: 11-23-04
Rouchon Industries, Inc., dba Swiftech – 1703 E. 28
th
Street, Signal Hill, CA 90755 – Tel. 562-595-8009 – Fax 562-595-8769 - E Mail:
[email protected] – URL:
http://www.swiftnets.com
7. C
OMPLETING THE INSTALLATION
Once your system has been tested for leaks, it is now time to finalize the water-block and components installation. Do not forget to
remove the protective paper you used to protect the CPU and water-block. Follow the instructions listed in appendix to secure your
water-block(s) to the motherboard, and then re-install your components inside of the chassis.
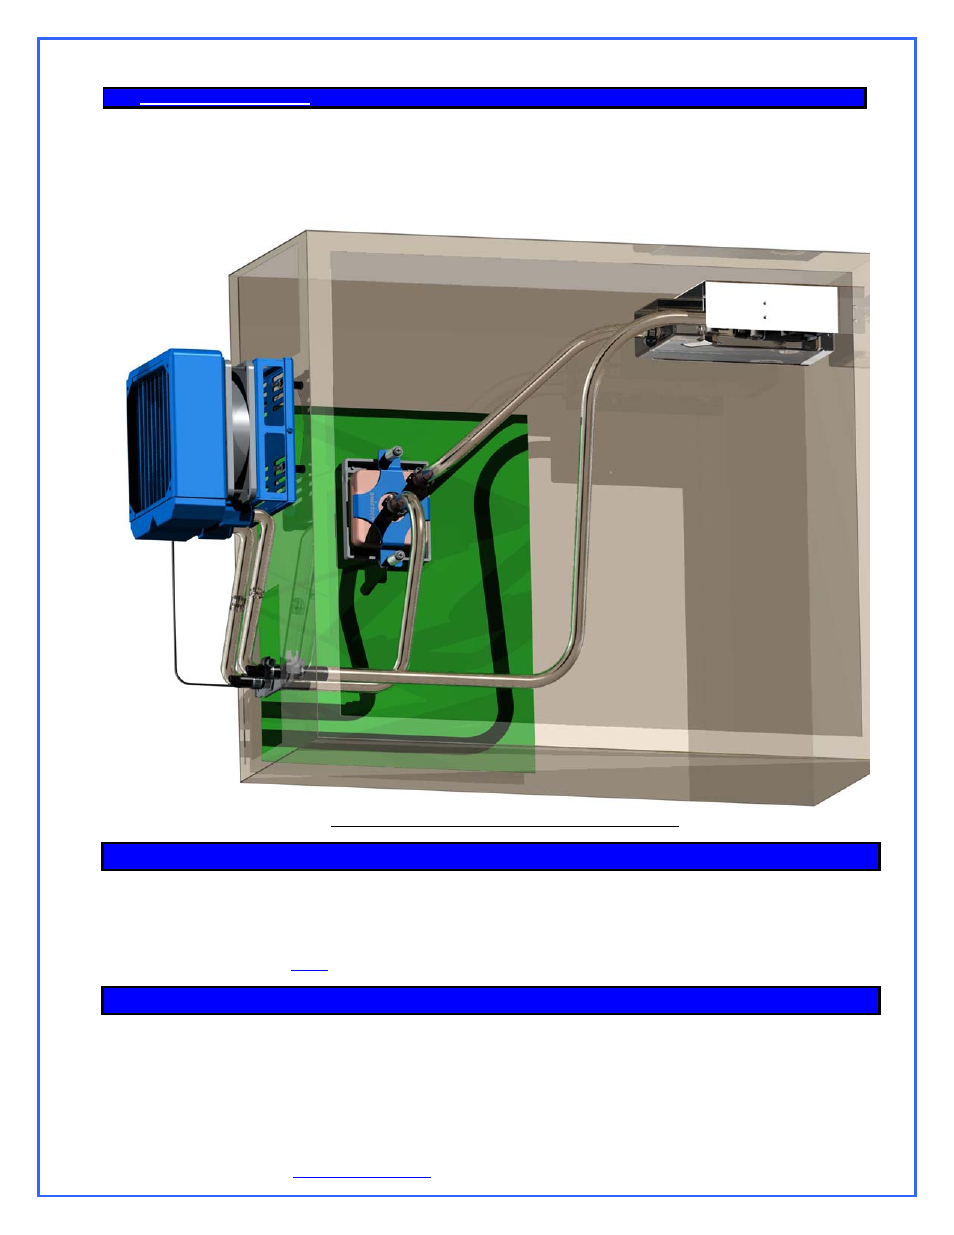
Ideal high overall performance installation (with “Radbox”)
III. Draining the system
You will need to disconnect a line from one of the lowermost components. Procure a bucket large enough to receive
approximately 1 liter of fluid, and place the bucket underneath the connection that you intend to “break”. Disconnect the
line, and place both ends into the bucket.
Open up the fill-cap from the MCRES-1000P. This will allow most of the fluid to escape.
A cleaner and much more convenient method consists in incorporating a drain assembly into the circuit during initial
installation. See
drain assembly below.
IV. Periodic maintenance
Every 6 months: dust off the radiator fins and fan. You can use a can of compressed air for example, available
in most electronic supply stores. If you live in a very dusty area, you should perform this task at closer intervals.
It is essential to maintain the optimum performance of your cooling system.
- Information subject to change without notice Page 14 of 38
Inspect the level of liquid inside the circuit, and refill if necessary. Evaporation in this closed circuit is extremely
limited, but still present due to permeability in the vinyl lines.