Swiftech SLI/Crossfire bridges for MCW60/80/82 User Manual
Sli/crossfire bridge series
Copyright Swiftech 2011
– All rights reserved – Last revision date: 9-9-11 – Rouchon Industries, Inc., dba Swiftech® –151 West Victoria St., Long Beach, CA 90805 – Tel.
(310) 763-0336 - Toll free (US) 888-857-9438
– Fax (310) 763-7095 - E Mail: [email protected] – URL: www.swiftech.com - Information subject to change without notice
SLI/CrossFire Bridge series
INSTALLATION GUIDE
Compatible fittings general specifications
Thread Size and class
Thread length
O-ring style
Fitting Style
¼” BSPP, G1/4”
Up to 5mm
Built-in (
“Eurostyle”)
All barb fittings, All Compression up to ½” tube OD
Compatible Swiftech fittings & clamps
For ½” ID (5/8” or 3/4” OD) tubing
For 3/8” ID (1/2” OD) tubing
Use with
Worm-drive
clamp
(set of 4)
Use wit
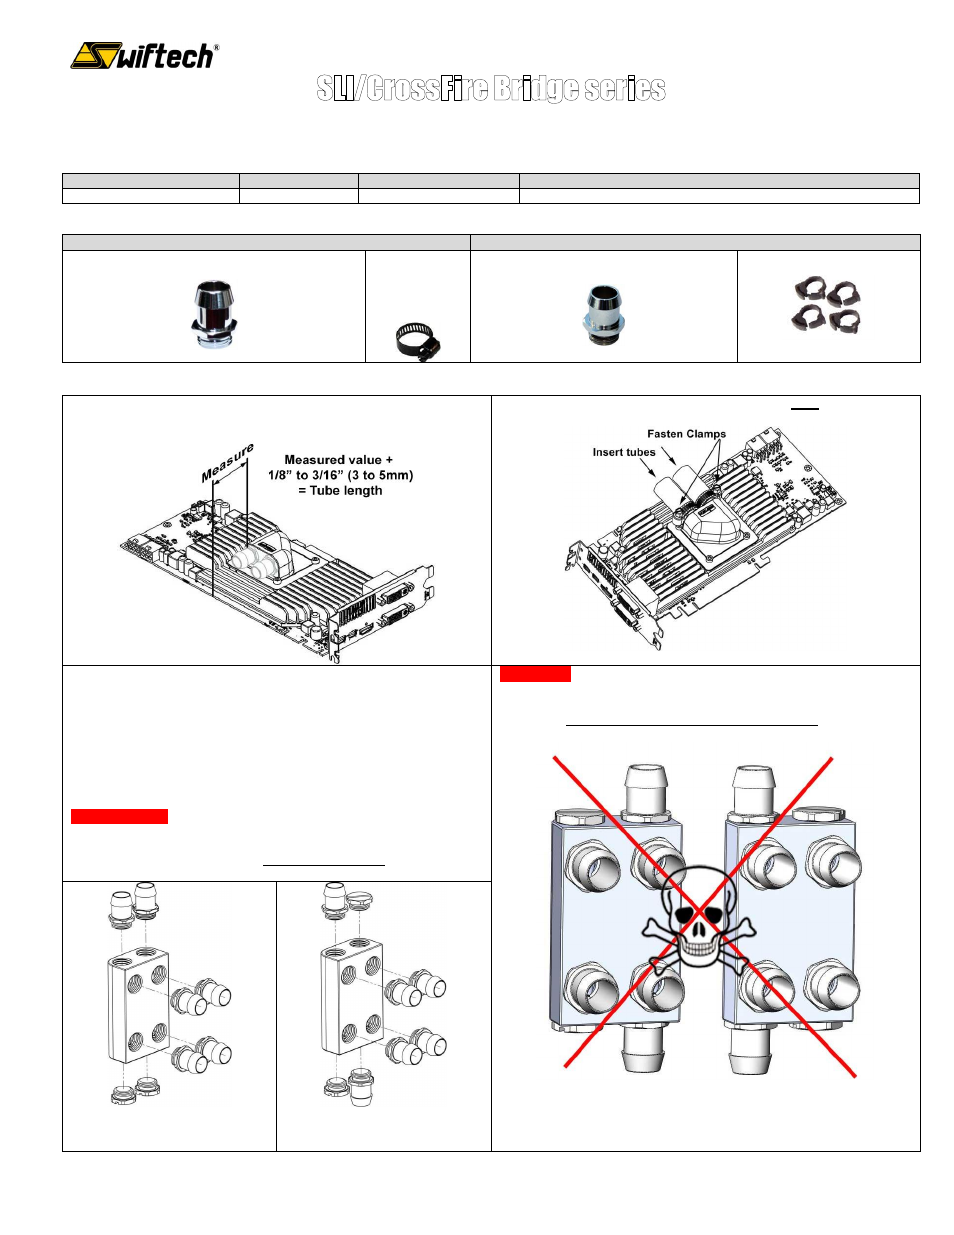
Step 1: Cut the tubing to length
– Make sure all tubes are of equal
length!
Step 2: Insert the tubes and fasten the clamps to each waterblock
Step 3: Install the fittings to the bridge
Installation of the upper and lower fittings will depend on how your loop is
routed. Two typical examples are shown below.
Fasten the fittings until they completely mate with the bridge: the metal
flange of the fitting must sit flat against the surface of the bridge, thus
compressing the O-ring, and then tighten them
using a 5/8” (15mm)
wrench or socket as described below.
CRITICAL READ: The tightening force (torque) must be firm but not
excessive: not enough torque and the fitting will get loose and leak
over time, and too much torque will permanently damage the plastic
thread. Ideally, you want to add one quarter of a turn after the fitting
has reached its mating surface.
WARNING:
NEVER install the upper and lower barb fittings in the same vertical
alignment, or there will be no flow to the water-blocks!
Example 1: both inlet and outlet go
ports go upwards
Example 2: one port goes upwards,
and one port goes downwards.