Hubbardton Forge 346011 User Manual
Installation instructions, For post and pier mounted outdoor fixtures
H U B B A R D T O N F O R G E . C O M
hand-forged, vermont-made lighting and accessories
154 RT. 30 SOUTH
•
CASTLETON, VERMONT 05735
All designs and images ©1989-2013 Hubbardton Forge
®
. All rights reserved.
14823 Rev A
Installation Instructions
If you need further assistance, or find that you are missing any parts, please contact the dealer from which you purchased this product.
We hope you enjoy your fixture!
* Hubbardton Forge will not be liable for injury or damage caused by improper installation, lamping or use of this fixture.
To Install
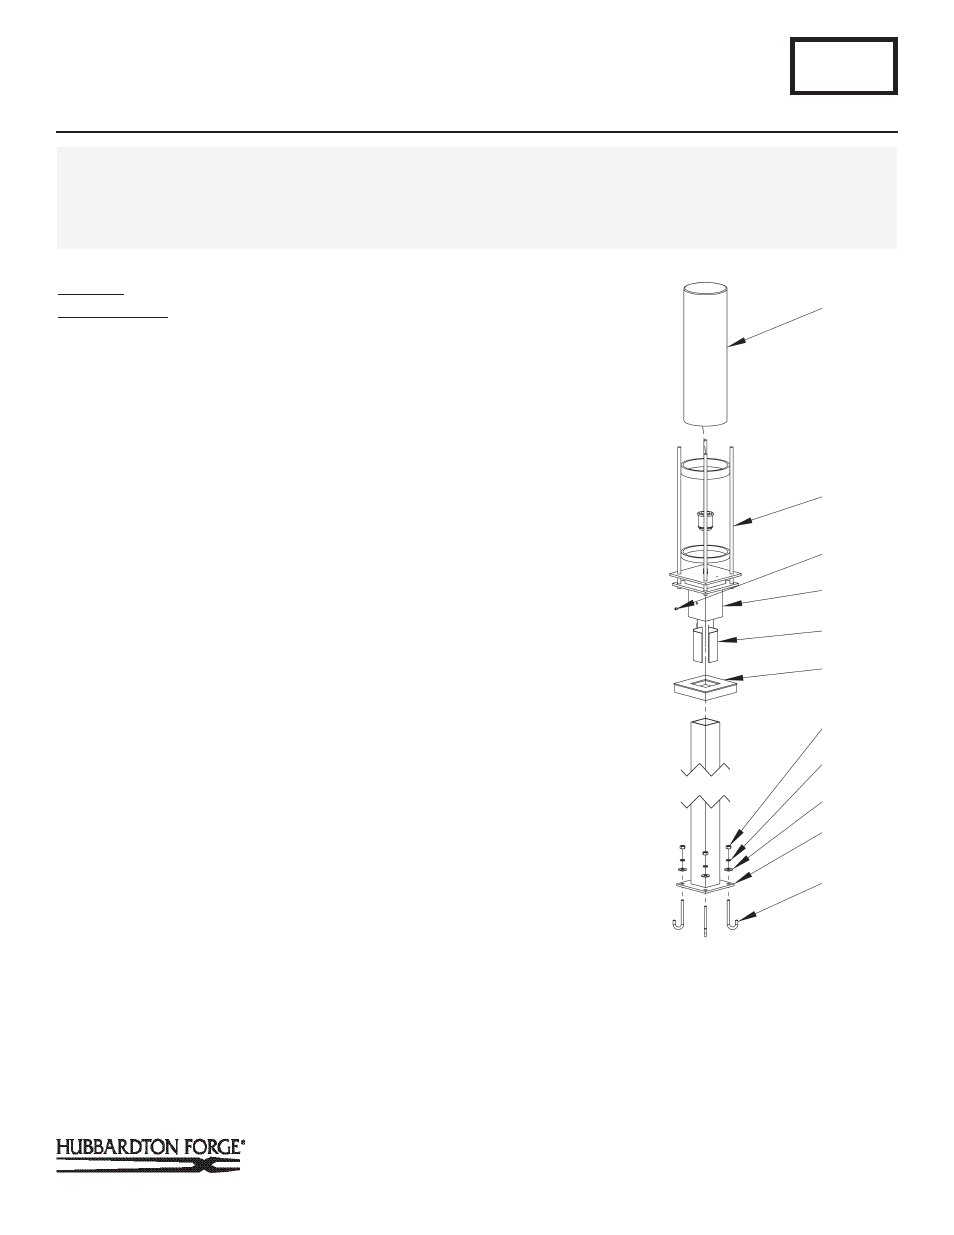
Component Parts
Note: Fixture, Post and Cover Cap each sold separately.
A J Bolts
B Fixture post
C Washers (4)
D Split washers (4)
E 5/16 nuts (4)
CAUTION: BE SURE POWER IS OFF AT THE MAIN BREAKER BOX
PRIOR TO INSTALLATION.
Site Preparation
1. Run appropriate wiring to the site of the fixture, leaving
enough excess wire to reach the top of the post, plus 12
inches.
2. Pour flat and level concrete base with wiring emerging at
the center. Insert J bolts (A) so approximately 1" of the bolts
are exposed above the concrete. Position J bolts according
to the supplied template. Allow concrete to cure before
installing fixture.
Installation
Note: Post may be cut to length as desired before installation
begins.
1. Position post over J bolts allowing supply wire to run up
though the post and secure using washers (C), split washers
(D) and nuts (E).
2. Place optional cover cap (sold separately) (F) over post to
conceal mounting hardware.
3. Connect fixture wires to supply wires using appropriate wire
connectors (not provided), black to black, white to white
and bare copper or green to bare copper or green. If fixture
is wired with twin lead lamp cord, connect smooth side of
fixture wire to black and ridged side to white.
G2
For Post and Pier Mounted Outdoor Fixtures
Page 1 of 2
CAUTION: FAILURE TO INSTALL THIS FIXTURE PROPERLY MAY RESULT IN SERIOUS PERSONAL INJURY OR DEATH AND
PROPERTY DAMAGE. We recommend installation by a licensed electrician. This product must be installed in accordance with
applicable installation code(s), by a person familiar with the construction and operation of the product and the hazards involved.*
Caution: Do not exceed maximum wattage noted on fixture. Use only recommended bulbs with fixture.
This illustration represents a typical fixture
and may not match every style.
I
G
H
K
J
F Cover Cap (sold separately)
G Fixture
H Set screw
I Glass
J Rubber Strip
K Fixture Collar
(Continued)
F
E
D
C
B
A