Component parts, A258, Assembly & installation instructions – Hubbardton Forge 123307 User Manual
Page 2
Assembly & Installation Instructions
A258
Semi-Flush Kirigami Four Light 12-3305 & 12-3307
Page 2 of 3
Hand-Forged, Vermont-Made Lighting and Accessories
154 Route 30 South, Castleton, Vermont 05735
24793 Rev D
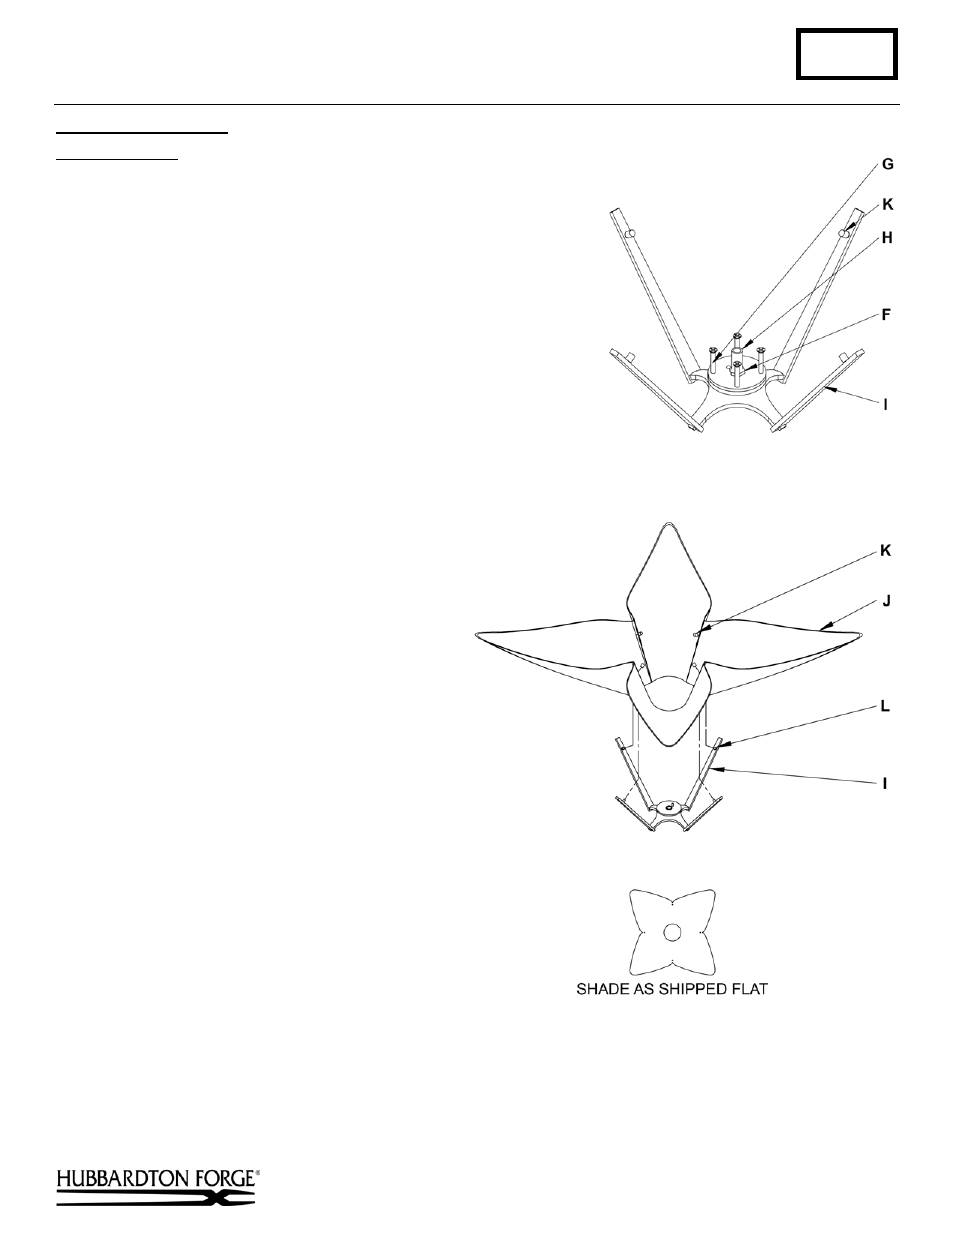
To Assemble Bottom
(Figures 2, 3 & 4)
Component Parts
F Hex Nut
G Diffuser Top Plate
H Nipple
I
Bottom Assembly
J
Shade
K Threaded Knob (4)
L
Threaded Stud (4)
M Diffuser
N Alignment Pin
O Spring
P Flat Head Screw (4)
1. Remove hex nut (F) and the four threaded knobs (K) (Figure 4).
Save for later use.
2. Slip diffuser top plate (G) with flat head screws (P) installed off
bottom assembly (I) (Figure 4). Save for later use.
3. Install shade (J) into bottom assembly by
slipping the holes in the shade over the threaded
studs (L) (Figure 5).
Note: Be careful when
installing shades not to allow the shade to come
in contact with the four threaded studs. Contact
with the studs will damage the shade and cause
visible scratches.
4. Install knobs (K) to keep shade (J) in place
(Figure 5).
See Figure 4 (next page) for the remaining steps
unless another figure is referenced.
5. Slip diffuser (M) onto nipple (H) aligning the
alignment hole in the diffuser with the alignment
pin (N).
6. Thread the four flat head screws (P) installed in
the diffuser plate (G) so they protrude slightly
out the bottom of the plate.
7. Align the diffuser top plate (G) so the three flat
head screws (P) align with the three holes in the
diffuser (M) and slip onto the nipple (H) until it
rests on top of the diffuser.
8. Thread hex nut (F) onto nipple (H) until it sits
on top of the diffuser top plate (G). Tighten the
hex nut being careful not to over tighten.
9. Thread the three flat head screws (P) until they are snug.
10. Slip the spring (O) onto the nipple.
11. Refer to instructions following to complete
installation.
(continued)
(Figure 3)
(Figure 2)