Assembly & installation instructions – Hubbardton Forge 207861 User Manual
Page 2
Assembly & Installation Instructions
B65
Hand-Forged,
Vermont-Made Lighting and Accessories
P.O. Box 827, 154 Route 30 South, Castleton, Vermont 05735
17725 Rev F
For Bracket-Mounted After Hours Sconces
Page 2 of 3
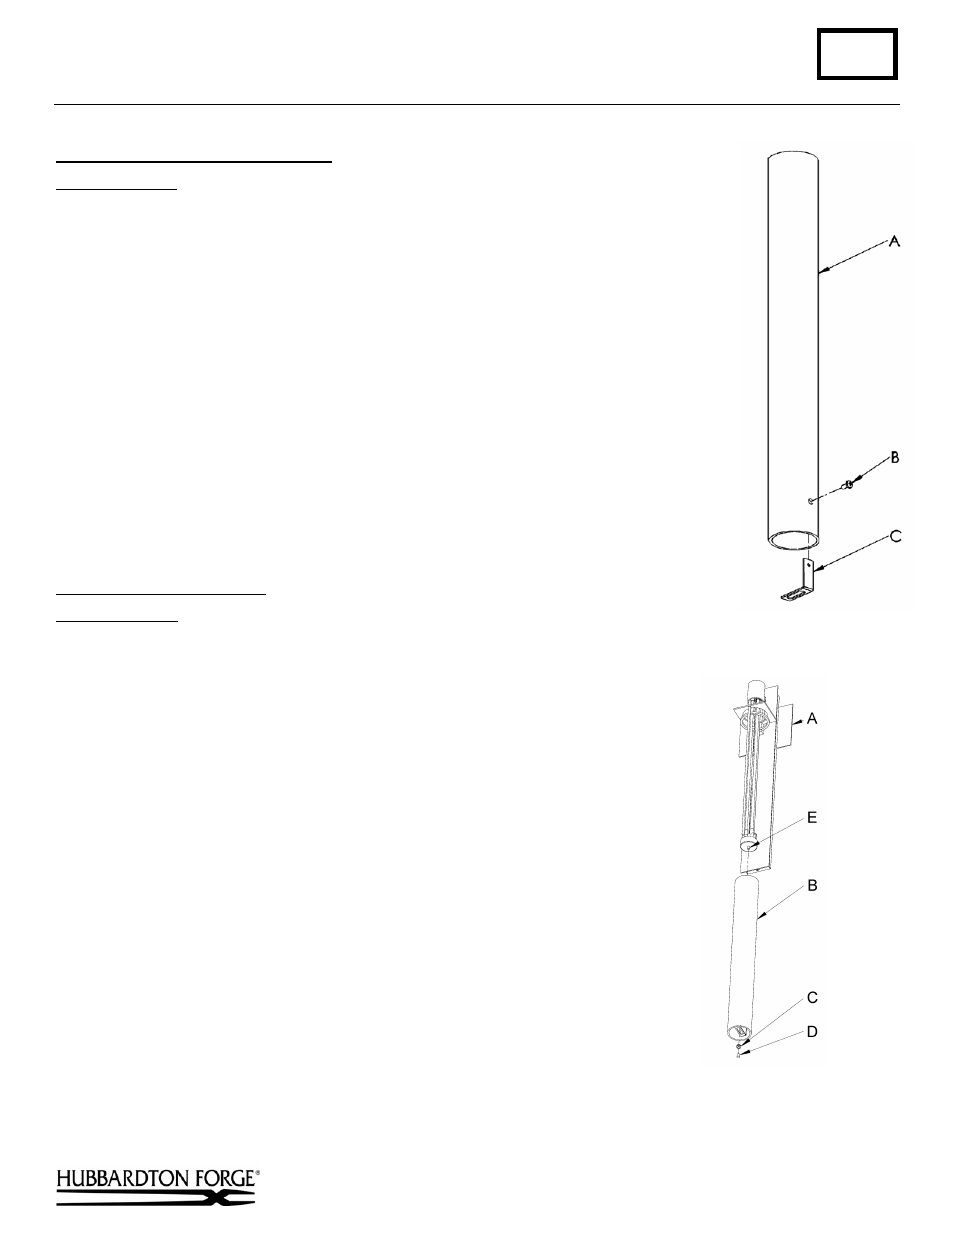
To Install Glass Mounting Bracket
(Figure 2)
Component Parts
A Glass
B Screw
C Glass Mounting Bracket
1. Remove screw (B) from glass mounting bracket (C). Save for later use. Screw is shipped
installed in bracket.
2. Slide glass mounting bracket (C) inside end of the glass (A) that has drilled hole.
3. Align small threaded hole in glass mounting bracket (C) with hole in glass (A).
4. Attach glass mounting bracket (C) to glass (A) with screw (B). Do not over tighten.
To Install Glass to Fixture
(Figure 3)
Component Parts
A Fixture
B Glass
C Washer
D Ball
E Threaded
Rod
1. Remove ball (D) and washer (C) from bottom of fixture and save for later use.
2. Align glass (B) so that mounting bracket is at the bottom of the glass.
3. Slide glass (B) over light bulbs until it stops at top of fixture (A).
4. Holding glass in place slide washer (C) over small threaded rod (E) at the bottom
of the fixture (A).
5. Thread ball (D) onto threaded rod (E) until tight against washer (C).
Note: This fixture can be mounted as shown or in reverse.
(continued)
(Figure 2)
(Figure 3)