B122, Installation instructions – Hubbardton Forge 205770 User Manual
Page 2
If you need further assistance, or find that you are missing any parts, please contact the dealer from which you purchased this product.
We hope you enjoy your fixture!
* Hubbardton Forge will not be liable for injury or damage caused by improper installation, lamping or use of this fixture.
H U B B A R D T O N F O R G E . C O M
hand-forged, vermont-made lighting and accessories
154 RT. 30 SOUTH
•
CASTLETON, VERMONT 05735
All designs and images ©1989-2013 Hubbardton Forge
®
. All rights reserved.
20160 A
Installation Instructions
To Install Fixture
(Figure 1)
(Continued)
CAUTION: MAKE SURE WIRE CONNECTORS ARE TWISTED ON
SECURELY, AND NO BARE WIRE IS EXPOSED.
5. Slide fixture assembly (E) over threaded studs (B) and push
firmly to wall, making sure that no wires are pinched
between fixture back and wall. Fasten with knurled balls (A).
Be sure threaded studs (B) are fully seated in the knurled
balls (A).
6. Install light bulb(s) (not provided).
7. Install glass (see instructions below).
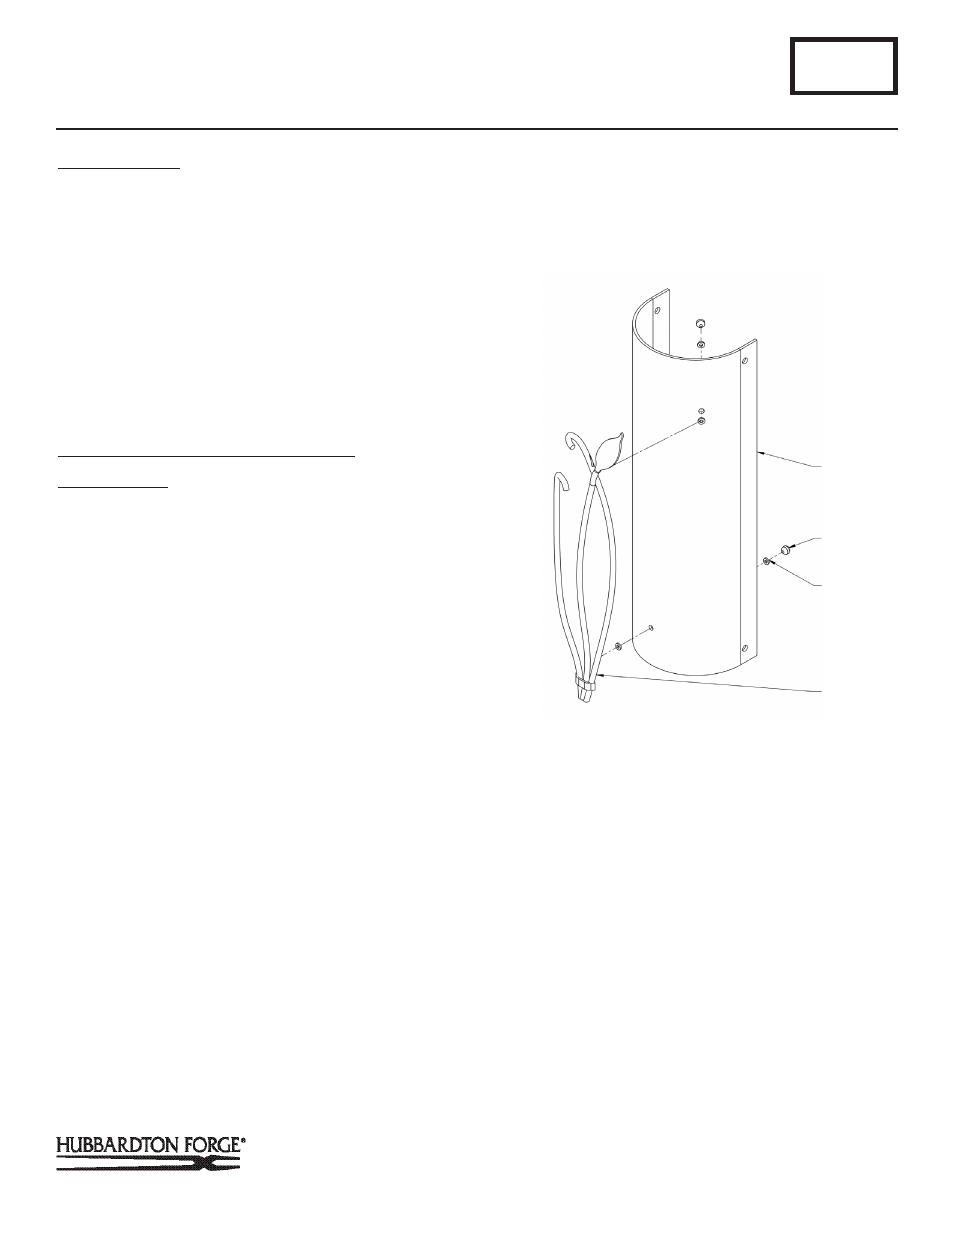
To Attach Decorative Assembly to Glass
(Figure 2)
Component Parts
A Knurled Balls (2)
F Decorative Assembly
G Rubber Washers (4)
H Glass
1. Remove (1) knurled ball (A) and rubber washer (G) from
each stud on the decorative assembly (F). Parts are
shipped installed.
2. Attach decorative assembly (F) to glass (H) by sliding studs
on decorative assembly (F) through holes in the glass (H).
Apply rubber washers (G) and then tighten with knurled balls
(A). Be sure not to over tighten.
B122
Forged Leaf and Stem Sconce 205770L & 205770R
Page 2 of 3
(Figure 2)
G
A
F
(Continued)
H