A322, Assembly & installation instructions – Hubbardton Forge 139635 User Manual
Page 3
H U B B A R D T O N F O R G E . C O M
hand-forged, vermont-made lighting and accessories
154 RT. 30 SOUTH
•
CASTLETON, VERMONT 05735
All designs and images ©1989-2013 Hubbardton Forge
®
. All rights reserved.
28093A
Assembly & Installation Instructions
If you need further assistance, or find that you are missing any parts, please contact the dealer from which you purchased this product.
We hope you enjoy your fixture!
* Hubbardton Forge will not be liable for injury or damage caused by improper installation, lamping or use of this fixture.
To Complete Assembly & Install
(Figures 2 & 3)
(Continued)
7. Slide fixture canopy (D) against ceiling, and secure with
canopy ring (E).
8. Once the fixture is fastened to the ceiling, tighten the set
screw (K) in clutch (J) firmly with hex wrench provided. Only
after the set screw (K) is tight should you install the lower
assembly.
To Assemble Bottom
(Figures 4, 5 & 6)
Component Parts
L #8-32 Screw
P Internal 16”Shade
M Top Shade Bracket Q Thumb Screw
N Bottom Shade Bracket R Socket Washer
O External 20” Shade
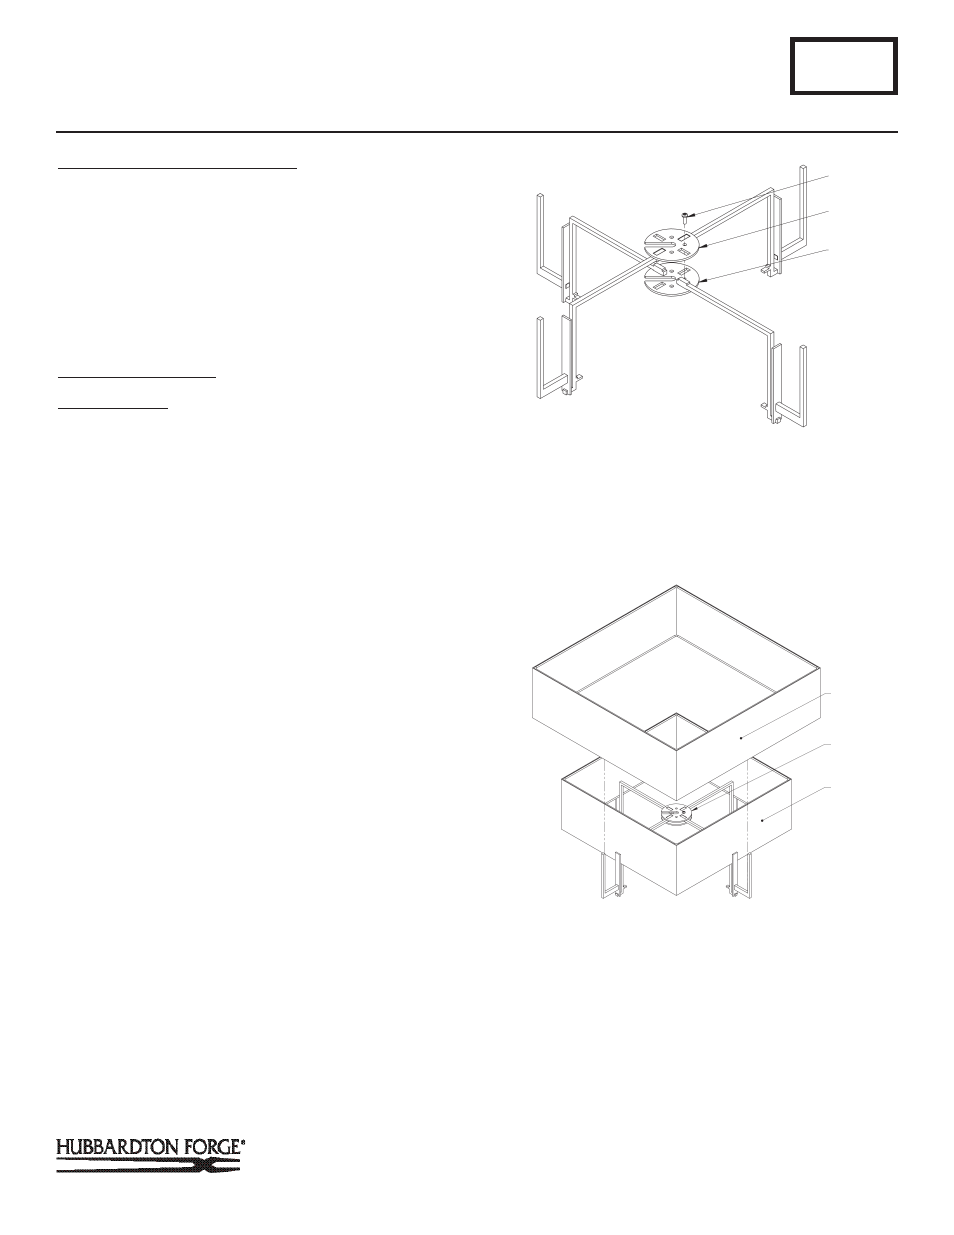
1. Remove #8-32 screw (L) from bracket (N) and set aside.
2. Orient top shade bracket (M) and bottom shade bracket (N)
such that the slots are aligned as seen in Figure 4.
3. Holding these brackets together, insert #8-32 screw (L) and
tighten such that two brackets are fastened together.
4. Slide the internal shade (P) into groove behind forged plates
as seen in Figure 5 followed by external shade (O).
5. Raise shade bracket assembly with shades installed up to
the installed fixture.
6. Align the slot in shade brackets (M & N) with the fixture pipe
as seen in Figure 6.
7. Slide the shade brackets (M & N) around fixture pipe (G) and
lower until it rests upon the socket washer (R).
8. Rotate until two holes in shade brackets (M & N) alight with
holes in the socket or socket washer (R).
9. Slide thumb screws (Q) through two holes in shade brackets
(M & N) and thread into socket or socket washer (R) until
tight.
A322
Exos Square Shade Pendant 139625, 139630 & 139635
Page 3 of 4
N
L
(Figure 4)
M
(Continued)
P
O
(Figure 5)
M