Installation instructions – Hubbardton Forge 138552 User Manual
Page 3
Installation Instructions
A92
For Ondrian Pendant 13-8550 & 13-8552
Page 3 of 3
Hand-Forged,
Vermont-Made Lighting and Accessories
154 Route 30 South, Castleton, Vermont 05735
19404 Rev B
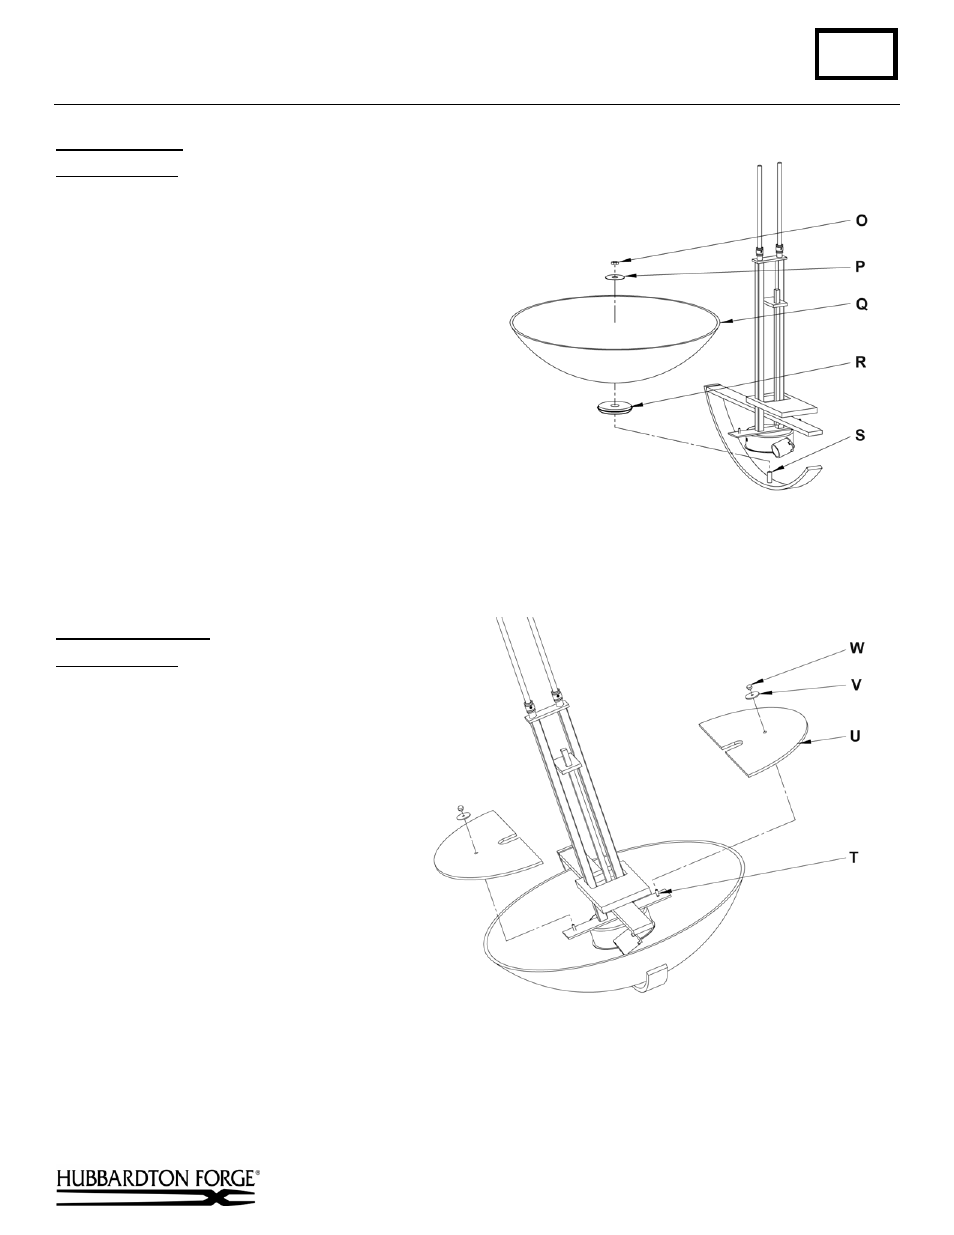
To Install Glass
(Figure 4)
Component Parts
O Hex
Nut
P Washer
Q Glass
Bowl
R Cup with Foam Washer
S Threaded
Nipple
1. Remove hex nut (O) and washer (P) from the
threaded nipple (S). Cup and foam washer (R) sit
loose on nipple (S), but do not require removal.
2. Place glass bowl (Q) over nipple and onto foam
washer (R).
3. Place washer (P) over nipple (S) followed by the hex
nut (O).
4. Position the glass and secure by hand tightening the
hex nut (O) (do not over tighten). For the best
appearance, the glass should be level with an even
gap between the glass and the curved bar on the
fixture.
5. Refer to diffuser installation instructions below to
complete the installation.
To Install Diffusers
(Figure 5)
Component Parts
T Diffuser Mounting Stud (2)
U Diffuser Glass (2)
V Washer
(2)
W Knurled Ball Nuts (2)
1. Install light bulbs before installing
diffusers.
2. Place diffuser glass (U) over diffuser
mounting stud (T) with flat side of
diffuser glass toward center of the
fixture.
3. Place washer (V), over diffuser
mounting stud (T) and secure with
knurled ball nut (W).
4. Repeat for remaining diffuser glass.
5. Restore electricity at the main breaker.
If you need further assistance, or find that you are missing any parts, please contact the dealer from which you purchased
this product. We hope you enjoy your fixture!
* Hubbardton Forge will not be liable for injury or damage caused by improper installation, lamping or use of this fixture.
Figure 5
Figure 4