A256, Assembly & installation instructions – Hubbardton Forge 137650 User Manual
Page 2
Assembly & Installation Instructions
A256
For Current Pendant 13-7650
Page 2 of 3
Hand-Forged,
Vermont-Made Lighting and Accessories
P.O. Box 827, 154 Route 30 South, Castleton, Vermont 05735
24786
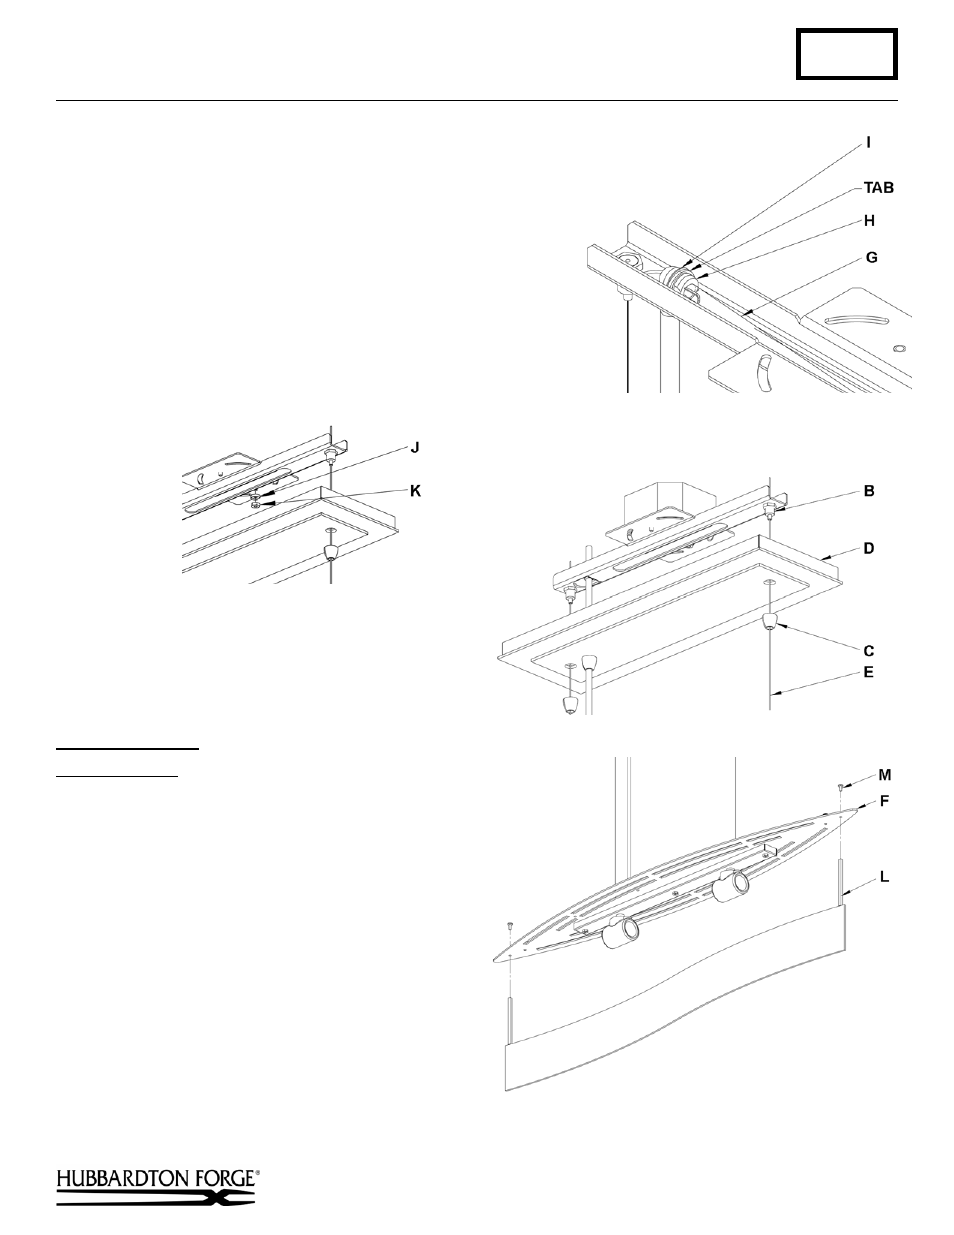
10. Run a pigtail lead from the ceiling bracket (A) using cupped
washer (J) and hex nut (K) to the junction box. Using suitable wire
connectors (not provided) connect unshielded wire from supply
wire (I) to all ground wires (bare copper or green shielded)
(Figure 4).
11. Using suitable wire connectors (not provided) connect fixture
wires to supply (wire with white tracer to white and wire with no
tracer to black).
Caution: Make sure wire connectors are twisted on
securely, and no bare wire is exposed.
12. Raise canopy (D) and push firmly to ceiling making sure that no
wires are pinched between fixture canopy and ceiling. Fasten to
ceiling by threading gripper nuts (C) onto grippers (B) (Figure 5).
Fixture Assembly
(Figures 6 thru 9)
Component Parts
F Fixture
L Center Plate Assembly
M 8-32
Screws
(6)
N Outside Plate Assembly (2)
O Diffuser
P Shade
Q Thumb Screw with Washer and Hex Nut (2)
1. Install two 8-32 screws (M) through the top of fixture
(F) and thread into center plate assembly (L) until
snug (Figure 6).
2. Install two 8-32 screws (M) through the top of fixture
(F) and thread into the first outside plate assembly
(N) until snug (Figure 7).
(continued)
(Figure 3)
(Figure 4)
(Figure 5)
(Figure 6)