Hubbardton Forge 104325 User Manual
A348, Installation instructions
H U B B A R D T O N F O R G E . C O M
hand-forged, vermont-made lighting and accessories
154 RT. 30 SOUTH
•
CASTLETON, VERMONT 05735
All designs and images ©1989-2013 Hubbardton Forge
®
. All rights reserved.
30264
Installation Instructions
If you need further assistance, or find that you are missing any parts, please contact the dealer from which you purchased this product.
We hope you enjoy your fixture!
* Hubbardton Forge will not be liable for injury or damage caused by improper installation, lamping or use of this fixture.
To Assemble Fixture
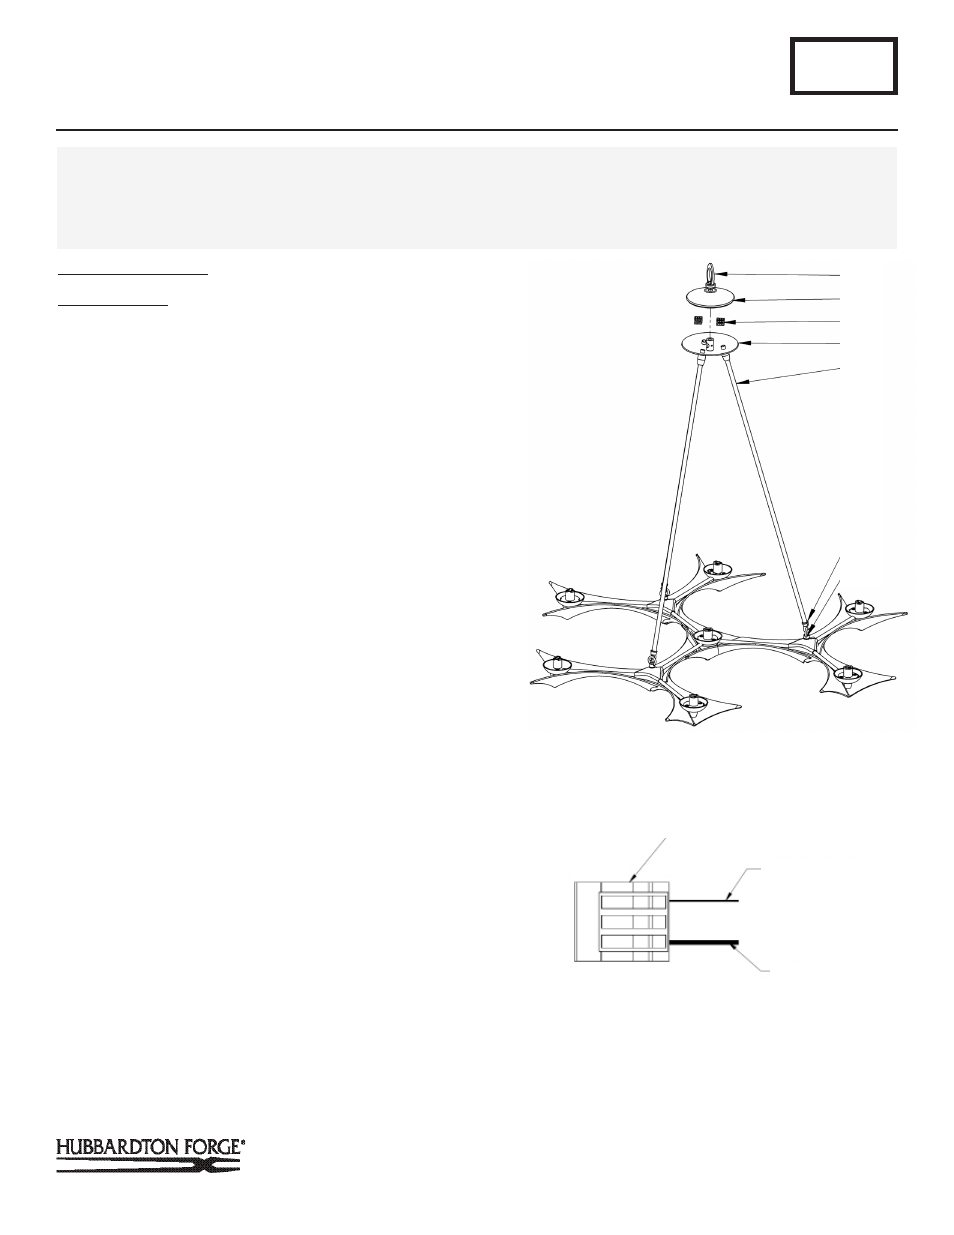
(Figures 1 & 2)
Component Parts
A Cap
B Wire connector
C Bob
D Fixture pipe
CAUTION: BE SURE POWER IS OFF AT THE MAIN BREAKER BOX
PRIOR TO INSTALLATION.
1. Carefully unpack the fixture from the carton.
2. Spin fixture loop (O) counter clock wise to remove it. Set
aside along with cap (A).
3. Remove lock washers and nuts shipped installed on fixture
pipes (D) and set aside for later use.
4. Run power cord and ground wire from fixture through one
fixture pipe (D), hook (E) end first.
5. Feed wires followed by swivel end of fixture pipe (D) through
hole in the bob (C). Attach with lock washer and nut, leaving
nut loose.
6. Slide hook (E) into loop (F) pulling wires tight.
Note: Wire fed through hoop (F) and hook (E) must be facing
outside of fixture to avoid being pinched.
7. Slide hook (E) into loop (F) pulling wires tight.
Note: Terminals are shipped attached to power cord & ground.
8. Pass swivel on remaining two fixture pipes (D) through bob
(C) and fasten with lock washer and nut, leaving nuts loose.
9. Secure remaining two fixture pipes (D) to fixture by feeding
hooks (E) through loops (F).
10. Tighten all three nuts to bob (C). Tuck wires into bob (C) and
lower cap (A) over the wires being careful not to pinch them.
Follow with fixture loop and twist until tight.
11. Follow next steps to install canopy and hang fixture.
A348
For Moreau 7 Light Chandelier 104325
Page 1 of 3
CAUTION: FAILURE TO INSTALL THIS FIXTURE PROPERLY MAY RESULT IN SERIOUS PERSONAL INJURY OR DEATH AND
PROPERTY DAMAGE. We recommend installation by a licensed electrician. This product must be installed in accordance with
applicable installation code(s), by a person familiar with the construction and operation of the product and the hazards involved.*
Caution: Do not exceed maximum wattage noted on fixture. Use only recommended bulbs with fixture.
(Figure 2)
A
(Figure 1)
(Continued)
E Hook
F Loop
O Fixture loop
O
A
B
C
D
E
F
FIXTURE WIRE
(WHITE OR BLACK)
CANOPY WIRE
B