Hubbardton Forge 103290 User Manual
A340, Assembly & installation instructions
h u b b a r d t o n f o r g e . c o m
hand-forged, vermont-made lighting and accessories
154 rt. 30 South
•
caStleton, Vermont 05735
All designs and images ©1989-2013 Hubbardton Forge
®
. All rights reserved.
28356
Assembly & Installation Instructions
If you need further assistance, or find that you are missing any parts, please contact the dealer from which you purchased this product.
We hope you enjoy your fixture!
* Hubbardton Forge will not be liable for injury or damage caused by improper installation, lamping or use of this fixture.
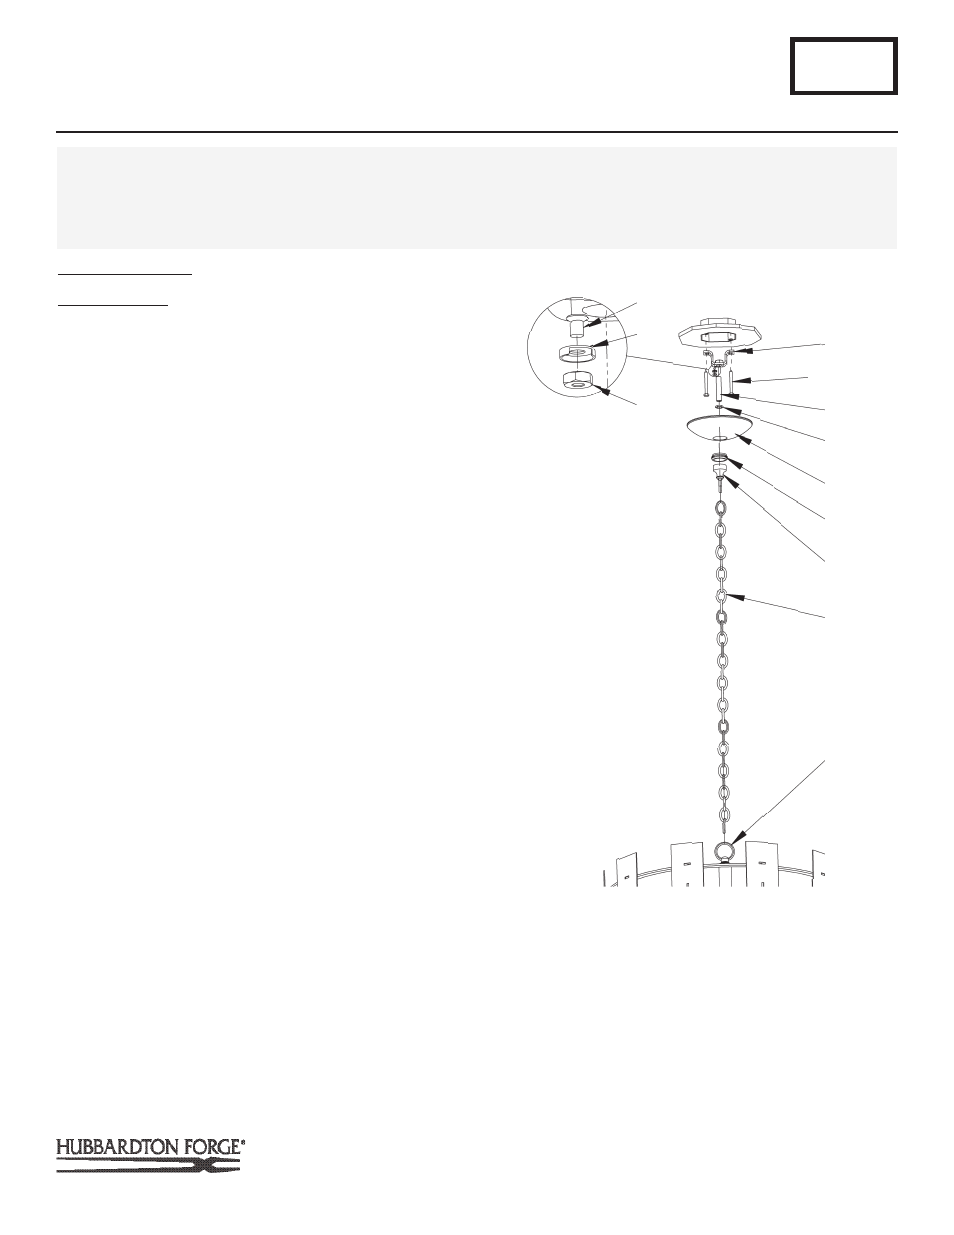
Install the Canopy
(Figure 1)
Component Parts
a crossbar
b threaded nipple
c lag Screw (2)
d lock nut
e canopy
f loop collar
CautIon: Be sure power is off at the main Breaker Box
prior to installation.
CautIon: this fixture must Be supported independently of
an outlet Box. CrossBar is designed to fit in the Bottom
of a standard metal 4” oCtagonal outlet Box.
1. drill two holes through the back of the outlet box and us-
ing two lag screws (c) attach cross bar (a) to a structural
member in the ceiling, centering the crossbar in the outlet
box. We've supplied lag screws with your fixture; however,
different materials and/or construction methods may require
different fasteners. If in doubt, contact a qualified electrician.
2. unthread loop collar (f) from threaded loop (g). thread
lock nut (d) and threaded loop (g) onto nipple, then place
canopy (e) over threaded loop and adjust nipple length to
ensure a snug canopy fit. once the length is determined, set
the canopy aside and lock nipple position by tightening the
locknut (d) against the crossbar (a).
3. attach one end of the chain (h) to the fixture loop (I).
4. Slide loop collar (f) and canopy (e) over chain.
5. attach the other end of the chain to the threaded loop (g).
thread the fixture wires through every other link of the chain
(h) and up through the threaded loop (g) and nipple (b) into
the outlet box.
A340
For Circular New Town Ten Light 103290
Page 1 of 2
CautIon: FAILURE TO INSTALL THIS FIXTURE PROPERLY MAY RESULT IN SERIOUS PERSONAL INJURY OR DEATH AND
PROPERTY DAMAGE. We recommend installation by a licensed electrician. this product must be installed in accordance with
applicable installation code(s), by a person familiar with the construction and operation of the product and the hazards involved.*
caution: do not exceed maximum wattage noted on fixture. use only recommended bulbs with fixture.
a
(Figure 1)
C
B
D
g threaded loop
h chain
I fixture loop
J ground Screw
K cupped Washer
l hex nut
E
F
G
H
I
J
K
L