B307, Installation instructions – Hubbardton Forge 205960 User Manual
Page 2
If you need further assistance, or find that you are missing any parts, please contact the dealer from which you purchased this product.
We hope you enjoy your fixture!
* Hubbardton Forge will not be liable for injury or damage caused by improper installation, lamping or use of this fixture.
H U B B A R D T O N F O R G E . C O M
hand-forged, vermont-made lighting and accessories
154 RT. 30 SOUTH
•
CASTLETON, VERMONT 05735
All designs and images ©1989-2013 Hubbardton Forge
®
. All rights reserved.
30072 Rev -
Installation Instructions
To Mount Fixture to Wall
(Figures 2 & 3)
(Continued)
Put the wall mount bracket down and drill 1/4" holes in the locations
marked on the wall. For holes using anchors, place the tapered end
of the anchors (E) into the holes and gently tap them flush to the wall
using a light weight hammer.
2. Thread the wires in the electrical box through the center
hole in the wall mount bracket while moving the bracket into
position. Attach wall mount bracket to electrical box using
two machine screws( not provided) Using the #8 screws (D),
screw the bracket securely to the wall. Be careful not to
over-tighten or strip the anchors.
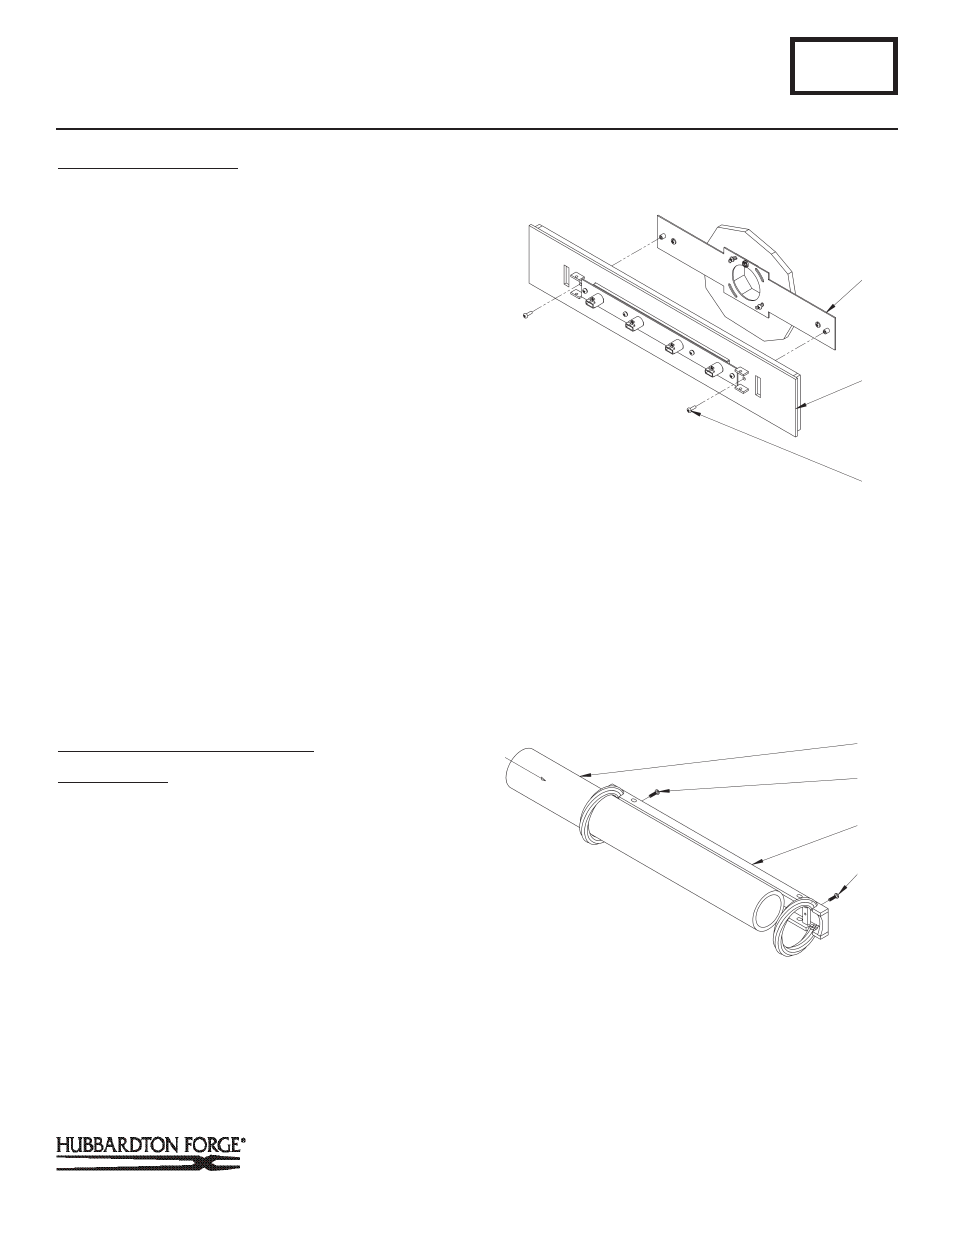
3. Hold the fixture body (B) close to the wall mount bracket
(C) and using suitable wire connectors (not provided),
connect fixture wires to supply wires (white to white or
ribbed and black to black or smooth). Ground the mounting
bracket using the green ground screw (G) and cupped
washer (H) to secure a pigtail lead to the bracket and
connect all ground wires (bare copper or green to bare
copper or green).
CAUTION: BE SURE POWER IS OFF AT THE MAIN BREAKER BOX
PRIOR TO INSTALLATION.
4. Carefully tuck all wires behind the fixture assembly and in
side the wall mount bracket and place the fixture (B) firmly
onto bracket (C) and fasten with #8 pan head screw w/lock
washer (L) (Figure 3).
To Install Glass & Decorative Front
(Figures 4 & 5)
Component Parts
A Decorative Front
I Bulb (Included)
J Glass
K Thumb Screw (2)
1. Slide glass tube (J) into decorative front (A). Secure glass
to decorative front using thumb screws (K) (Figure 4). Set
aside.
2. Install bulbs (I). Be careful not to touch bulb with bare
hands; oil from the hands will dramatically reduce bulb life.
B307
Cavo Sconce 205960
Page 2 of 3
(Figure 3)
C
(Figure 4)
(Continued)
B
L
J
K
A
K