A345, Assembly & installation instructions – Hubbardton Forge 137675 User Manual
Page 3
H U B B A R D T O N F O R G E . C O M
hand-forged, vermont-made lighting and accessories
154 RT. 30 SOUTH
•
CASTLETON, VERMONT 05735
All designs and images ©1989-2013 Hubbardton Forge
®
. All rights reserved.
30030 Rev -
Assembly & Installation Instructions
If you need further assistance, or find that you are missing any parts, please contact the dealer from which you purchased this product.
We hope you enjoy your fixture!
* Hubbardton Forge will not be liable for injury or damage caused by improper installation, lamping or use of this fixture.
To Install to Ceiling
(Figures 2-4)
(Continued)
15. Raise canopy (D) and push firmly to ceiling making sure that
no wires are pinched between fixture canopy and ceiling.
Fasten to ceiling by threading gripper nuts (C) onto grippers
(B) (Figure 4).
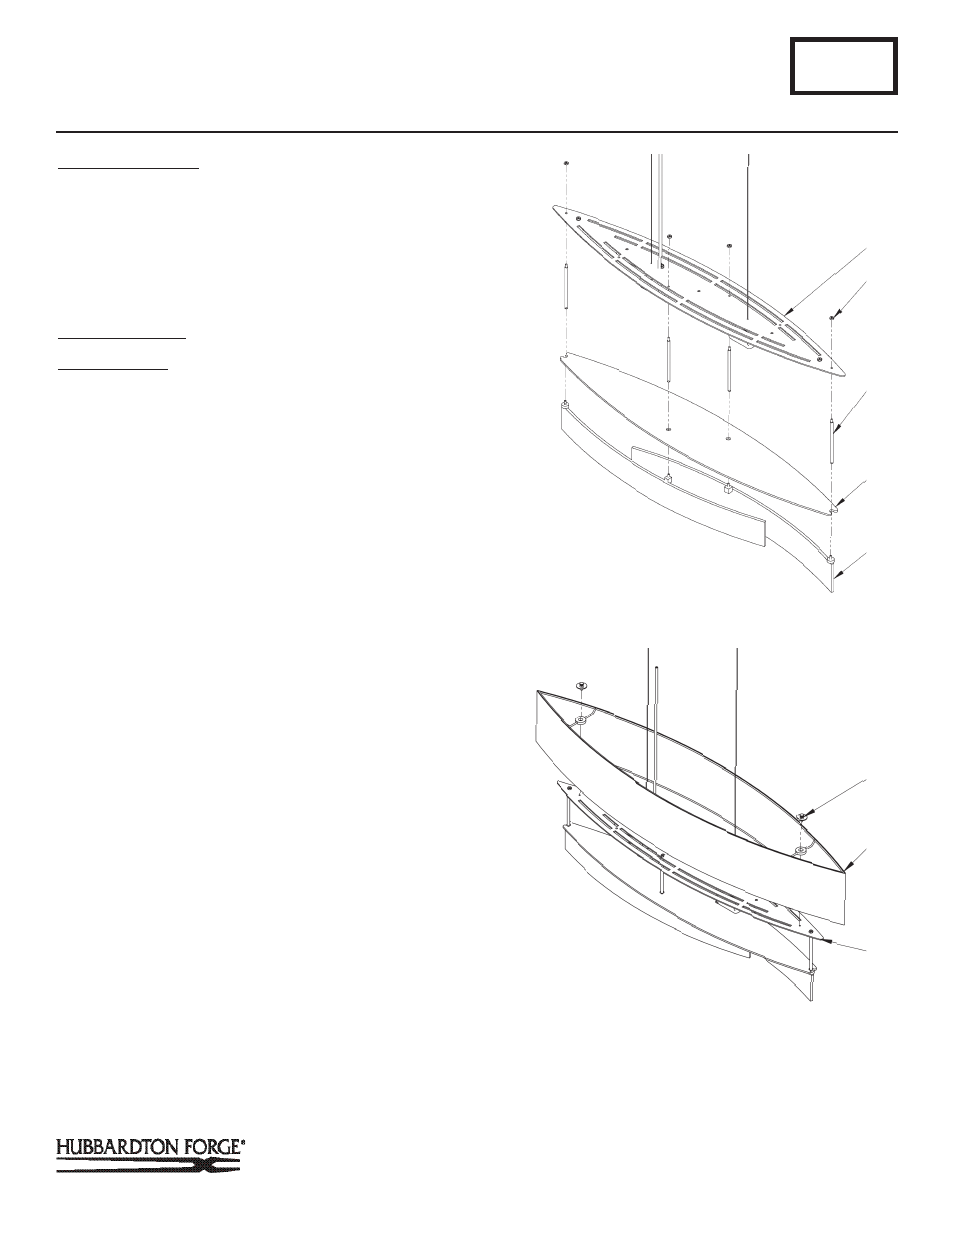
Fixture Assembly
(Figures 5 & 6)
Component Parts
K Hex Nut (4)
F Fixture
L Textured Plate (2)
M Threaded Rod (4)
O Diffuser
P Shade
Q Thumb Screw with Washer and Hex Nut (2
1. Screw four threaded rods (M) onto threaded studs on
textured plates (L) until snug (Figure 6).
2. Slide diffuser (O) over threaded rods (M) (Figure 6).
3. Raise textured plates (L) and diffuser (O) up to fixture so that
threaded rods (M) pass through holes in fixture (F). Attach
hex nuts (K) to threaded rods and tighten (Figure 6).
4. Install Bulbs (not included).
5. Install shade (P) from the bottom and tilt so it will pass
fixture (F). Lower the shade so it rests on top of the fixture.
6. Secure the shade (P) with the thumb screw, washer and hex
nut.
7. Restore electricity at the main breaker.
A345
Oceanus Pendant 137675
Page 3 of 3
M
O
R
(Figure 5)
Q
F
K
(Figure 6)
P
F