A312, Assembly & installation instructions – Hubbardton Forge 127663 User Manual
Page 2
If you need further assistance, or find that you are missing any parts, please contact the dealer from which you purchased this product.
We hope you enjoy your fixture!
* Hubbardton Forge will not be liable for injury or damage caused by improper installation, lamping or use of this fixture.
H U B B A R D T O N F O R G E . C O M
hand-forged, vermont-made lighting and accessories
154 RT. 30 SOUTH
•
CASTLETON, VERMONT 05735
All designs and images ©1989-2013 Hubbardton Forge
®
. All rights reserved.
27254 Rev C
Assembly & Installation Instructions
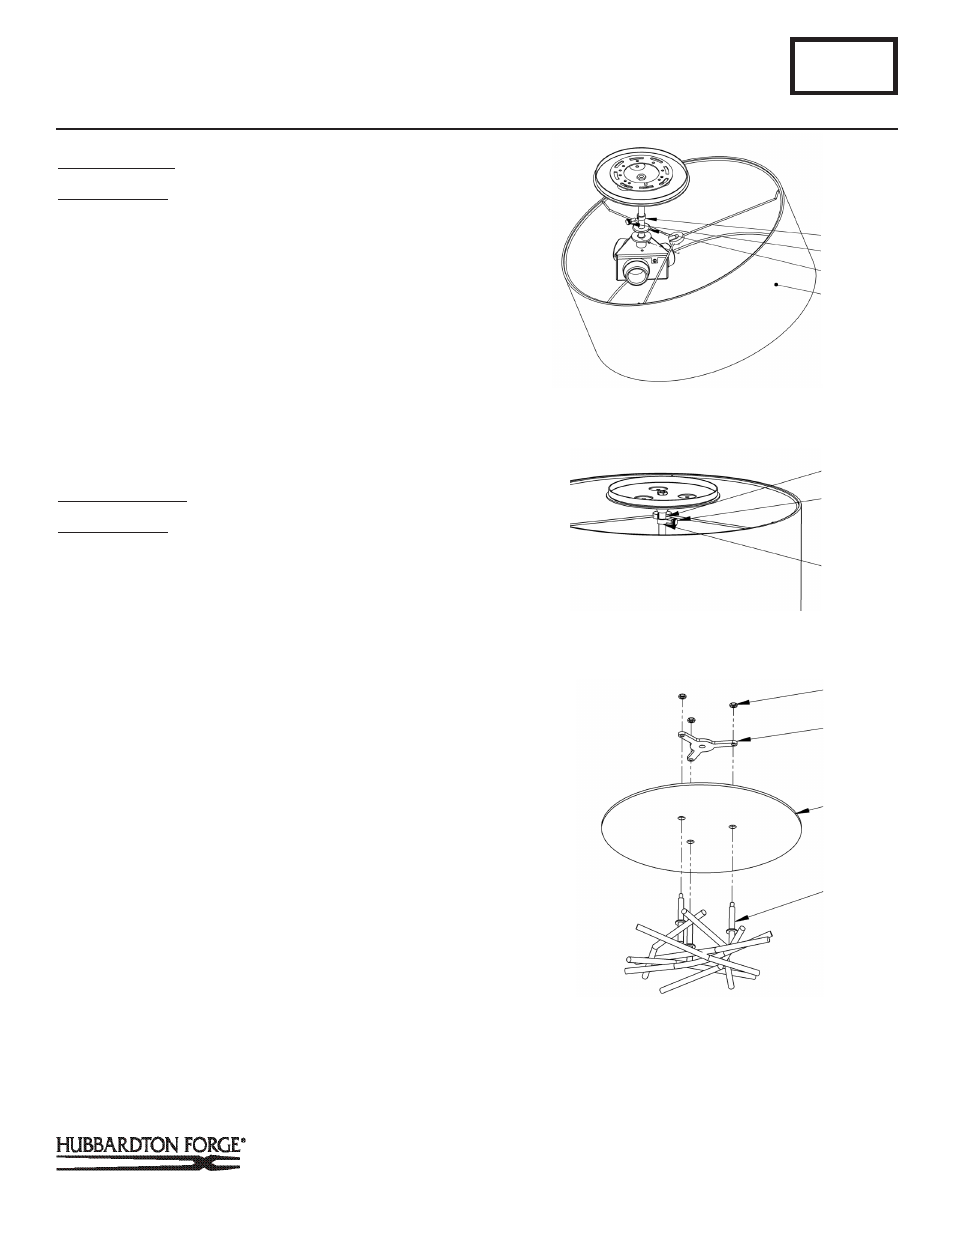
To Install Shade
(Figures 2 & 3)
Component Parts
F Thumb Screw
G Collar
H Checkring
I Shade
1. Tilt shade (I) and lift over socket. (Figure 2).
2. Loosen thumb screw (F) and slide collar (G) to the top of the
pipe, leaving a small gap for the shade (I).
3. Tighten thumb screw (F) to secure collar and place shade
(I) on top of collar so it is out of the way for the next steps
(Figure 3).
To Install Diffuser
(Figure 4)
Component Parts
J ¼-20 Nut (3)
K Spider
L Diffuser
M Lower Assembly
1. Remove ¼-20 nuts (J) and spider (K) from the lower
assembly (M) and set aside.
2. Align holes in diffuser (L) with the three studs on the lower
assembly (M). Lower diffuser (L) onto lower assembly (M).
3. Replace spider (K) and ¼-20 nuts (J) and tighten.
A312
Brindille Semi-Flush 127660 & 127663
Page 2 of 3
(Figure 2)
(Figure 3)
(Continued)
(Figure 4)
G
F
G
F
I
I
J
K
L
M
H