Chapter 2: installation 56 – Allied Telesis AT-LX3800U User Manual
Page 56
Chapter 2: Installation
56
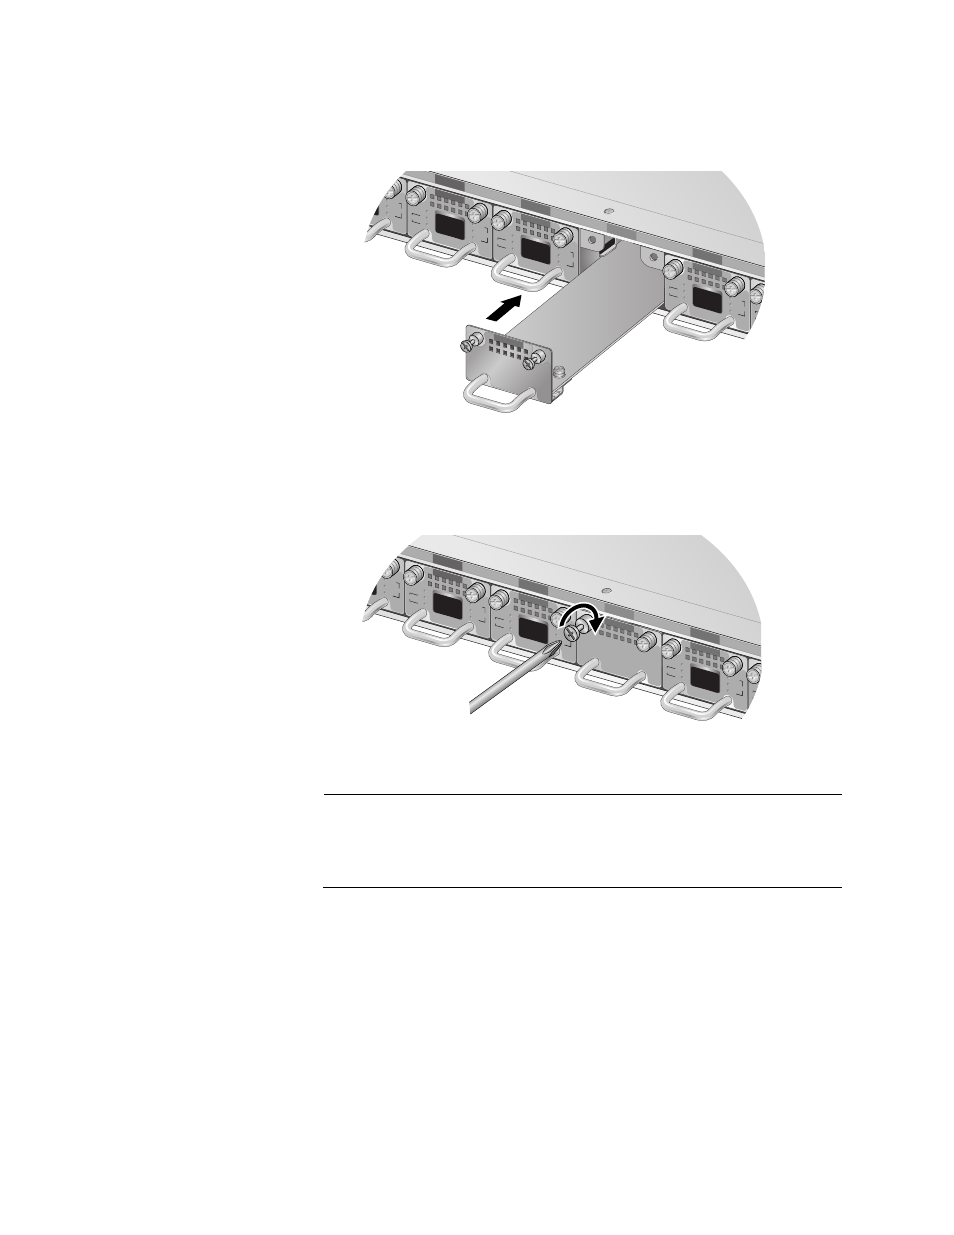
6. Slide the blank slot cover into the slot, as shown in Figure 29, until the
faceplate is flush with the front.
Figure 29. Installing the Blank Slot Cover
7. Use a Phillips head screwdriver to tighten the captive screws, as
shown in Figure 30.
Figure 30. Tightening the Captive Screws
Note
Always tighten the captive screws to secure the blank slot cover to
the chassis. This helps ensure that the fiber optic connectors on the
backplane are covered by the blank slot cover connectors.
8. Repeat this procedure to install additional blank slot covers.
142
3
4
5
6
SFP
SYNC
TX
RX
LINE
RDY
TX
RX
TRIB
AT-LX3811/3
SFP
SYNC
TX
RX
LINE
RDY
TX
RX
TRIB
AT-LX3811/4
TRIB
RD
R
TRIB
X3811/2
SFP
SYNC
TX
RX
LINE
AT-LX3801
SFP
SYNC
TX
RX
LINE
RDY
TX
RX
TRIB
AT-LX3811/6
2
3
4
5
6
SFP
SYNC
TX
RX
LINE
RDY
TX
RX
TRIB
AT-LX3811/3
SFP
SYNC
TX
RX
LINE
RDY
TX
RX
TRIB
AT-LX3811/4
TRIB
R
TRIB
3811/2
FP
SYNC
TX
RX
LINE
SFP
SYNC
TX
RX
LINE
RDY
TX
RX
TRIB
AT-LX3811/6
AT-LX3801
143
- AT-GS908M (54 pages)
- AT-x230-10GP (80 pages)
- AT-GS950/48PS (64 pages)
- AT-GS950/10PS (386 pages)
- AT-GS950/16PS (386 pages)
- AT-GS950/48PS (386 pages)
- AT-9000 Series (258 pages)
- AT-9000 Series (1480 pages)
- IE200 Series (70 pages)
- AT-GS950/48 (60 pages)
- AT-GS950/48 (410 pages)
- AT-GS950/8 (52 pages)
- AT-GS950/48 (378 pages)
- SwitchBlade x8106 (322 pages)
- SwitchBlade x8112 (322 pages)
- SwitchBlade x8106 (240 pages)
- SwitchBlade x8112 (240 pages)
- AT-TQ Series (172 pages)
- AlliedWare Plus Operating System Version 5.4.4C (x310-26FT,x310-26FP,x310-50FT,x310-50FP) (2220 pages)
- FS970M Series (106 pages)
- 8100L Series (116 pages)
- 8100S Series (140 pages)
- x310 Series (116 pages)
- x310 Series (120 pages)
- AT-GS950/24 (404 pages)
- AT-GS950/24 (366 pages)
- AT-GS950/16 (44 pages)
- AT-GS950/16 (404 pages)
- AT-GS950/16 (364 pages)
- AT-GS950/8 (364 pages)
- AT-GS950/8 (52 pages)
- AT-GS950/8 (404 pages)
- AT-8100 Series (330 pages)
- AT-8100 Series (1962 pages)
- AT-FS970M Series (330 pages)
- AT-FS970M Series (1938 pages)
- SwitchBlade x3112 (294 pages)
- SwitchBlade x3106 (288 pages)
- SwitchBlade x3106 (260 pages)
- SwitchBlade x3112 (222 pages)
- AT-S95 CLI (AT-8000GS Series) (397 pages)
- AT-S94 CLI (AT-8000S Series) (402 pages)
- AT-IMC1000T/SFP (23 pages)
- AT-IMC1000TP/SFP (24 pages)
- AT-SBx3106WMB (44 pages)