Installing the at-lx3800u chassis in a rack, Class 1 laser p roduc t, Reset – Allied Telesis AT-LX3800U User Manual
Page 47
AT-LX3800U Multi-Service Transport System Installation and Maintenance Guide
47
Installing the AT-LX3800U Chassis in a Rack
The chassis is shipped with two rack-mount brackets. To mount the
chassis in a rack, perform the following procedure:
1. Place the chassis upside down on a level, secure surface.
2. Using a flathead screwdriver, remove the plastic feet from the bottom
of the chassis, as shown in Figure 19.
Figure 19. Removing Plastic Feet from the Chassis
3. Turn the chassis right side up.
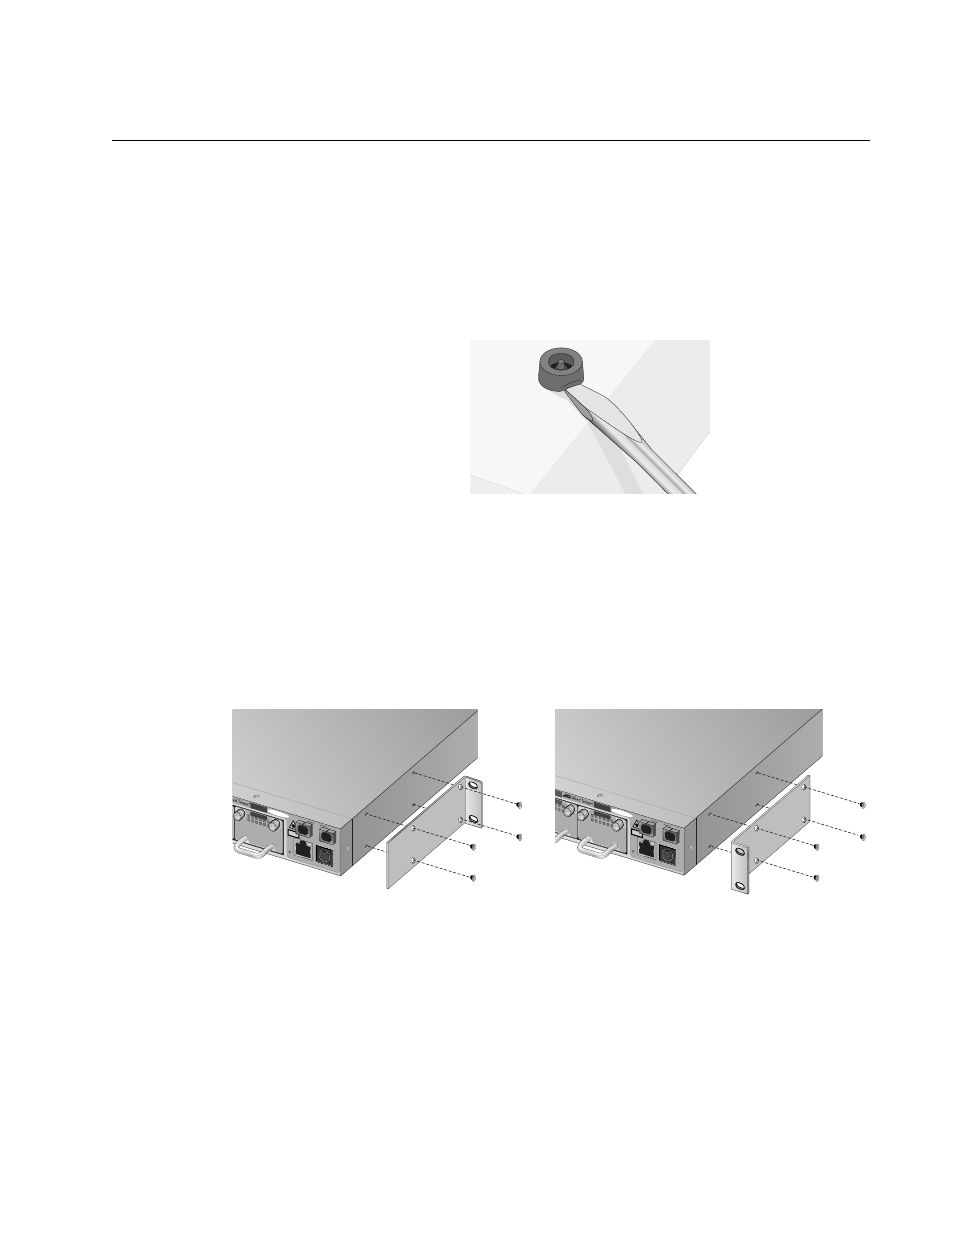
4. Install a bracket on one side of the chassis using a Phillips screwdriver
and four of the rack-mount screws included with the unit. There are two
ways that you can attach the brackets to the chassis: so that it extends
forward from the rack, or flush with the front of the rack, as shown in
Figure 20.
Figure 20. Rack-Mount Bracket Configurations
5. Repeat step 4 to attach the remaining bracket to the other side of the
chassis.
TX
RX
CLASS 1
LASER P
RODUC
T
100 10
10/100Base-TX
RS-232
TERMINAL
FT
CO
PA
PB
8
RESET
AT-LX3800U
8
LINE
AT-LX3801
136
TX
RX
CLASS 1
LASER P
RODUC
T
100 10
10/100Base-TX
RS-232
TERMINAL
FT
CO
PA
PB
8
RESET
AT-LX3800U
8
LINE
3801
AT-LX380
1