Input patient id in the patient id screen, Patient id screen display and functions of buttons – Canon TX-20 Full Auto Tonometer User Manual
Page 52
52
5TypesofMeasurements
Input Patient ID in the PATIENT ID Screen
This section explains how to input the patient ID in the PATIENTID screen.
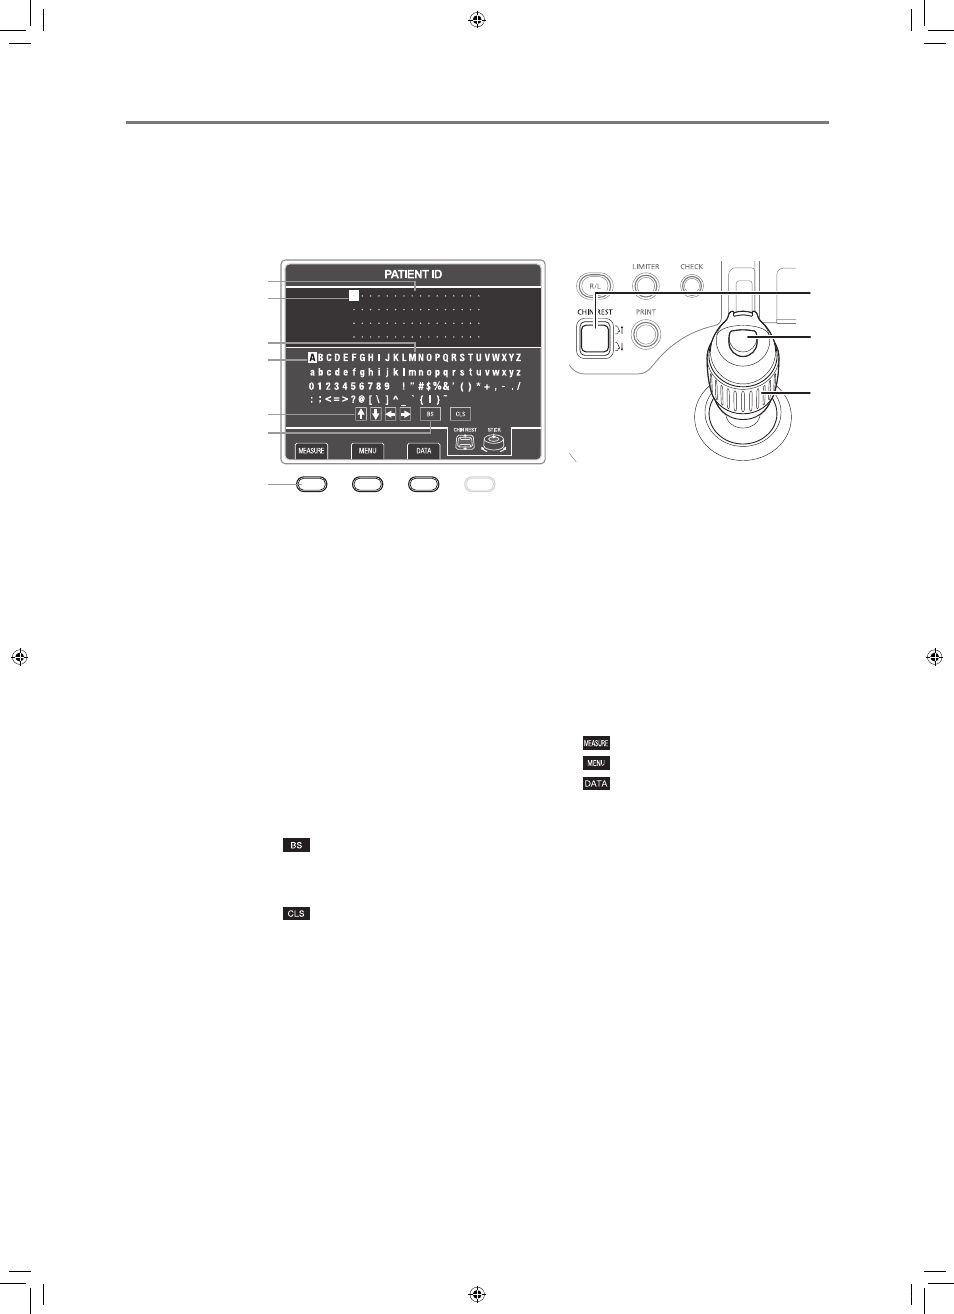
PATIENT ID Screen Display and Functions of Buttons
1
2
4
5
10
6
3
9
8
7
1
Patient ID area
Displays the patient ID that was input.
2
ID cursor
Displays the position immediately after a character
is input. Also, selects the targeted character when
deleting a patient ID.
3
List of characters
List of characters that can be input as a patient
ID. Specify from upper and lower case letters,
numbers, and symbols.
4
Selection cursor
Selects characters or commands to use.
5
ID cursor movement commands
Moves the ID cursor up, down, left, or right one
space.
6
ID delete command
Deletes the patient ID.
: Deletes the character that is before the
character specified by the ID cursor.
However, if the ID cursor is specifying the
first character, it deletes that character.
: Deletes all the characters in the patient ID.
7
CHIN REST button
Moves the selection cursor up and down.
8
Measurement unit vertical movement ring
Moves the selection cursor left and right.
Clockwise: Right
Counterclockwise: Left
9
Measurement button
Inputs the character specified by the selection
cursor for a patient ID.
10 MEASURE key/MENU key/DATA key
Moves to other screens.
: Measurement screen
: MENU screen
: DATA screen
L-IE-5191C_TX-20.indb 52
2013/07/18 13:10:32