Operation panel – Canon TX-20 Full Auto Tonometer User Manual
Page 22
22
3NamesofParts
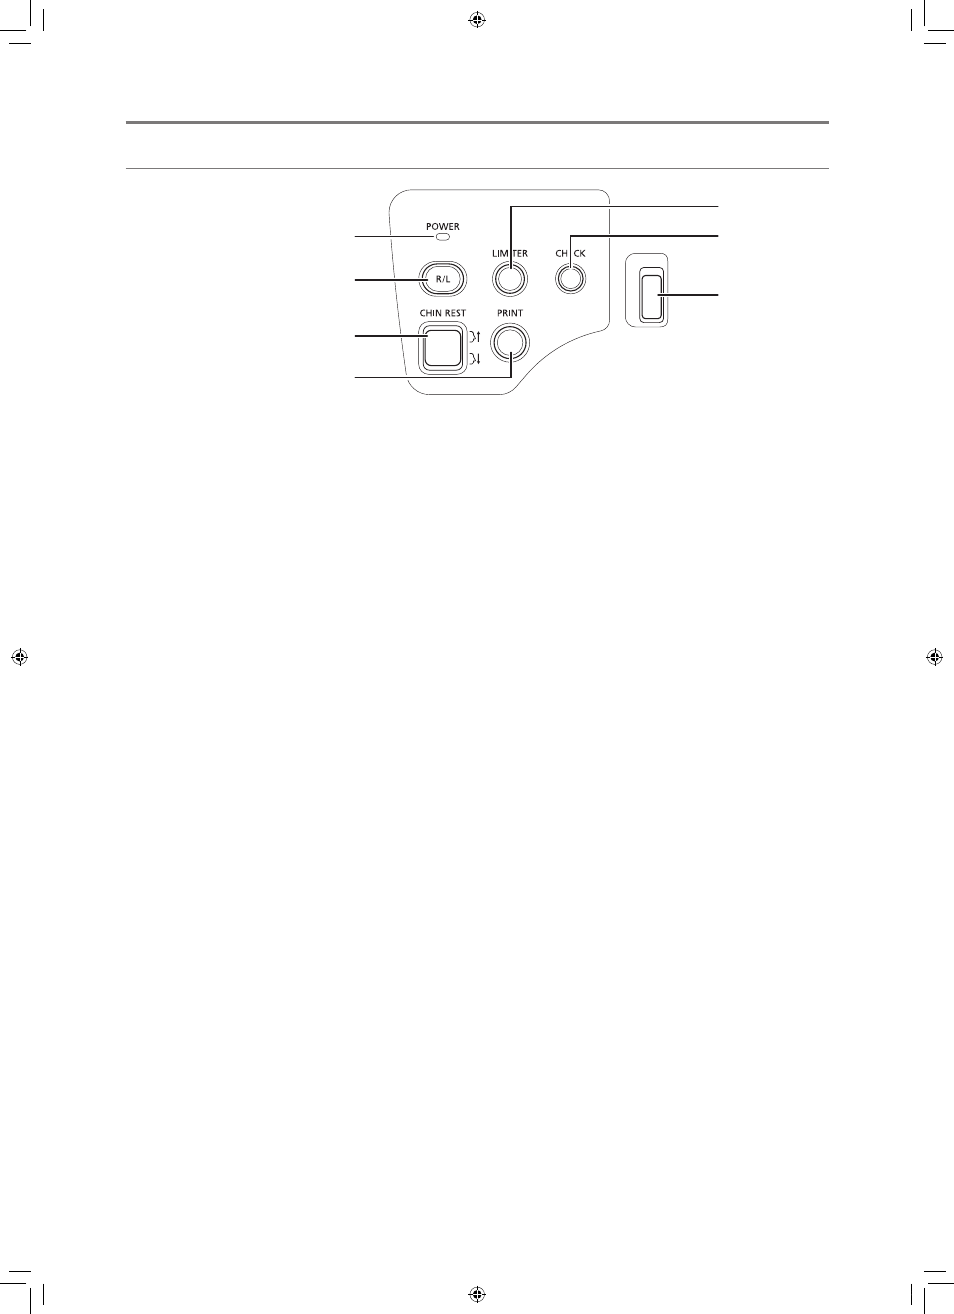
Operation Panel
4
6
7
5
1
2
3
1
POWER lamp
Lights when power is turned on.
2
R/L button
Switches between the patient's left and right eye
as the measurement unit moves automatically.
3
CHIN REST button
Moves the chin rest up and down to align the
height of the patient's eye.
4
PRINT button
• Prints the measurement results. Sends the
measurement results to an external device if one
is connected and the settings have been done in
advance.
• Pressing the PRINT button for 2 seconds or
more prints or transmits the measured value and
standard value for the number of measurements
(see page 63).
• For the preparation for the next measurement,
the settings change as shown below.
- Nozzle stop position: Releases the setting.
- Selection of eye fixation lamp: The internal eye
fixation lamp is selected.
The external eye fixation lamp turns off and the
internal eye fixation lamp flashes.
- Patient ID: The patient ID is cleared* (not
entered state).
- Patient No: Counts up the patient numbers
(however, according to settings).
- Display of measured value: Measured values
are cleared* (not measured state).
- Measurement unit: Returns to the initial position.
5
LIMITER button
Sets the stop position to prevent the measurement
unit from touching the patient.
6
CHECK button
Blows air from the nozzle.
7
Paper cover button
* You can confirm the patient ID or measured value on the DATA screen until the measurement button
is pressed.
L-IE-5191C_TX-20.indb 22
2013/07/18 13:10:18