Keypad operation, Keypad operation -3 – Triton 97XX Series Operation Manual User Manual
Page 24
TRITON SYSTEMS, INC.
2-3
SECTION 2 - BASIC OPERATION
O
PERATION
M
ANUAL
- M
ODEL
97XX-Series
Keypad Operation
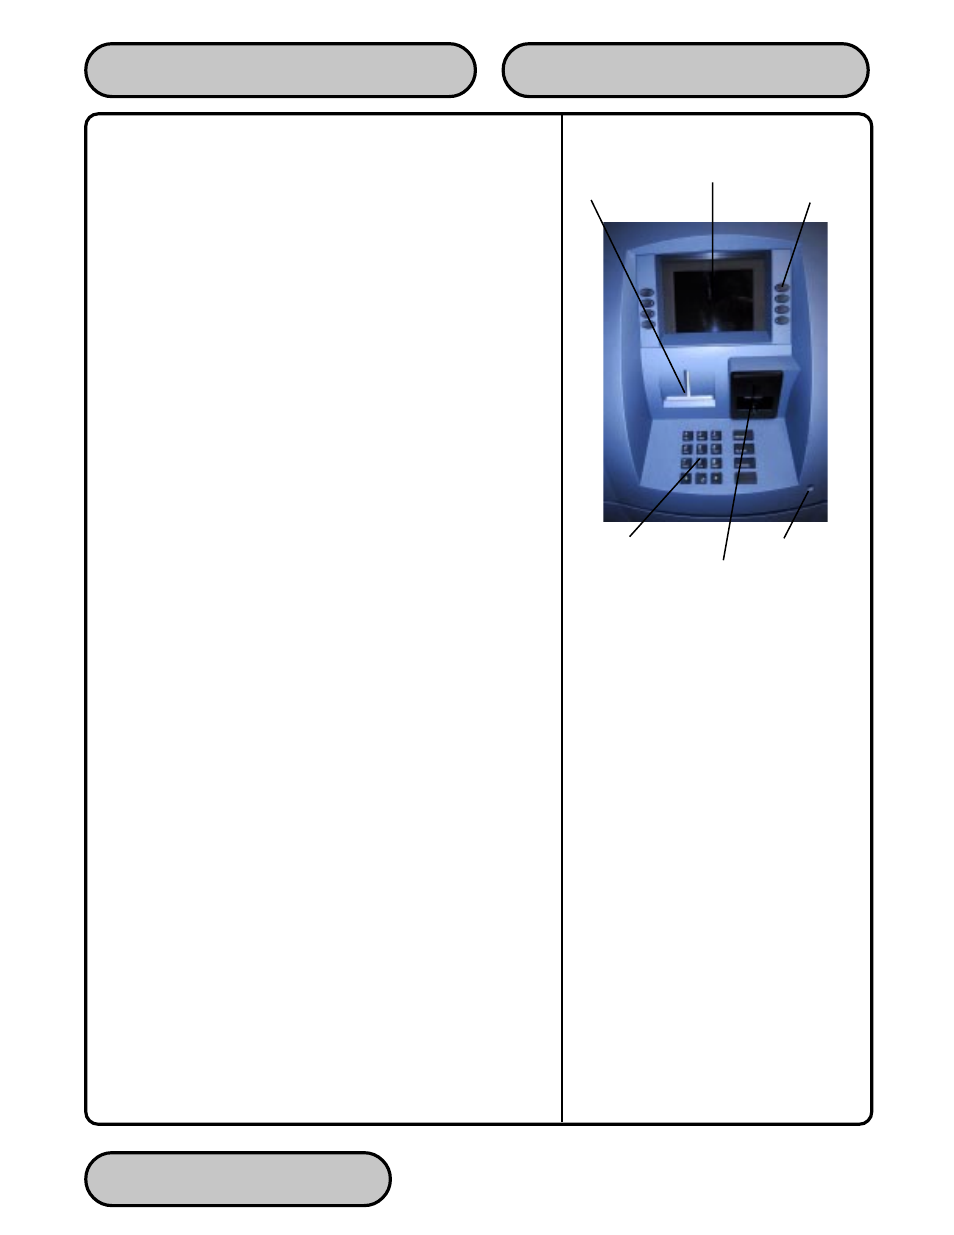
See Figure 2-2. The user interface of the terminal consists of the
LCD display and 24 rubber keys on three keypads. The primary
menu navigation keys are arranged in two four-key groups, one
group on either side of the LCD display. The main keypad consists
of 10 alphanumeric keys, two arrow keys and four large control
keys, all located in a 16-key group beneath the LCD display.
All of the keys that a customer would use to conduct transactions
have an integral raised Braille symbol to conform to the require-
ments of the Americans with Disabilities Act. To activate a key,
press it until a beep is heard. If the key does not beep, it means
that the key is not active for the current function, or the key was not
pressed firmly enough.
The entry of numeric characters via the keypad is straightforward:
simply press the desired key. However, in certain management
function screens it may be necessary to enter alphabetic charac-
ters, a procedure that requires a little more explanation. On such
screens a flashing cursor will be evident on the display, represent-
ing the location where the next character you enter will be dis-
played. To enter a letter or punctuation mark, you will first press
the
the keypad), and then you will press the number that has the letter
or other character you want.
Each of the numbered keys (<0> through <9>) has six characters
available. See Figure 2-3, Alphanumeric Keypad, and Table 2-1,
Keypad Characters. On most of these keys (<2> through <9>), the
first three of the available characters are alphabetic, and are printed
on the keycap above the number character. Two keys, the <0> and
<1>, are different. The <0> key does not show any additional char-
acters, while the <1> key shows two alphabetic characters (‘QZ’).
The first character on the first key (0-9) you press after the
key will be displayed at the current cursor position. Pressing the
same key repeatedly will cycle the displayed letter through the avail-
able character choices for that key (X1-X6). When the desired
character is displayed, press the
in’ and move the cursor to the next position. Repeat these steps to
enter the next character.
The
most alphanumeric data entry situations. The
used to back up and erase a character. The
used to lock in a character. These keys will auto-repeat if held
down for more than one second.
Figure 2-2, Control Panel Interface.
LCD Screen
Menu Keys
Receipt Chute
Card Reader
Main Keypad
Headphone Jack