Hired-Hand RollSeal Sidewall System (Curtain): SideWall Curtain User Manual
Page 19
Part No. 4801-5072 Rev 9-08
Side Wall Curtain
Page 19
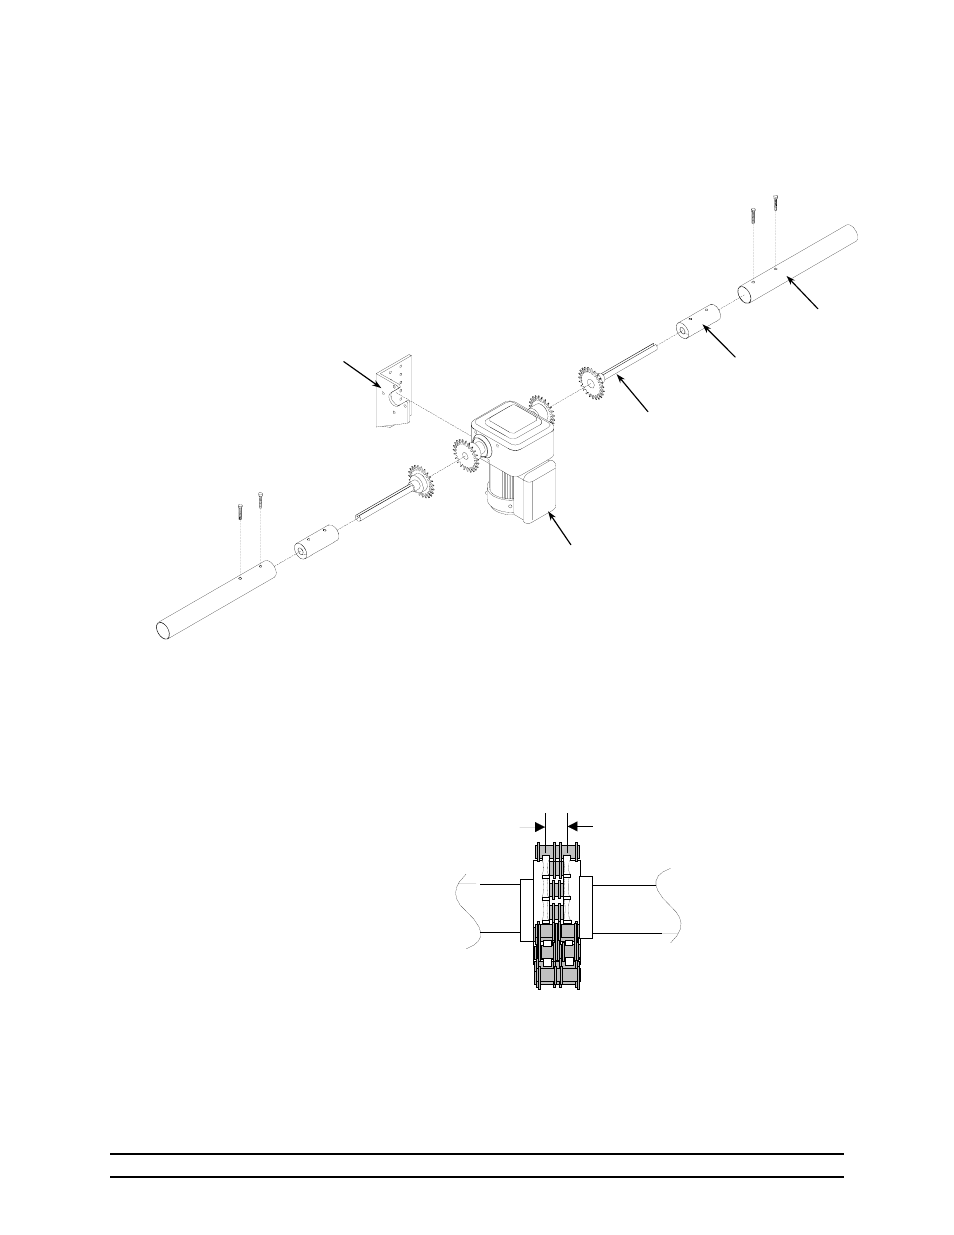
Figure 20
Exploded view showing attachment
Of two drive pipes to motor.
Motor mount
Motor
shaft/sprocket
assembly
Drive insert
Drive pipe
Motor
8.10.4
Installation Of Drive Pipe
1. Refer to Section 8.11 for instructions on placing drive pipe into guide brackets. Refer to
section 8.10.4 after installing drive pipe.
2. Refer
to
Fig. 20. Insert drive shaft/sprocket assembly into center hole
of drive insert. Rotate drive shaft to align groove in shaft with two screw
holes in drive insert.
3. Install lock screws through holes. Tighten lock screws securely.
8.10.5
Ridder Motor Attachment
1. Attach Ridder motor to motor mount with four bolts provided. Tighten bolts securely.
2. After attaching Ridder motor to motor mount, make sure that sprockets are in line and
separated by 5/8" (1.58 cm). If necessary, loosen two screws holding insert & drive
shaft. Slide drive shaft to achieve proper spacing between sprockets. Tighten set screws
securely.
3. Connect sprockets together with double link chain.
8.10.6
Electrical Wiring To Ridder Motor
Refer to Ridder Motor Control Manual, part no. 4801-5081 for instructions on
connecting the motor & limit switches to controller.
5/8" (1.58 cm)
Figure 21
Wrap double link chain
around sprockets.
Connect end links together.