Hired-Hand RollSeal Sidewall System (Curtain): SideWall Curtain User Manual
Page 17
Part No. 4801-5072 Rev 9-08
Side Wall Curtain
Page 17
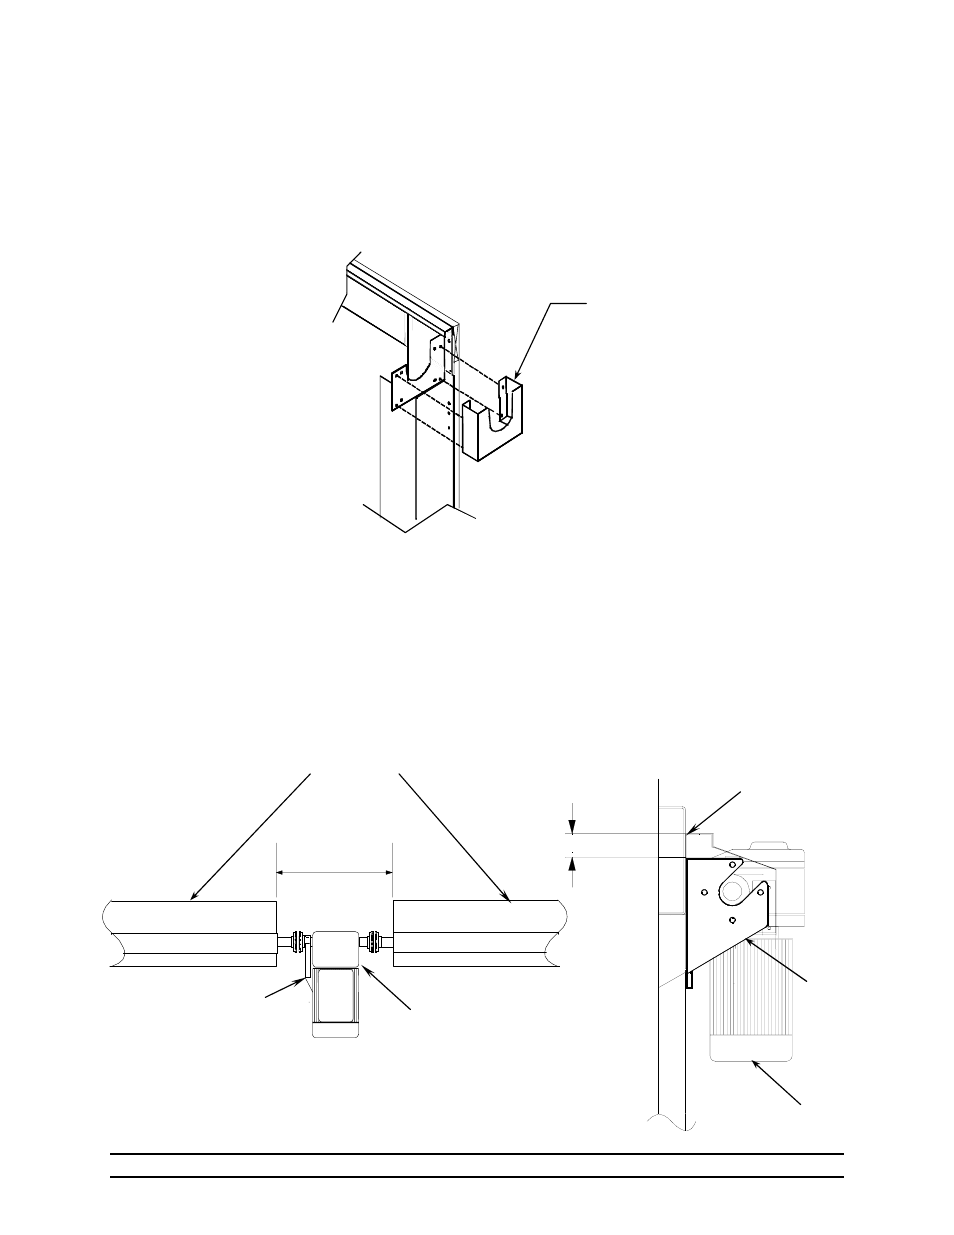
8.10 Ridder
Motor
Installation
8.10.1
Ridder Motor Mount & Bearing Mount
1. Attach bearing mount to track on end of system opposite motor. Install four bolts and
nuts through the holes of bearing mount and respective holes of guide bracket. Tighten
bolts & nuts securely.
8.10.2
Ridder Motor Mount
NOTE: Install motor mount after drive pipe has been positioned in guide brackets.
1. Position top edge of motor mount bracket exactly 1.75" (4.44 cm) from top edge of
backplate.
2. Align slot of motor mount bracket in line with end of drive pipe.
IMPORTANT! Make sure that sprocket of motor will align exactly with the sprocket on
end of drive pipe. Refer to Fig. 16 and Fig. 20.
3. With motor mount properly aligned according to 1 and 2, fasten motor mount to framing
member with 1/4-20 x 1/2 screws (1004-1401) provided.
1.75"
(4.44 cm)
2 ft.
(60.96 cm)
Backplates
Motor Mount
Motor
Motor
Top of Backplate
Motor
mount
Figure 16
Placement of
Motor Mount
IMPORTANT! Diagram above shows two sidewall
systems with motor mounted between systems. When
two systems are installed, separate backplates by 2 ft.
(60.96 cm) to allow for installation of motor.
Bearing Mount
Use Bolts and nuts to attach
bearing mount to four holes
indicated in guide bracket.
Figure 15
Bearing Mount