2 setting the phase and wire system, Phase and wire system, Phase and wire system setting – Yokogawa PR300 Power and Energy Meter User Manual
Page 18: Setting the phase and wire system -2
2-2
IM 77C01E01-01E
2.2
Setting the Phase and Wire System
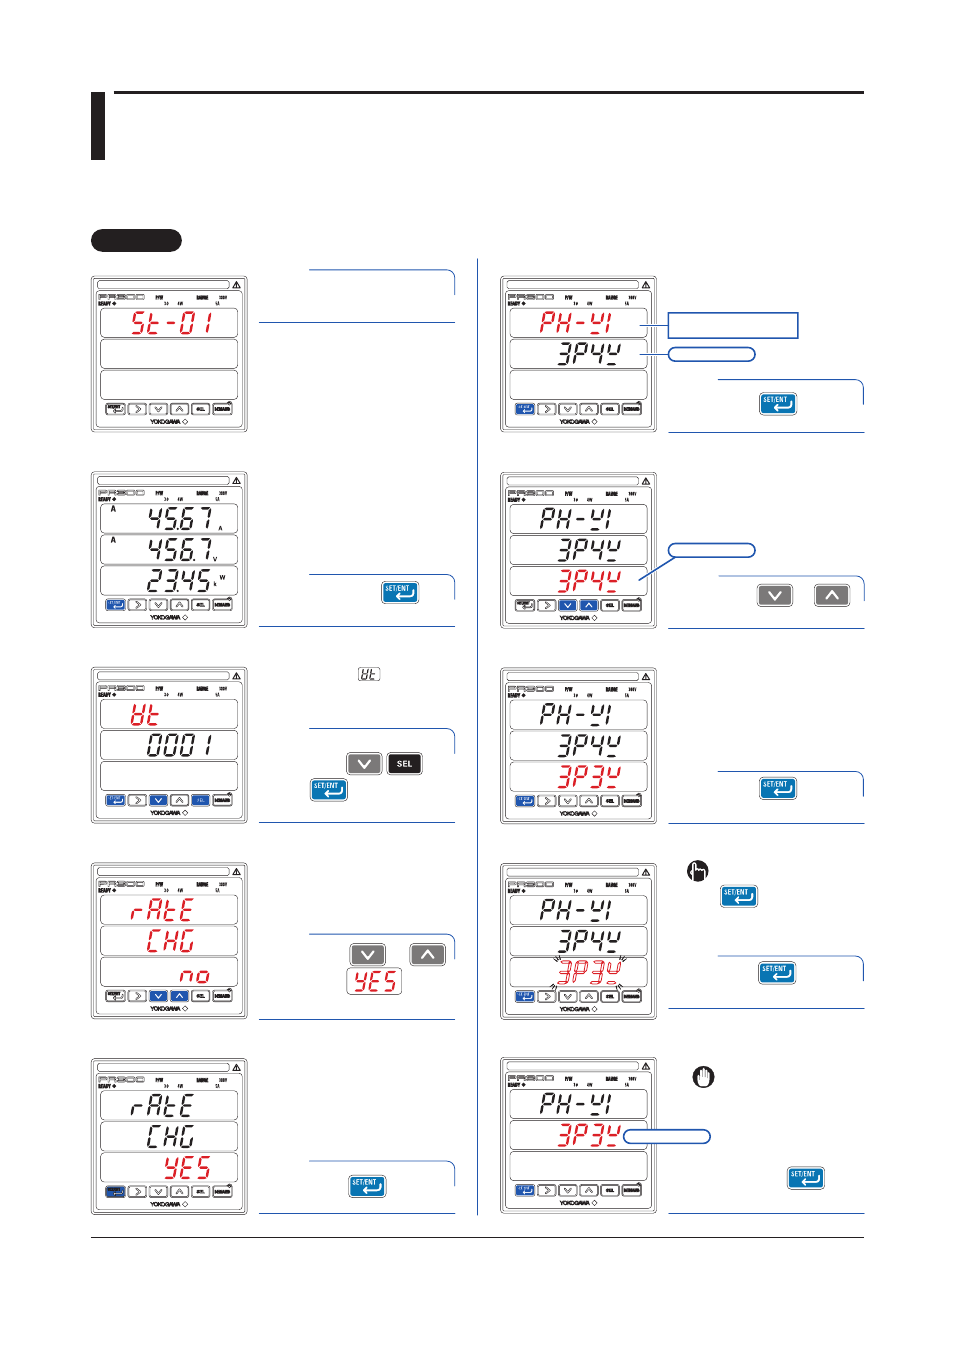
This section explains how to set the phase and wire system by taking as an example the case when a
three-phase four-wire system is changed to a three-phase three-wire system.
Operation
Operation
Hold down for
at least 3 seconds.
Turn on the PR300.
The Specification Change
Confirmation screen appears.
Measured Value screen
Startup screen
VT Ratio screen
2
1
3
Simultaneously hold
down +
for at least 3
seconds.
Hold down for
at least 3 seconds.
Phase and Wire System screen
6
Specification Change
Confirmation screen
Specification Change
Confirmation screen
4
Press once.
Press once.
Phase and Wire System
screen
Press once to
blink the setpoint.
The parameter (VT ratio)
appears.
The PR300 shows the station
number for about 5 seconds,
then the Measured Value screen
appears.
The Phase and Wire System
screen appears.
The setpoint is confirmed and the PR300
returns to the Phase and Wire System
screen. The phase and wire system
thus set is shown as the current value.
Phase and Wire System
Setting screen
7
The Phase and Wire System
Setting screen appears.
5
Using or ,
show on the
lower display.
Current value
Parameter symbol for
phase and wire system
Current value
Setpoint
Phase and Wire System
Setting screen
8
Press once while
the setpoint is blinking.
9
Phase and Wire System
Setting screen
10
When proceeding to set the
voltage range, start from step
6
in Section 2.3, “Setting the
Voltage Range,” with this
screen (figure on the left)
shown as is.
To re-set the parameter:
Press any key other than
while all digits of the
setpoint are blinking.
The PR300 returns to the initial
setting screen.
Using or ,
select the setpoint.