Print (hardcopy) settings, Configure printer settings, Hardcopy settings – Teledyne LeCroy HDO6000 Operators Manual User Manual
Page 108: Hardcopy setup, Send to printer
HDO6000 High Definition Oscilloscope
Print (Hardcopy) Settings
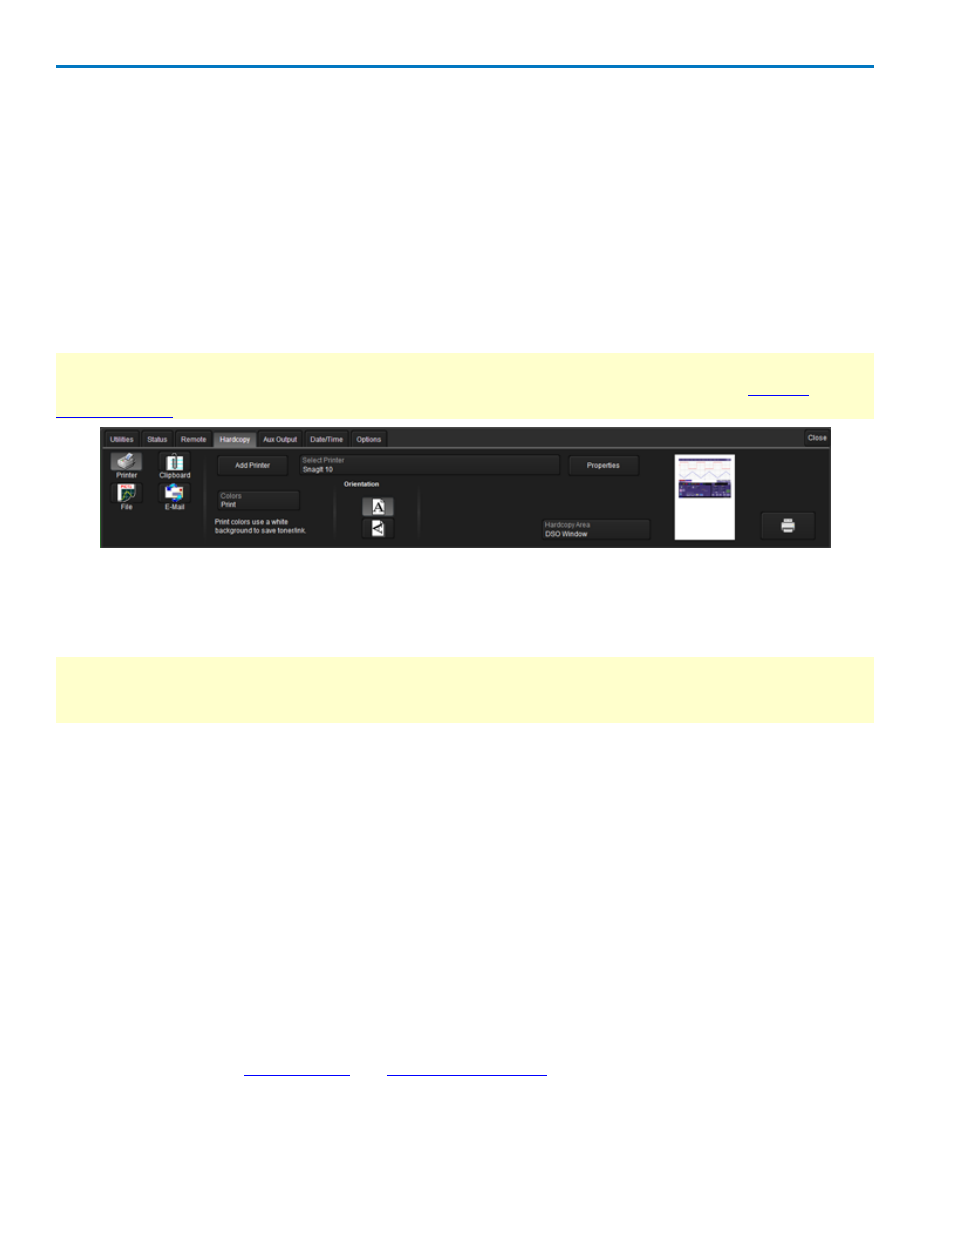
Hardcopy settings control how the oscilloscope Print function behaves. Print captures an image of the
oscilloscope display, but there are several options as to what it does with the image next:
l
Send to a hardcopy printer
l
"Print" to a file that can be saved to an internal or external drive
l
Send to E-Mail
l
Copy to the Windows clipboard for you to paste elsewhere
Each option is set up on the Utilities Hardcopy dialog. You can further set up a default print color scheme
and capture area. A preview of your hardcopy setup appears to the right of the dialog.
NOTE: You can configure the Front Panel Print button to create a new Notebook Entry to be included in a
LabNotebook report. This is not done in Utilities Hardcopy, but in LabNotebook itself. See
. However, the File menu Print option will continue to use your Hardcopy setting.
Send to Printer
Follow these procedures to configure output to a printer.
A
DD
P
RINTER
NOTE: Any printer compatible with Microsoft Windows Embedded Standard 7P operating system is
supported by your instrument. Install printer drivers on the instrument outside of the oscilloscope
application. Printers can be connected via LAN (Ethernet) or USB.
1. From the menu bar, choose File → Print Setup... or Utilities → Utilities Setup → HardCopy.
2. On the Utilities Hardcopy dialog, choose Printer.
3. Touch the Add Printer button that appears.
A Microsoft Windows Devices and Printers window opens where you can configure a new printer.
4. To make the printer the instrument default, select it from the Select Printer list.
P
RINT
S
ETUP
1. From the menu bar, choose File → Print Setup... or Utilities → Utilities Setup → HardCopy.
2. On the Hardcopy dialog, choose Printer.
3. Touch Select Printer and choose a printer from the list. If you don't see the printer you want, first
follow steps to Add Printer.
4. Choose a page Orientation: portrait or landscape.
5. Optionally, choose a
color scheme
and
hardcopy (print) area
.
6. Optionally, touch Properties to open the Windows print dialog and adjust printer properties.
100
922499 Rev B