Securitron iMXDa_iEXDa INSTALLATION User Manual
Page 4
P/N 500-22175
Page 4
Rev. B, 04/11
22. While keeping the assembly aligned, use a hammer to tap the head of the sex bolt into place
and use a 3/16” hex key wrench in the socket head of the screw to tighten the assembly.
DO NOT OVERTIGHTEN THE STRIKE/SEX BOLT ASSEMBLY AS THIS CAN CAUSE
DAMAGE TO THE RUBBER WASHERS AND MAY PREVENT THE PROPER OPERATION OR
REDUCE THE HOLDING STRENGTH OF THE UNIT
MOUNTING OF THE ACTUATOR:
23. Drill the two (2) previously marked actuator mounting holes as instructed on the template.
24. Using a #2 Phillips screwdriver and the screws provided install the actuator to the door as
shown.
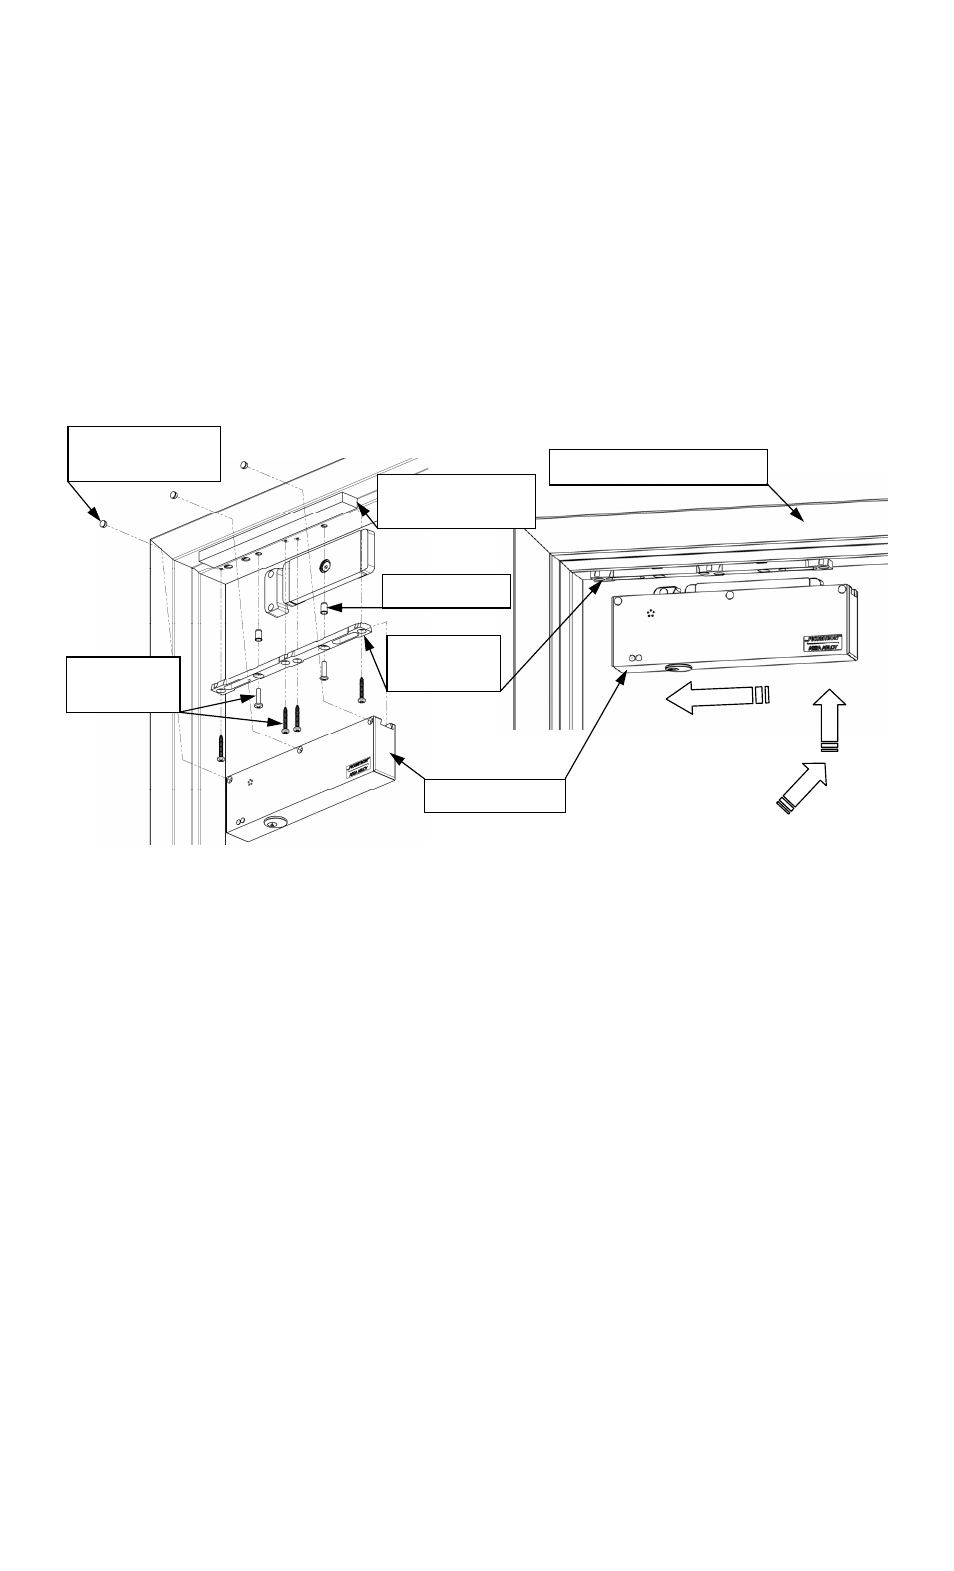
MOUNTING OF THE LOCK HOUSING:
Figures 4 and 5 below illustrate a typical lock housing installation on a steel door frame.
Figure 4
Figure 5
At least two (2) blind nuts (as specified by the template) MUST be used for installing
the mounting bracket to aluminum and/or hollow metal frames.
1. FOR METAL DOOR FRAME: Drill two (2) 3/8” [9.5mm] diameter holes and one 1/2”
[12.7mm] diameter hole at the three previously marked [A] hole positions on the frame.
Install two (2) 1/4-20 blind nuts into the 3/8” diameter holes. (See the Blind Nut
Installation section for details of how to install the blind nuts).
a. Using a #3 Phillips screwdriver and the two (2) 1/4-20 UNC X 1” long machine screws,
attach the lock mounting bracket to the frame.
2. FOR WOOD DOOR FRAME: Drill two (2) 3/16” [4.8mm] diameter holes X 1-1/4” [32mm]
deep (minimum) and one 1/2” [12.7mm] diameter hole through the frame at the previously
marked [A] hole positions.
a. Using a #3 Phillips screwdriver and two (2) #12 X 1-1/2” long Type “A” screws, attach
the lock mounting bracket to the frame.
3. Loosen the two (2) mounting screws enough to allow movement of the bracket.
4. Assemble the lock onto the bracket by shifting the unit to one side (approximately 1-1/2”
inches), engaging the top of the housing onto the bracket and then sliding it back toward
center as shown in Figure 5. Ensure that the lock is centered on the bracket.
5. Adjust the lock (and bracket) into position making contact with the face of the strike.
6. Mark the door frame at each end of the assembly to indicate the position of the mounting
bracket and then carefully remove the lock from the bracket.
7. As necessary, re-align the bracket to the position marks, then using a screwdriver fully
tighten the two bracket mounting screws.
Blind Nuts
Lock Housing
Mounting Hole
Dress Plugs
SFP Bracket
(Not Included)
Door Frame & Stop
Mounting
Bracket
Mounting
Screws