Figure 17, Figure 18b, Figure 18a – Reese 30144 18K ELITE SERIES User Manual
Page 10: Figure 18c
10. Once the slider rail assemblies are square to each other, snug tight (no vertical play in anchor bushing assembly) all
four 1” jam nuts inside the slider rails using a 1-1/2” box end wrench as it sits in the pucks in the bed of the truck.
Finish tightening each jam nut by turning the nut 1/4 turn more to achieve the required torque.
See Figure 17
.
Measure the slider rails after the 1” jam nuts are torqued, to be sure that they remained square and equal to the
smaller dimension measured in
Step 8
. while tightening. If they are not square and equal to the smaller
dimension measured in
Step 8
, then loosen the 1” jam nuts and repeat
Steps 9 & 10
until they are square.
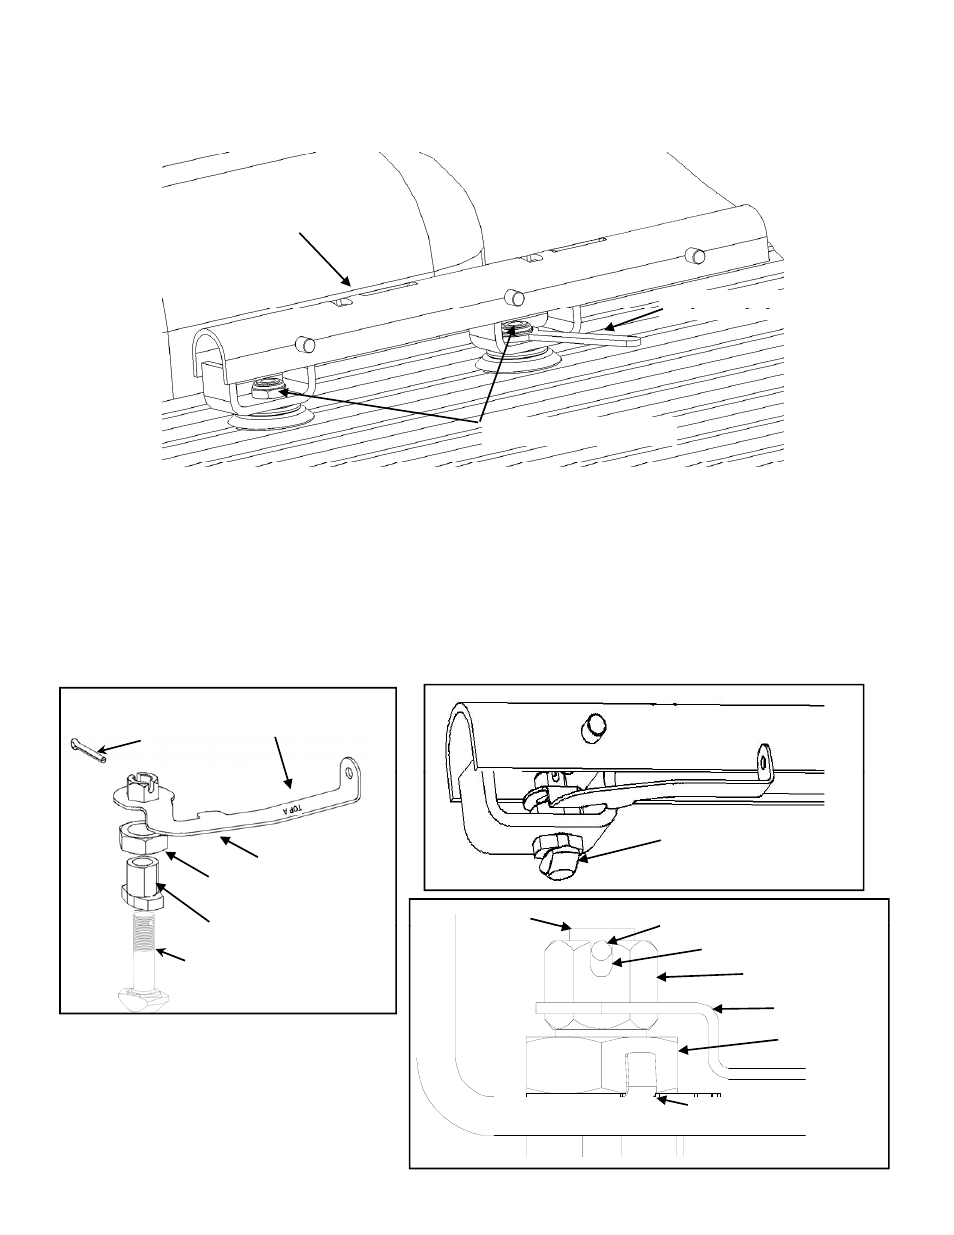
Box End Wrench
Slider Rail Assembly
Box End Wrench
Anchor Bushing Assembly
Figure 17
11.
Remove the rails from the truck bed and prepare for installing the Anchor Tee Pins, Anchor Handles and the 3/16”
cotter pins. Install the Anchor Tee Pin by inserting it up through the Anchor bushing and threading it into the Anchor
Handle.
See Figure 18a
. Each slider rail gets one of each anchor handle (
Anchor Handle “A” & Anchor Handle “B”
).
See Figure 19
for correct handle orientation. The Anchor Tee Pin should be threaded as far as it can go into the
Anchor Handle. The hole in the Anchor Tee Pin will probably not line up with the slot in the Anchor Handle nut at this
point and should be turned back slowly until they are inline. Once aligned, rotate the Anchor Tee Pin 540 degrees (
1
½ times
) counter clockwise until the hole and slot re align The 3/16” cotter pin can now be inserted into the hole
½ times
) counter clockwise until the hole and slot re-align. The 3/16 cotter pin can now be inserted into the hole.
Once the 3/16” cotter pin is in place, pry open the ends and bend them back on themselves to secure. At this point,
also bend up (
1
) tab on each tab washer that best matches up with a flat on each jam nut. This is to keep jam nuts
from working loose over time.
See Figures 18a, 18b & 18c
.
Cotter Pin
Anchor Handle “A” Shown
Figure 18b
Anchor Assembly
Anchor Bushing
Jam Nut
Anchor Handle
Hole in Anchor Tee Pin
Anchor
Figure 18a
Anchor Tee Pin
Anchor Bushing
1” Jam Nut
Anchor Handle nut
Hole in Anchor Tee Pin
Anchor Handle
Tee Pin
Slot in Anchor Handle nut
30144N– 05JUL10A PCN13292 ©2010 CEQUENT PERFORMANCE PRODUCTS, INC.
Litho in USA
10
For Kit 30144
Figure 18c
Tab Washer with (1) tab bent
up against flat of Jam Nut