Luminex xPONENT 3.1 User Manual
Page 66
Luminex xPONENT 3.1 Software Manual
54
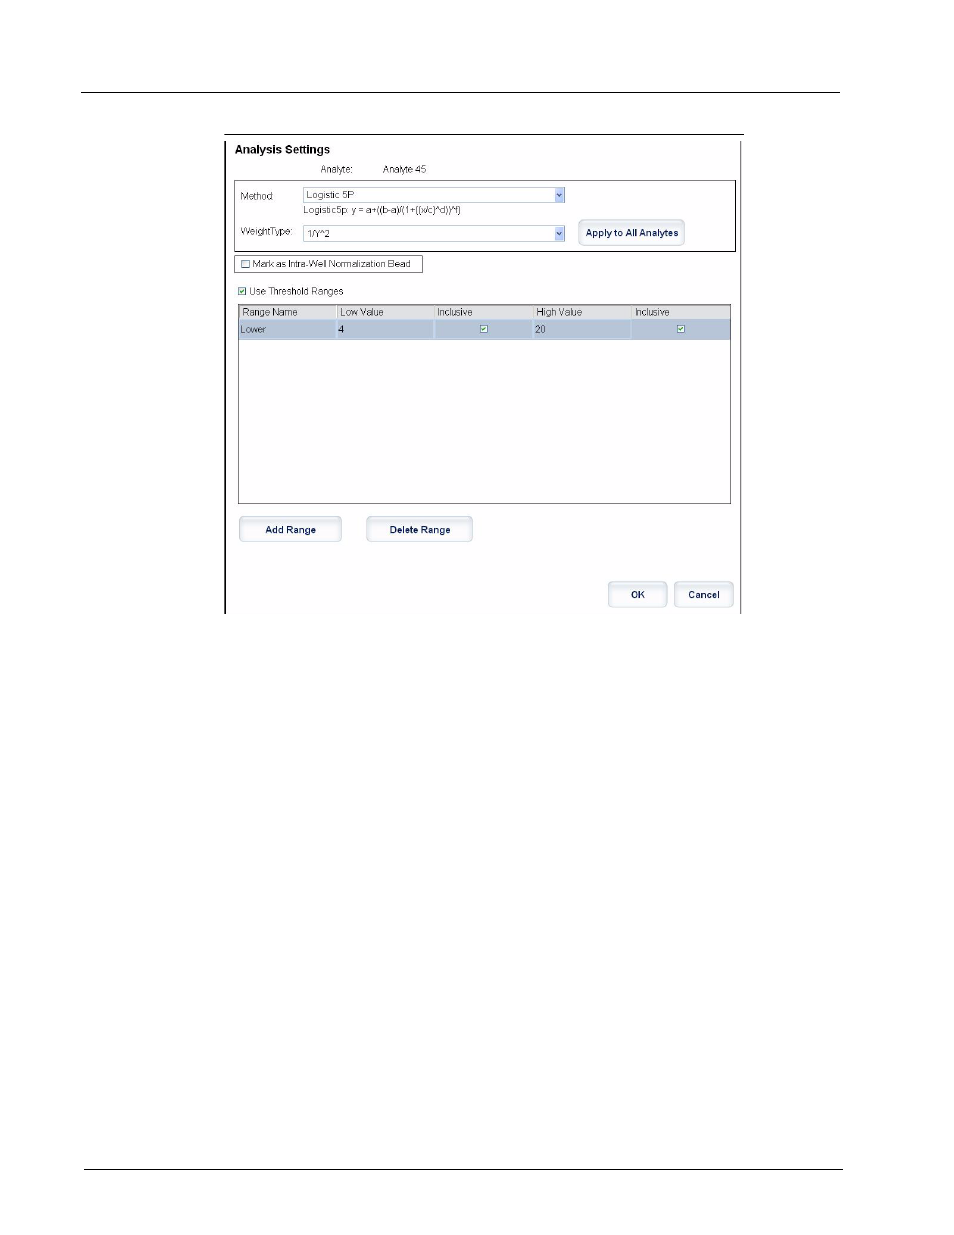
FIGURE 33.
Analysis Settings Dialog Box
•
Select a method from the Method list.
•
If necessary, select a weight type from the Weight Type list.
•
Apply the analysis to all analytes in the list by clicking Apply to All Analytes.
•
Select Mark as Intra-Well Normalization Bead to make the analyte an intra-well
normalization bead.
•
Add a range to the analysis by clicking Add Range.
•
Select Use Threshold Ranges to enable ranges for the analysis.
•
Click Add Range to add a range.
•
Type a Range Name, a Low Value, a High Value, and select Inclusive if you wish
to include the low and high values in the range. Click OK to exit the dialog box.
•
Units - The unit of measurement you specified in the Unit box. Click this box to type a
value for the analyte.
•
Count - The total desired bead count for an analyte. Click this box to type a value. The
system continues analyzing until each bead set has met the minimum events as
determined in the Count box above. If you select the Stop after total bead count
reaches: check box and type a total count in the corresponding box, this column does
not appear.
•
Region - Refers to the specific analyte selected. It is a number from 1 to 100.
Group. If you have selected Allele Call from the Analysis Type in the Settings tab, this
button displays. Click Group to group 2, 3, or 4 analytes for the group. Multiple groups can
be made.