Qs-3 usp 405 • quick start, Output menu, Advanced configuration menu – Extron Electronics USP 405 User Guide User Manual
Page 5
QS-3
USP 405 • Quick Start
2
Output menu
3
Memory Presets menu
4
Advanced Configuration menu
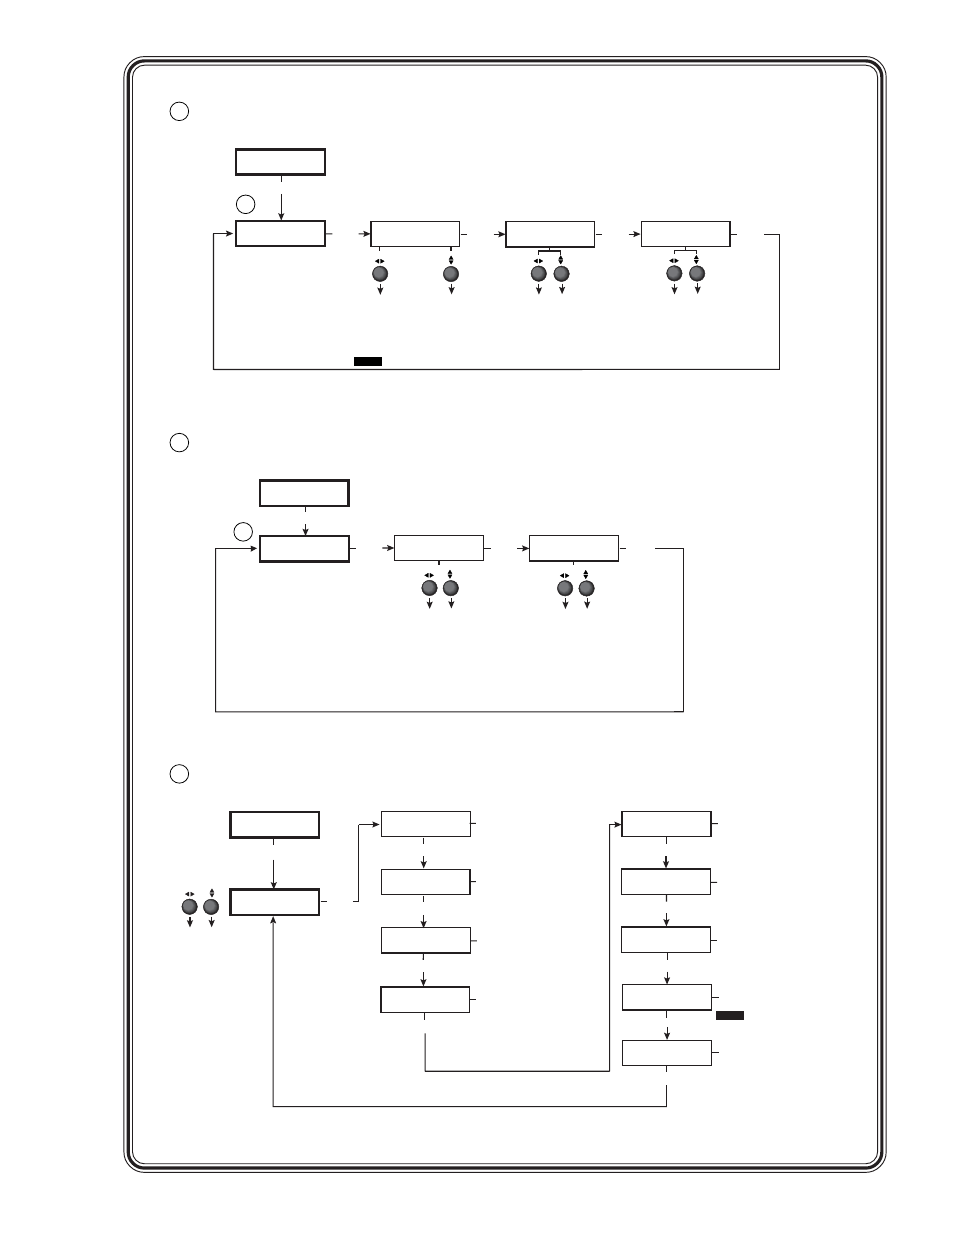
Output
Configuration
NEXT
Resol 1024 x 768
Refresh @ 60
Output Signal
RGB
Sync Polarity
H Neg V Neg
NEXT
NEXT
NEXT
Input
Configuration
MENU
Scaler output rates
• See the table in the "Output Configuration"
section of chapter two for available
combinations of resolutions and refresh
rates.
Default: 640x480, 60 Hz
NOTE
Lock = Accu-RATE Frame Lock™
Video types
• RGB (default)
• Y, R-Y, B-Y
Polarity combinations
• H-/V- (default)
• H-/V+
• H+/V-
• H+/V+
2
Output
Configuration
Advanced
Configuration
MENU
Edge Smoothing
OFF
NEXT
Encoder Filter
06
NEXT
Blue Mode
Top Blanking Bot
021 030
NEXT
RGB Delay
0.2 Seconds
NEXT
NEXT
Either Adjust knob is used
to adjust the submenus*
To reset the scaler, press
and hold the Freeze button
until reset message displays
Smooth edges
• On (default)
• Off
Encoder filter setting
• 0 thru 12 (default is 6)
to adjust sharpness
RGB delay time
(in seconds)
• 0.0 to 5.0 seconds
in 0.1 sec. increments
(0.7 second default)
Display blue and sync only
• On
• Off (default)
NEXT
Press and Hold
FREEZE to Reset
NEXT
Test Pattern
Off
NEXT
Set test pattern type
• Off (default)
• Alt pixel
• Color Bars
• Film aspect 1.78
• Crosshatch
• Film aspect 1.85
• 4 x 4 crosshatch • Film aspect 2.35
• Grayscale
• Ramp
• Crop
Top and Bottom Blanking
*
• Top blanking ranges from
000 (default) to 237
• Bottom blanking ranges
000 (default) to 237
Enhanced Mode
Enhanced mode (gain control)*
• On (default)
• Off
NEXT
PAL Film Mode
• On
• Off (default)
Input 2 PAL Film
NEXT
NOTE
Adjust knobs do not affect
this submenu.
*
If the Test Pattern is set "On",
"Not Available" is displayed.
NEXT
Save Preset
Erase Preset
NEXT
NEXT
Saving (Save) memory presets
• Save the currently selected input's
sizing and centering information.
• Up to 3 presets per input can be
selected < > (N/A is the default) and
saved.
• Save a preset by pressing the Next
button.
Erasing (Erase) memory presets
• Erase the currently selected input's
saved sizing and centering
information.
• Up to 3 presets per input can be
selected < > (N/A is the default)
and erased.
• Erase a preset by pressing the Next
button.
Output
Configuration
Memory
Presets
MENU
3