Motor assembly, Motor and torque arm ii reducer installation – Grain Systems Bucket Elevtors, Conveyors, Series II Sweeps PNEG-1204 User Manual
Page 22
17
PNEG-1204 Enclosed Belt Conveyors
Motor Assembly
Motor Mount Brackets
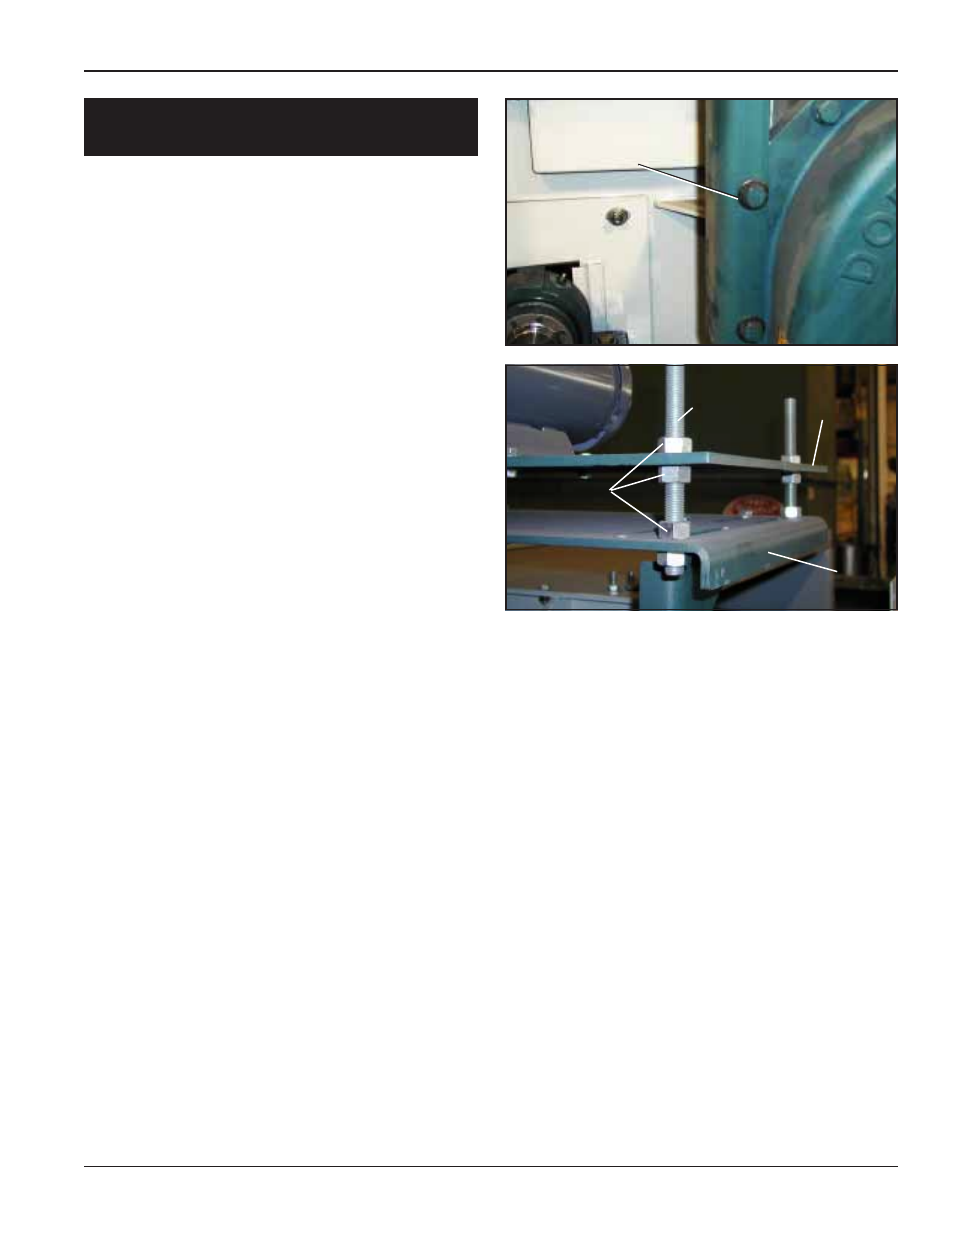
8. Remove three bolts from each side of the
reducer housing. Use a set of holes in the
motor mount upright brackets that allows the
motor plate to be as close as possible to the
top of the conveyor. Check this location by
temporarily positioning the belt guard on the
reducer with the hole in the guard centered
over the reducer input shaft. This will show
the correct motor position for the lengths of
v-belts provided. Attach by replacing bolts
through brackets and housing. Tighten bolts
securely.
9. Thread nuts onto jackscrews. Place bolt
through motor mount bracket and base plate.
Thread another nut onto jackscrews to
secure. Repeat for 3 remaining jackscrews.
10. Thread another nut onto all four jackscrews.
Place adjustment plate onto jackscrews.
Thread another nut onto each jackscrew to
secure adjustment plate. Use these nuts to
adjust the motor height.
11. Attach the motor to the adjustment plate
using bolts and locknuts.
12. Install the rear panel of the drive guard before
mounting the sheaves. The rear panel has
two (2) mounting brackets with slotted holes.
Attach these left-hand and right-hand belt
guard mounting brackets to the motor mount
frame. Then fasten rear panel of belt guard to
the belt guard brackets. After the rear panel
is in place, install sheaves onto motor and
reducer.
MOTOR AND TORQUE ARM II
REDUCER INSTALLATION
(CONT.)
Motor Mount Adjustment Plates
Drive Guard Rear Panel
Motor
Mount
Bracket
Attached to
Reducer
Motor Mount
Adjustment
Plate
Jackscrews
Nuts
Base
Plate