4 how to create a clip, How to create a clip – EVS IPBrowse Version 6.0 - November 2012 User's Manual User Manual
Page 67
IPBrowse Version 6.0 – User Manual
EVS Broadcast Equipment – November 2012
Issue 6.0.B
59
Note
When the cursor is located in a text area, the
key can be pressed
together with a keyboard shortcut to perform one of the following action: Mark
IN, Mark OUT, Save Clip, Update Clip.
6.4 How to Create a Clip
To create a clip from a train or a recording ingest or to create a sub-clip from an existing
clip, proceed as follows:
1.
Load a media (train, recording ingest, clip or a log) on the Player pane.
2.
If you have loaded a clip, browse through it to select the point to be marked IN
and/or the point to be marked OUT.
3.
Set an IN point at the required timecode.
4.
Set an OUT point at the required timecode.
5.
Click the Save Clip button
or use the dedicated shortcut.
•
If the Show Save Clip Window setting has not been selected, make sure the
bin tab where you want to send the clip has been selected before clicking the
Save button. Refer to section 6.6 ‘Sending a Clip to a Bin’ on page 60.
The procedure is finished.
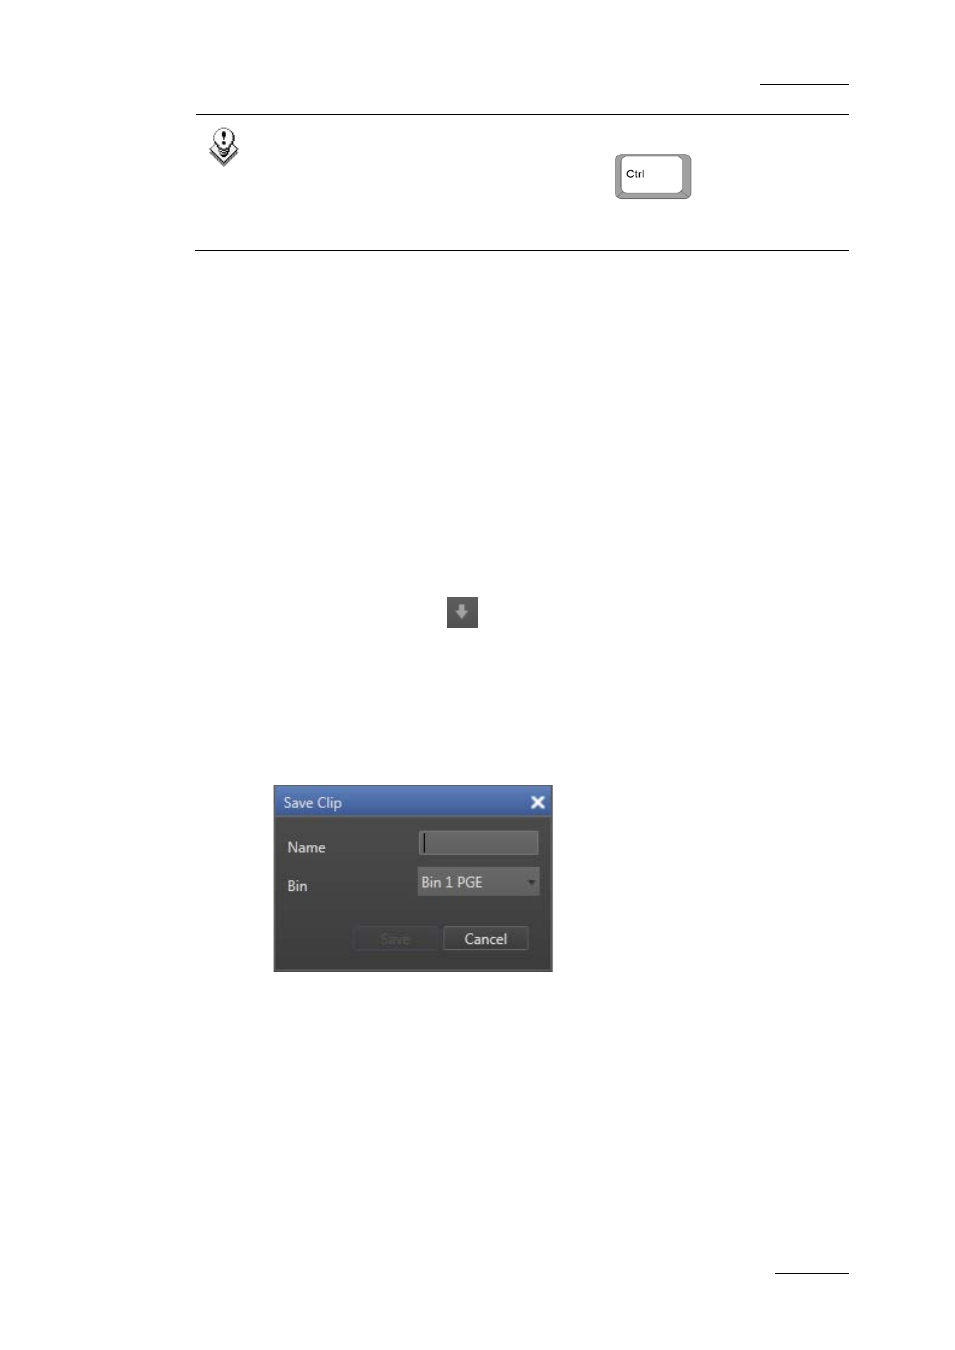
•
If the Show Save Clip Window setting has been selected, the Save Clip
window opens:
Follow steps 6 to 8.
6.
Enter a name for the clip in the Name field.
7.
In the Bin field, select the bin where you want to send the clip.
8.
Click the Save button to save the clip from the Save Clip window.
The clip is saved in the IPDirector database and the clip is sent to the selected bin.
If the selected recorder channel is part of a ganged group, clips are created on each of
them and are linked. They are all sent to the bin. They all receive the same name,
followed by xx, where xx starts with 00 and increments for each additional camera angle.