Cleaning instructions, Accessories, Checking the horizontal beams – RIDGID micro DL-500 User Manual
Page 11
micro DL-500 Self-Leveling 5-Dot Laser
9
the laser to the surface that the mark is
on (this distance is L). L must be greater
than 12.5 feet (3,8 m).
4. Calculate the acceptable misalignment:
• in inches by multiplying L (in feet) by
0.005
• in millimeters by multiplying L (in me-
ters) by 0.417
5. Rotate the laser 180° clockwise by swivel-
ing the laser on its base (do not move the
base). Make sure that the down beam is
positioned on the reference point. Mark
the up beam location as position B.
6. Rotate the laser 90° clockwise by swivel-
ing the laser on its base (do not move the
base). Make sure that the down beam is
positioned on the reference point. Mark
the up beam location as position C.
7. Rotate the laser 180° clockwise by swivel-
ing the laser on its base (do not move the
base). Make sure that the down beam is
positioned on the reference point. Mark
the up beam location as position D.
8. Measure the distance between points A
and B and between points C and D. If the
distance between the points is greater
than acceptable misalignment calculat-
ed in step 4, have the laser serviced. This
cannot be field calibrated.
0º (A)
180º (B)
90º (C)
270º (D)
Figure 8 - Up Beam Check
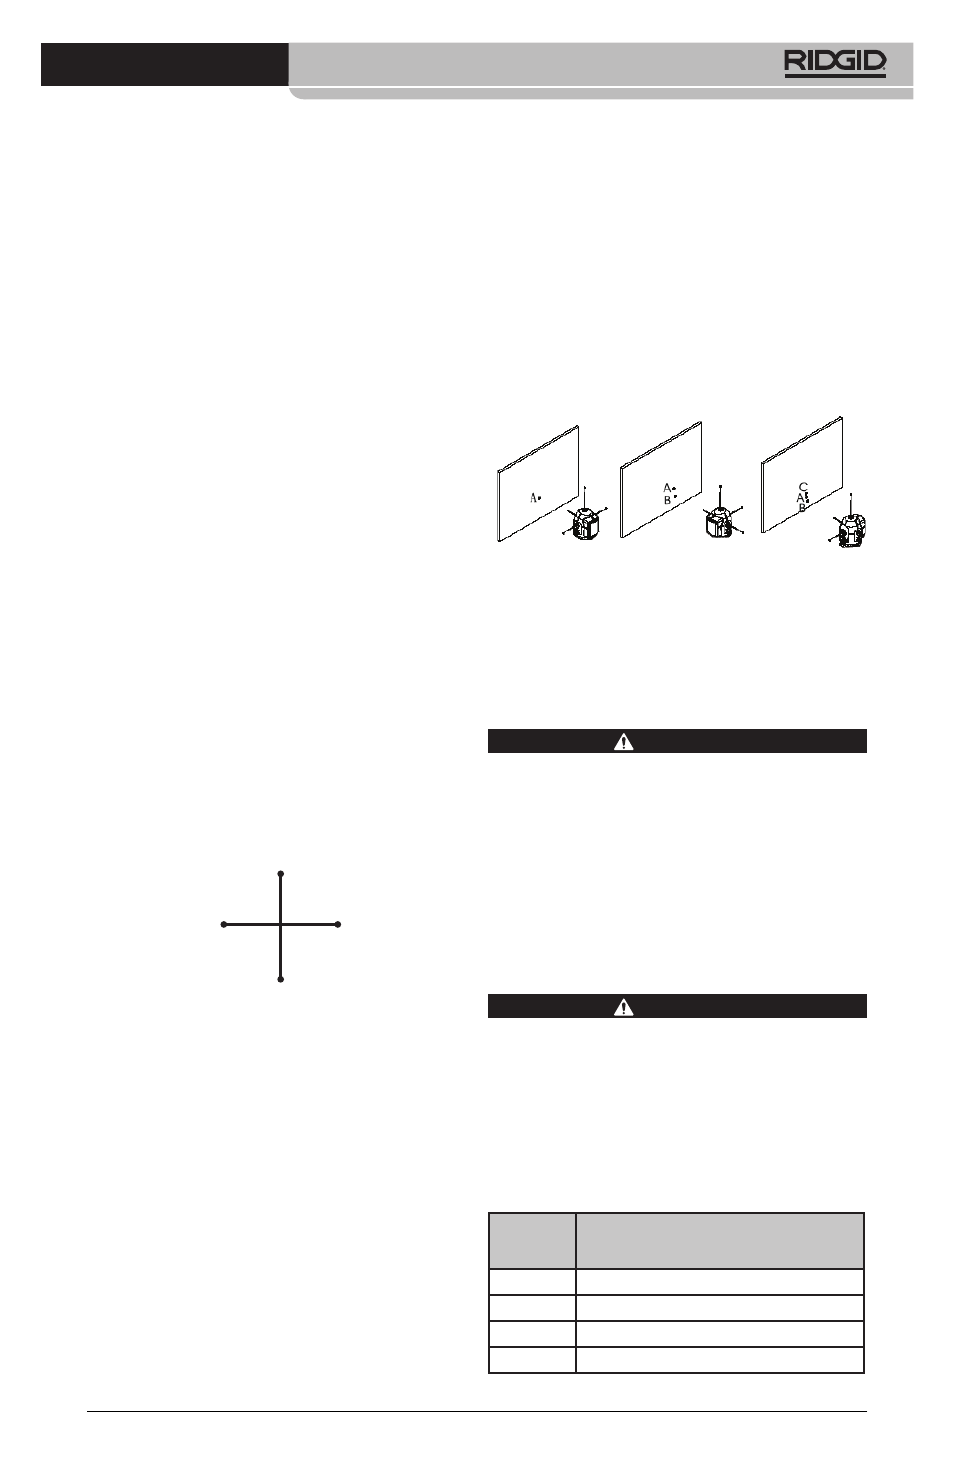
Checking the Horizontal Beams
1. As shown in Figure 9, squarely set up the
laser on the tripod or flat surface 50 ft.
(15,2 m) from a wall.
2. Turn the laser ON.
3. Aim the front beam at the wall. Mark the
front beam location as position A.
4. Rotate the laser 90° by swiveling the la-
ser on its base (do not move the base)
to point the left laser beam at the wall.
Mark the left beam location as position
B.
5. Rotate the laser 180° by swiveling the
laser on its base (do not move the base)
to point the right laser beam at the wall.
Mark the right beam location as position
C.
6. Points A, B and C should all fall in a ver-
tical line. Vertically there should be no
more than 0.125" (3,2 mm) between the
highest and lowest points. If the mea-
surement exceeds 0.125" (3,2 mm), have
the laser serviced. This cannot be field
calibrated.
Figure 9 - Self-Checking the 3 Horizontal
Beams
Cleaning Instructions
WARNING
Remove the batteries before cleaning.
Keep the micro DL-500 Self-Leveling Laser
dry and clean. Do not immerse in water.
Gently wipe off with a damp soft cloth. Do
not use any detergents or solvents. Pay spe-
cial attention to the laser output windows –
remove any lint or fibers.
Accessories
WARNING
Remove the batteries before cleaning.
To reduce the risk of serious injury, only use
accessories specifically designed and recom-
mended for use with the RIDGID micro DL-500
Self-Leveling 5-Dot Laser such as those listed
below. Other Accessories suitable for use with
other tools may be hazardous when used with
the micro DL-500 Self-Leveling 5-Dot Laser.
Catalog
No.
Description
41723
Magnetic Base w/Mounting Strip
41373
micro DL-500 Laser Target Plate
41378
Laser Glasses
41383
Tripod