Panel descriptions, Front panel – Roland RD-300 User Manual
Page 8
10
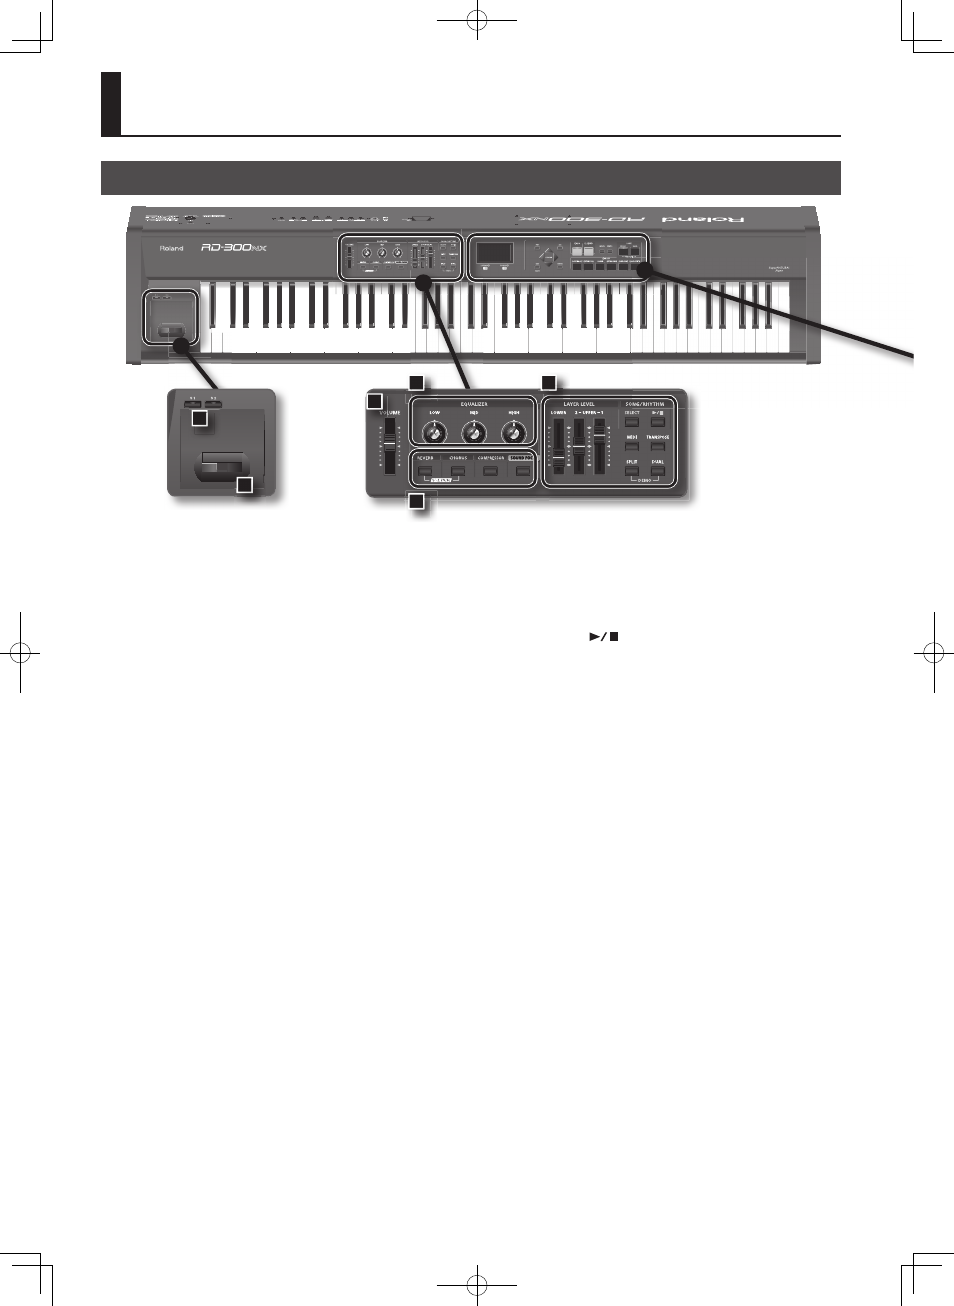
Panel Descriptions
1. [VOLUME] slider
Adjusts the overall volume that is output from the rear panel OUTPUT
jacks, and PHONES jack (p. 18).
2. EQUALIZER
[LOW] Knob
Adjusts the sound’s low-frequency range (p. 34).
[MID] Knob
Adjusts the sound’s midrange frequencies (p. 34).
[HIGH] Knob
Adjusts the sound’s high-frequency range (p. 34).
You can adjust the center frequency of each band by holding down
the [EXIT/SHIFT] button and turning the corresponding EQUALIZER
knob ([LOW] knob / [MID] knob / [HIGH] knob).
3. REVERB, CHORUS, COMPRESSOR, SOUND FOCUS
[REVERB] Button
Turns the reverb on/off (p. 32).
Adjusts the amount of reverb (p. 32).
By holding down the [REVERB] button and pressing the [CHORUS]
button, you can control a connected V-LINK compatible external video
device (p. 74).
[CHORUS] Button
Turns the chorus on/off (p. 32).
Adjusts the amount of chorus (p. 32).
By holding down the [REVERB] button and pressing the [CHORUS]
button, you can control a connected V-LINK compatible external video
device (p. 74).
[COMPRESSOR] Button
Turns the compressor on/off (p. 33).
Adjusts the amount of compression (p. 33).
[SOUND FOCUS] Button
Turns Sound Focus on/off (p. 34).
Allows you to enhance the sound’s defi nition (p. 34).
4. CONTROL
LAYER LEVEL Slider
Adjusts the volume level for each part (p. 30).
SONG/RHYTHM [SELECT] Button
Displays a screen where you can select a song or rhythm (p. 36, p. 37).
SONG/RHYTHM [
] Button
Start/stops playback of the song or rhythm (p. 36, p. 37)
[MIDI] Button
Puts the RD-300NX in control of the external MIDI sound generator (p.
77).
[TRANSPOSE] Button
Sets the range of the keyboard to transposed (p. 31).
[SPLIT] Button
This button selects “Split mode,” whereby the keyboard is divided into
two regions, allowing you to play separate sounds with the right and
left hands (p. 28).
In addition, you can listen to the demo songs by simultaneously
pressing this button and the [DUAL] button (DEMO PLAY) (p. 25).
[DUAL] Button
This button selects “Dual mode”; allows you to play the UPPER 1 and
UPPER 2 tones layered across the entire keyboard (p. 28).
In addition, you can listen to the demo songs by simultaneously
pressing this button and the [SPLIT] button (DEMO PLAY) (p. 25).
Front Panel
9
10
1
2
3
4