Lamp, Lamp replacement, Maintenance – Philips bSure 1 User Manual
Page 42: Lamp lamp replacement
>
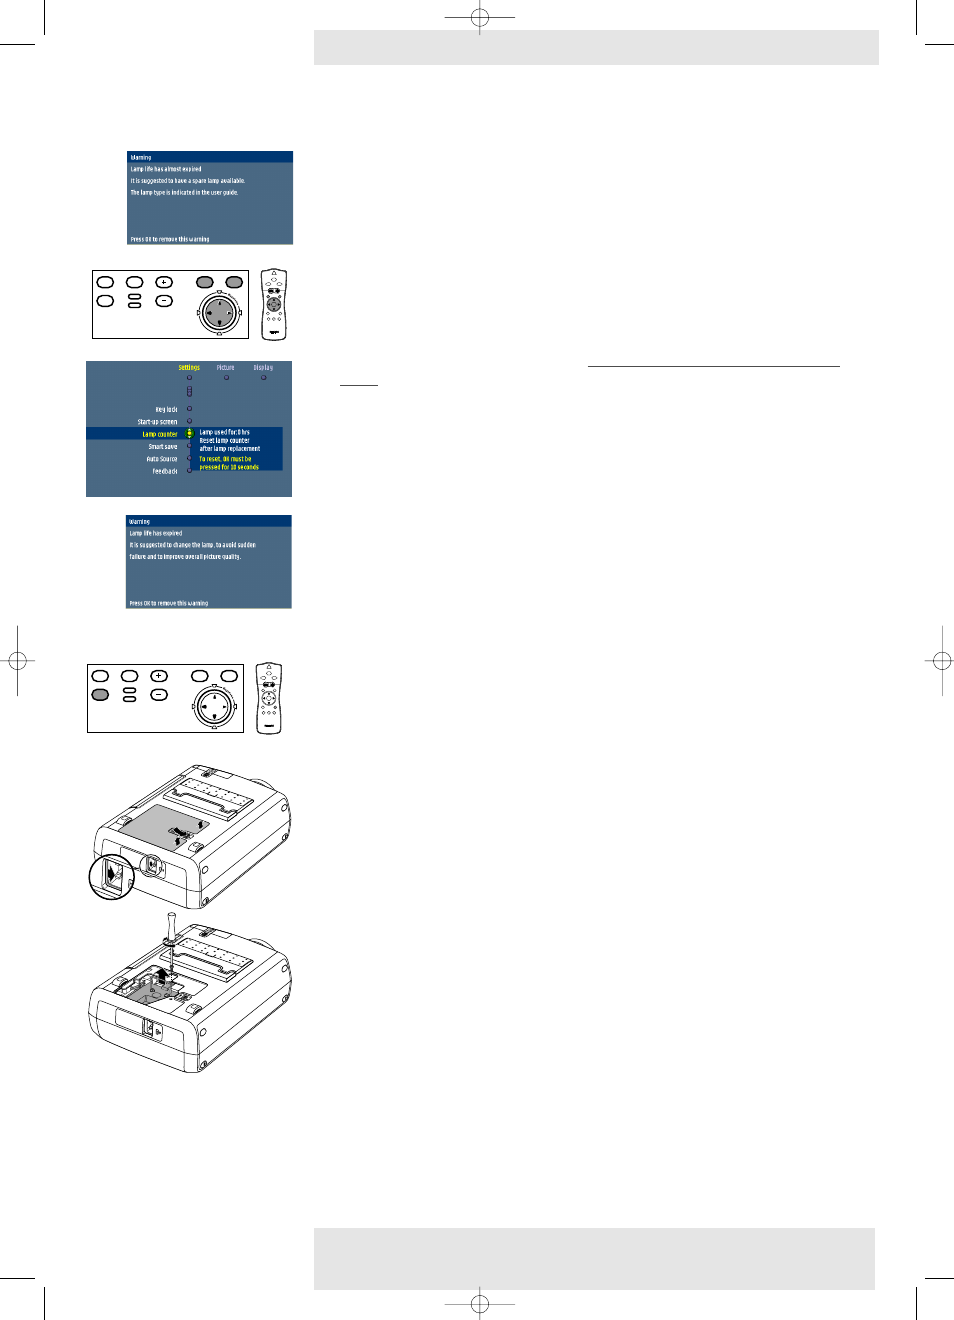
When operation time reaches the last 100 hours of the average lamplife, the message ‘Warning:
lamplife has almost expired’ will be displayed on the screen, each time the projector is switched
on.The lamp indicator lights up orange.
The lamplife remaining can be checked using the OSD menu.
1
Press Menu.
–
The menu bar appears on the screen.
2
Use Cursor Control to move the cursor to ‘Settings’.
3
Use Cursor Control to select ‘Lamp counter’.
–
The remaining lamplife hours are displayed
in the action window at the bottom of the
screen
.
–
When the lamplife has expired, the lamp indicator lights up red and the message
‘Warning: lamplife has expired’ is displayed on the screen.
1
Switch off the projector and wait until the lamp has cooled down (about 5 minutes) before
disconnecting the projector. Remove the mains lead from both projector and wall socket.
The mains lead must be disconnected from the projector otherwise the lamp door
cannot be removed.
2
Turn the projector over and place it on a soft surface.
Never place the projector on the side
where the connections are located!
3
Push tab A to the right and remove the lamp door.
–
When tab A is pressed the mains inlet socket will be partly closed. The lamp door therefore
cannot be removed if the mains lead is not disconnected from the projector.
4
Read the caution and warning labels on the lamp holder.
5
Unscrew screw B.
6
Grasp the lamp holder handle and carefully pull the lamp holder out of the projector.
•
Do not tilt. If the inner tube is broken glass particles may fall out.
•
Keep lamp holder opening to your right. Do not touch lamp or point lamp holder opening
at anyone.
7
Carefully remove the new lamp housing from its package.
Lamp
Lamp replacement
6. Maintenance
Philips Multimedia Projector
42
English User guide
cClear
A
Menu
OK
AV
Mute
Source
Stand
by
Lamp
Temp
Menu
OK
AV
Mute
Source
Stand
by
Lamp
Temp
LASER
LASER
VOolume
VOolume
OK
OK
Menu
Menu
Standby
Standby
On
On
AV Mute
AV Mute
Select
Select
Mode
Mode
Source
Source
Mouse
Mouse
RIGHT
RIGHT
LEFT
LEFT
RIight
RIight
Left
Left
6
Window
Window
Menu
OK
AV
Mute
Source
Stand
by
Lamp
Temp
Menu
OK
AV
Mute
Source
Stand
by
Lamp
Temp
LASER
LASER
VOolume
VOolume
OK
OK
Menu
Menu
Standby
Standby
On
On
AV Mute
AV Mute
Select
Select
Mode
Mode
Source
Source
Mouse
Mouse
RIGHT
RIGHT
LEFT
LEFT
RIight
RIight
Left
Left
6
B
XP cClear10 English (good) 24-07-2003 15:52 Pagina 42