Loading your own personal start-up screen, Operation, On screen display menu – Philips bSure 1 User Manual
Page 39: General adjustments/settings
Loading your own personal start-up screen
(for bSure2 Brilliance projectors only)
All settings described under ‘
General adjustments/settings
’ can be made,
following the
instructions
under ‘On Screen Display Menu - General explanation’. Loading your own personal
start-up screen however follows a slightly deviant procedure which we will describe hereafter.
You can load any image as long as the size of the image does not exceed 128 KB.The more
detailed the image is the larger its size will be.The image must be projected on the screen.
1
Press Menu.
–
The menu bar appears on the screen.
2
Use Cursor Control to move the cursor to ‘
Settings.’
3
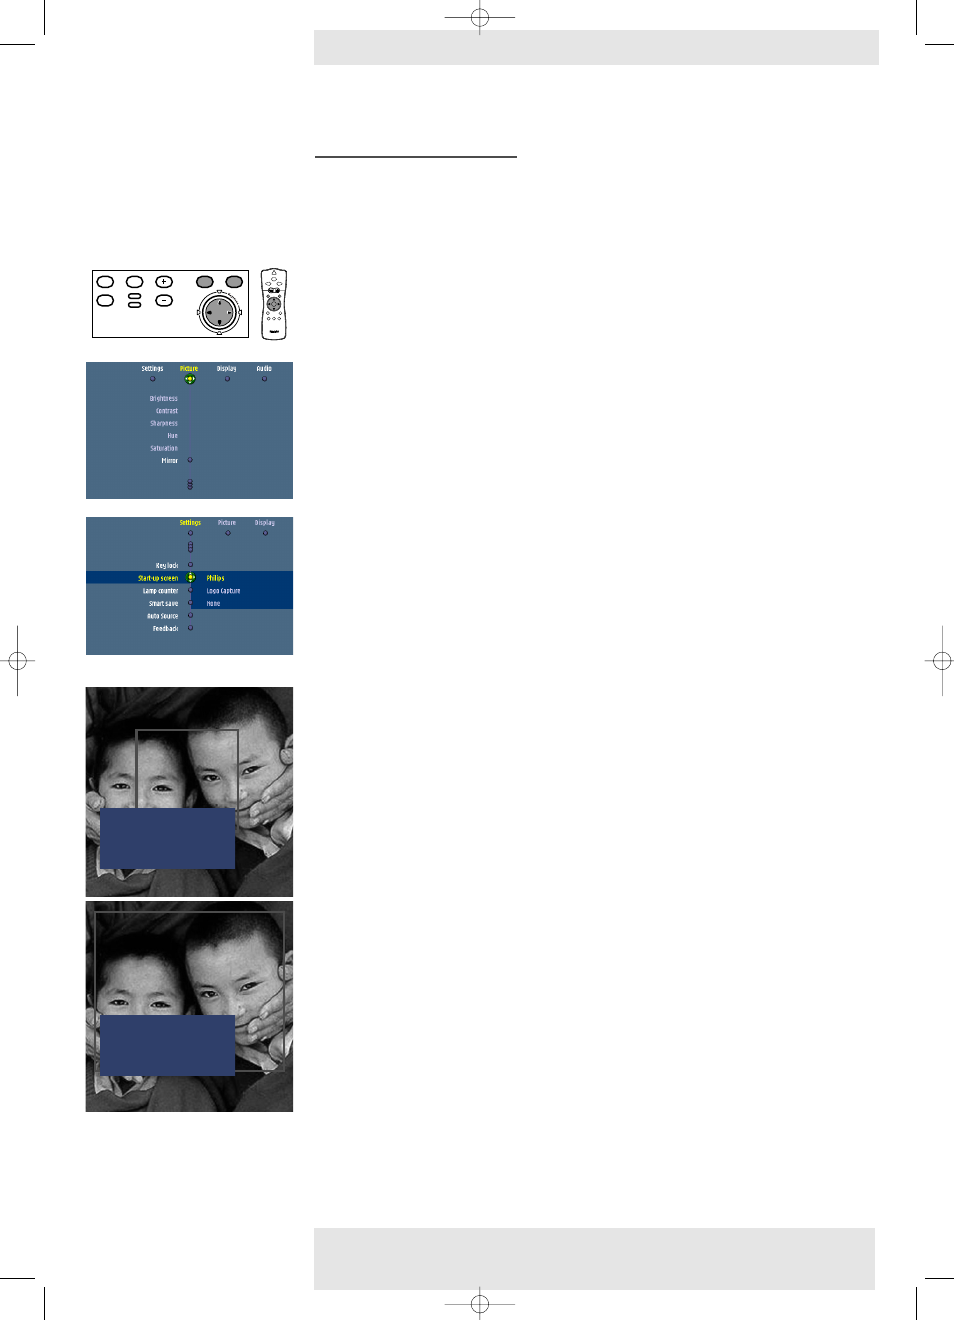
Select ‘Start-up screen’ using Cursor Control.
4
Select ‘Log capture’ if you wish to load the currently shown image and store it as start-up
screen.
–
The menu bar disappears and the image is shown.
5
Press OK to display the capture window.
The capture window (red oblong) shows you what part of the image will be loaded.
6
With Cursor Control you can move the window to select the part of the image you wish
to load.
•
Press OK if you wish to resize the capture window in order to make the image fit in the
window.You can use Cursor Control to adjust the size of the window.
7
Keep OK pressed for 3 seconds to confirm.
–
‘Capturing’ appears on the screen and the image will now be loaded.The loading time is
dependent on the size of the image and may take up to a few minutes.
–
When the image is loaded ‘Capture complete’ and ‘Please reset projector’ appear on the
screen.
8
You will now have to reset the projector. For this see ‘Resetting the projector’ hereafter.
5. Operation
Philips Multimedia Projector
39
English User guide
cClear
On Screen Display Menu >
Move window to select the area to be captured.
Press OK key to resize the capture window.
Keep OK key pressed for 3 seconds to confirm
capture of (new) Custom image.
Press Menu key to return to the menu.
Capture complete.
Please reset projector.
Menu
OK
AV
Mute
Source
Stand
by
Lamp
Temp
Menu
OK
AV
Mute
Source
Stand
by
Lamp
Temp
LASER
LASER
VOolume
VOolume
OK
OK
Menu
Menu
Standby
Standby
On
On
AV Mute
AV Mute
Select
Select
Mode
Mode
Source
Source
Mouse
Mouse
RIGHT
RIGHT
LEFT
LEFT
RIight
RIight
Left
Left
6
Window
Window
XP cClear10 English (good) 24-07-2003 15:52 Pagina 39