Service procedures – Sanyo CL4232 User Manual
Page 65
– 65 –
SM830078
12. SERVICE PROCEDURES
6
6
6
6
6
Continuity of fuse on P.C.B. Ass’y
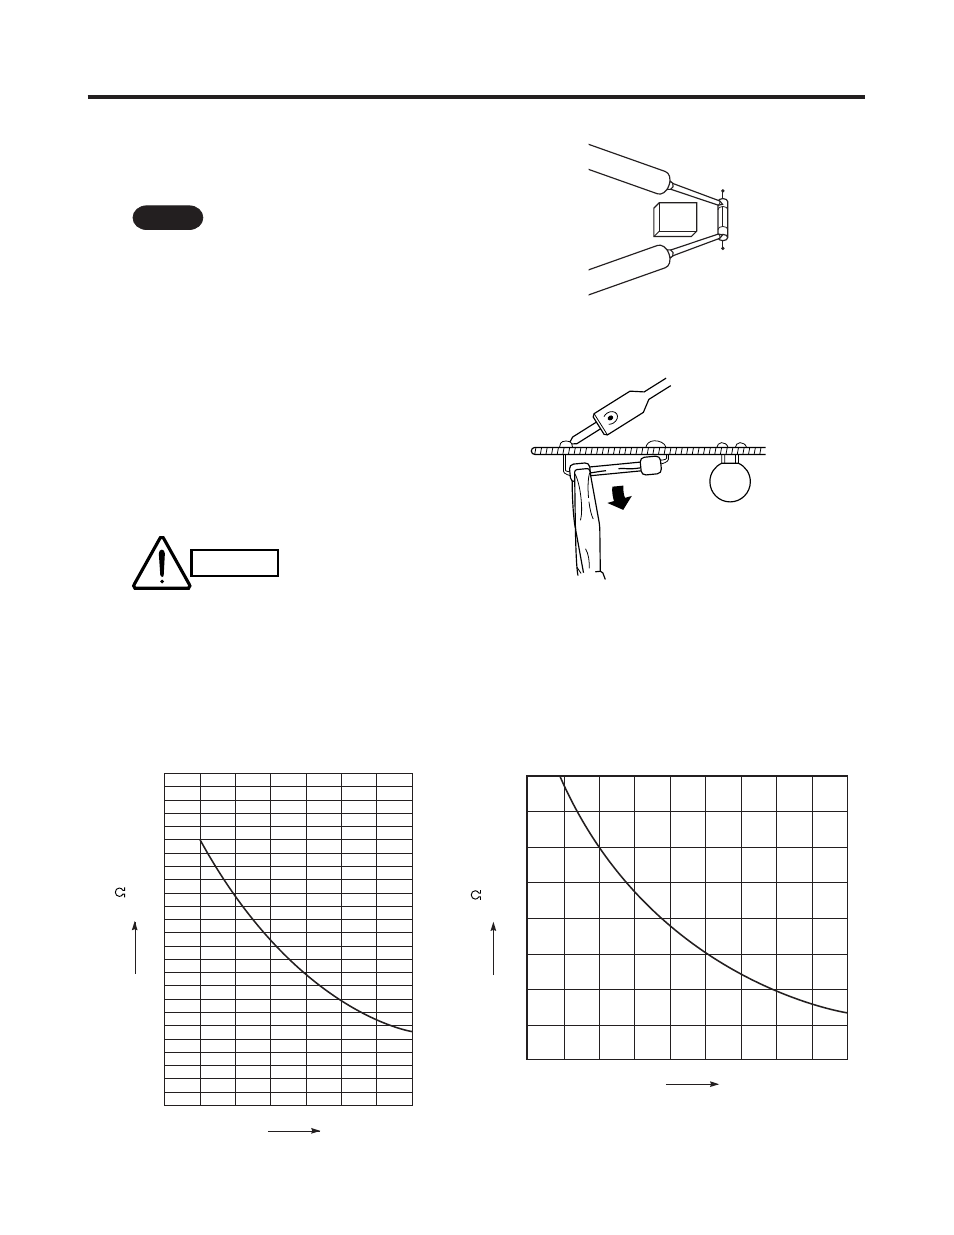
• Check for continuity using a multimeter
as shown in Fig. 19.
Method Used to Replace Fuse on PCB
Ass’y
1. Remove the PCB Ass’y from the electri-
cal component box.
2. Remove the fuse from PCB Ass’y using
pliers while heating the soldered leads
on the back side of the PCB Ass’y with
a soldering iron (30W or 60W). (Fig. 20)
3. For replacement, insert a fuse of the
same rating to the intended position and
solder it.
(Allow time to radiate heat during sol-
dering so that the fuse does not melt.)
When replacing the
fuse, be sure not to
break down the varis-
tor.
4)
Thermistor Characteristic Curve
Fig. 19
1043_X_S
Soldering iron
PCB Ass’y
Fuse
Varistor
Pliers
Fig. 20
1042_X_S
Fuse
NOTE
CAUTION
1
Room temp. sensor
(KTEC-35)
1
Coil sensor
(PBC-41E)
Resistance (kn )
50
59
68
77
86
95
104
10
9
8
7
6
5
4
3
2
1
Temperature (
°
F)
1044_M_I
–4
5
14
23
32
41
50
59
68
0
5
10
15
20
25
30
35
40
Temperature (
°
F)
Resistance (kn )
1045_M_I