Isdn, t1, e1, and v.92 mini pims, Ethernet ports – Juniper Networks SSG 20 User Manual
Page 25
Connecting a Device to a Network
25
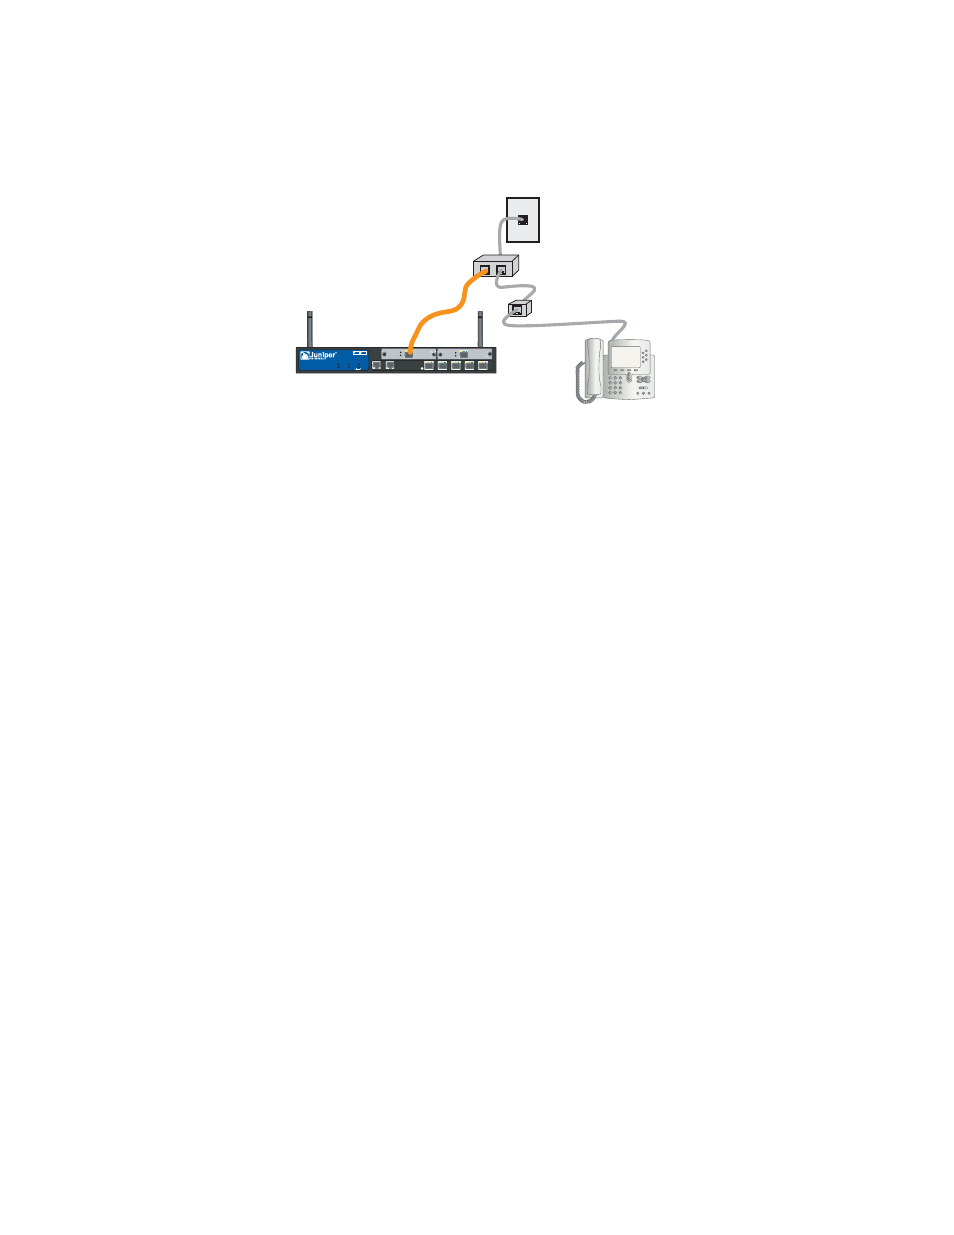
Figure 11: Microfilter and Splitter on Your Network Connection
ISDN, T1, E1, and V.92 Mini PIMs
To connect the mini PIMs to a device, perform the following steps:
1.
Have ready a length of the type of cable used by the interface.
2.
Insert the cable connector into the cable-connector port on the interface
faceplate.
3.
Arrange the cable as follows to prevent it from dislodging or developing stress
points:
a.
Secure the cable so that it is not supporting its own weight as it hangs to
the floor.
b.
Place any excess cable out of the way in a neatly coiled loop.
c.
Use fasteners to maintain the shape of the cable loops.
To configure the ISDN, E1, T1, or V.92 mini PIM, see “Mini PIM Configuration” on
page 41.
Connecting a Device to an Internal Network or a Workstation
You can connect your local area network (LAN) or workstation with the Ethernet
and/or wireless interfaces.
Ethernet Ports
An SSG 20 device contains five Ethernet ports. You can use one or more of these
ports to connect to LANs through switches or hubs. You can also connect one or all
of the ports directly to workstations, eliminating the need for a hub or switch. You
can use either crossover or straight-through cables to connect the Ethernet ports to
other devices. See “Default Device Settings” on page 31 for the default
zone-to-interface bindings.
CONSOL E
AUX
SSG 20
TX/RX
LINK
TX/RX
SYNC
1
2
ADSL 2 /2 +
0 /0 10/100
0 /1 10 /100
0 /2 10 /100
0 / 4 10 /100
0/ 5 10 /100
STATUS
POWER
PIM 2
PIM 1
b/g
802.11a
WLAN
TX RX
SYNC
ADSL 2 +
DATA
VOICE