Set remote control code, Enter remote control code, Prepare the recorder for receiving control code – JVC HM-HDS1U User Manual
Page 85: Transmit the new code to the recorder, Confirm the setting, Turn on the recorder, Control four jvc vcrs, Vcr a vcr c
EN
85
;;;
;;;
yyy
yyy
DIGITPURE TECHNOLOGY
HM-HDS1
;;
;;
;;
yy
yy
yy
POWER
S-VHS ET
S-VHS
HDD
OK
MENU
REC LINK
CH
NAVI
STOP
PLAY
PAUSE
REC
REW
FEW
A. DUB
EJECT
VIDEO
PAUSE
S-VIDEO
(M) L – AUDIO – R
F - 1
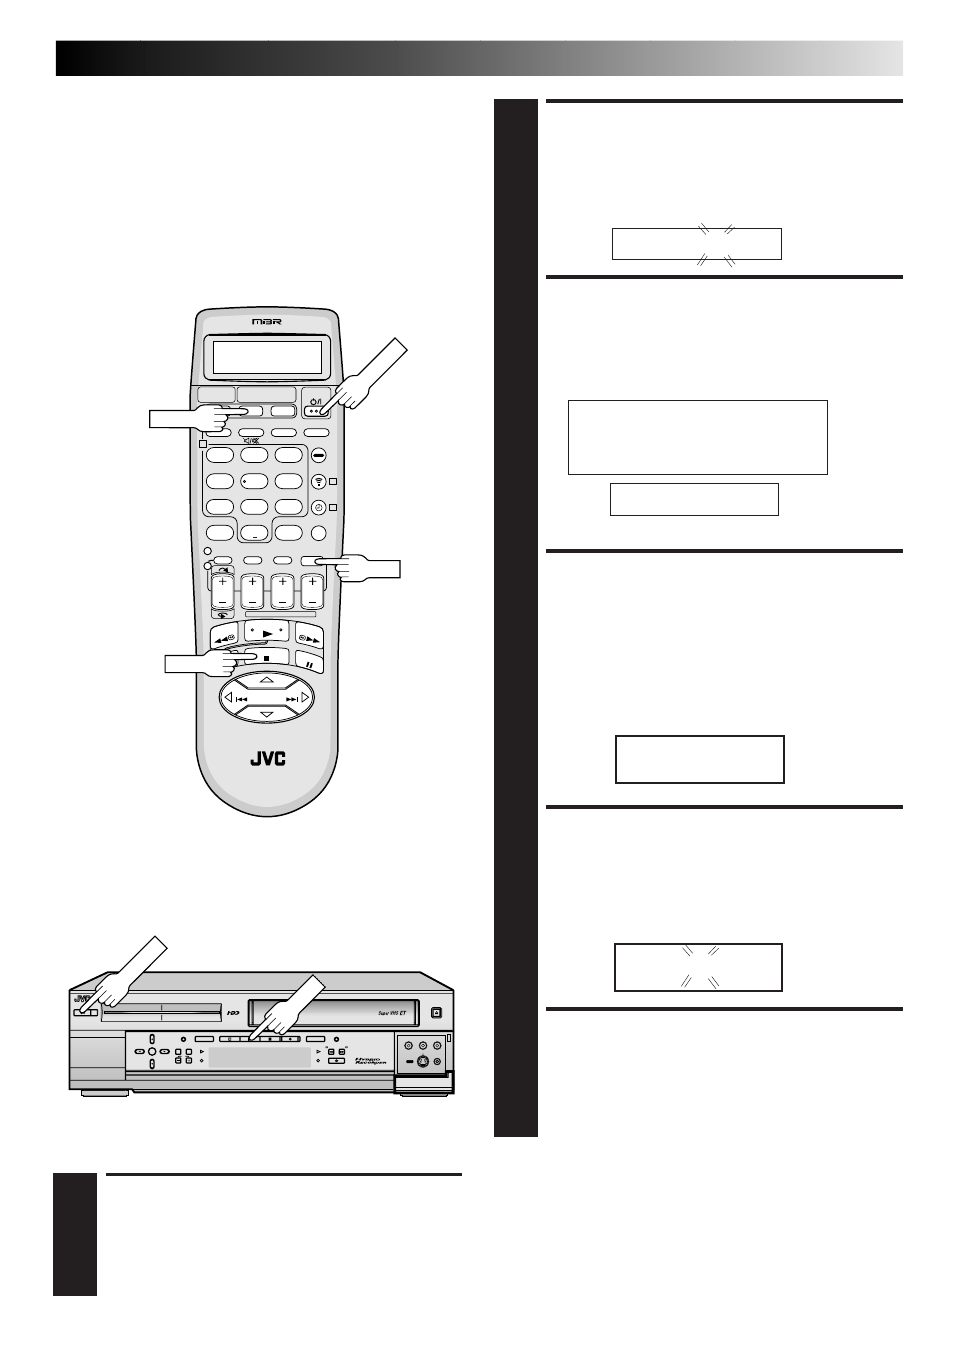
SET REMOTE CONTROL
CODE
2
Press and hold HDD on the remote control until “A”
starts blinking on the display window of the remote
control.
ENTER REMOTE CONTROL
CODE
3
Press one of the following buttons to enter the desired
cord, then press OK. The current setting code of the
remote control appears on the display window.
2: sets the remote control code to “B”
3: sets the remote control code to “C”
4: sets the remote control code to “D”
1: sets the remote control code to “A”
PREPARE THE RECORDER
FOR RECEIVING CONTROL
CODE
4
1) To turn off the unit, press POWER on the front panel.
2) Press PLAY on the front panel for 5 seconds. The
current setting code of the unit appears on the
display.
TRANSMIT THE NEW
CODE TO THE RECORDER
5
Press STOP on the remote control. The new code is
transmitted to the unit and blinks for about 5 seconds
on the display, then the clock time appears.
CONFIRM THE SETTING
6
Press POWER on the remote control. When the unit is
turned on, the setting is complete. If the unit is NOT
turned on, repeat from step 1.
Control Four JVC VCRs
The remote control is capable of controlling two JVC VCRs
independently; one set to respond to your remote control's A
code control signals and the other set to respond to B, C, D
code control signals. The remote control is preset to send A
code signals because your recorder is initially set to respond to
A code signals. You can easily modify your recorder to respond
to the other code signals.
VCR A
VCR C
Ex. When pressing 3.
A
C
TURN ON THE RECORDER
1
Press POWER.
1
2
3
4
5
6
7
8
9
0
2
1
4
3
>
<
1
2
–
+
PLAY
OK
HDD
STOP
POWER
POWER