Access main menu screen, Access vhs set up 2 screen, Select s-vhs mode – JVC HM-HDS1U User Manual
Page 50: Return to normal screen, Recording features for vhs deck (cont.), S-vhs (super vhs), s-vhs et and vhs
50
EN
S-VHS (Super VHS), S-VHS
ET and VHS
Your recorder can record in S-VHS, S-VHS ET or VHS.
S-VHS allows you to make high quality video recordings with a
horizontal resolution of 400 lines. This compares with the 240
lines of resolution of normal VHS recordings. To achieve the
highest quality picture we recommend that you record in S-VHS
mode.
By using S-VHS ET it is possible to record and play back with S-
VHS picture quality on VHS cassettes with this recorder. For
details, refer to the next page.
RECORDING FEATURES for VHS deck (cont.)
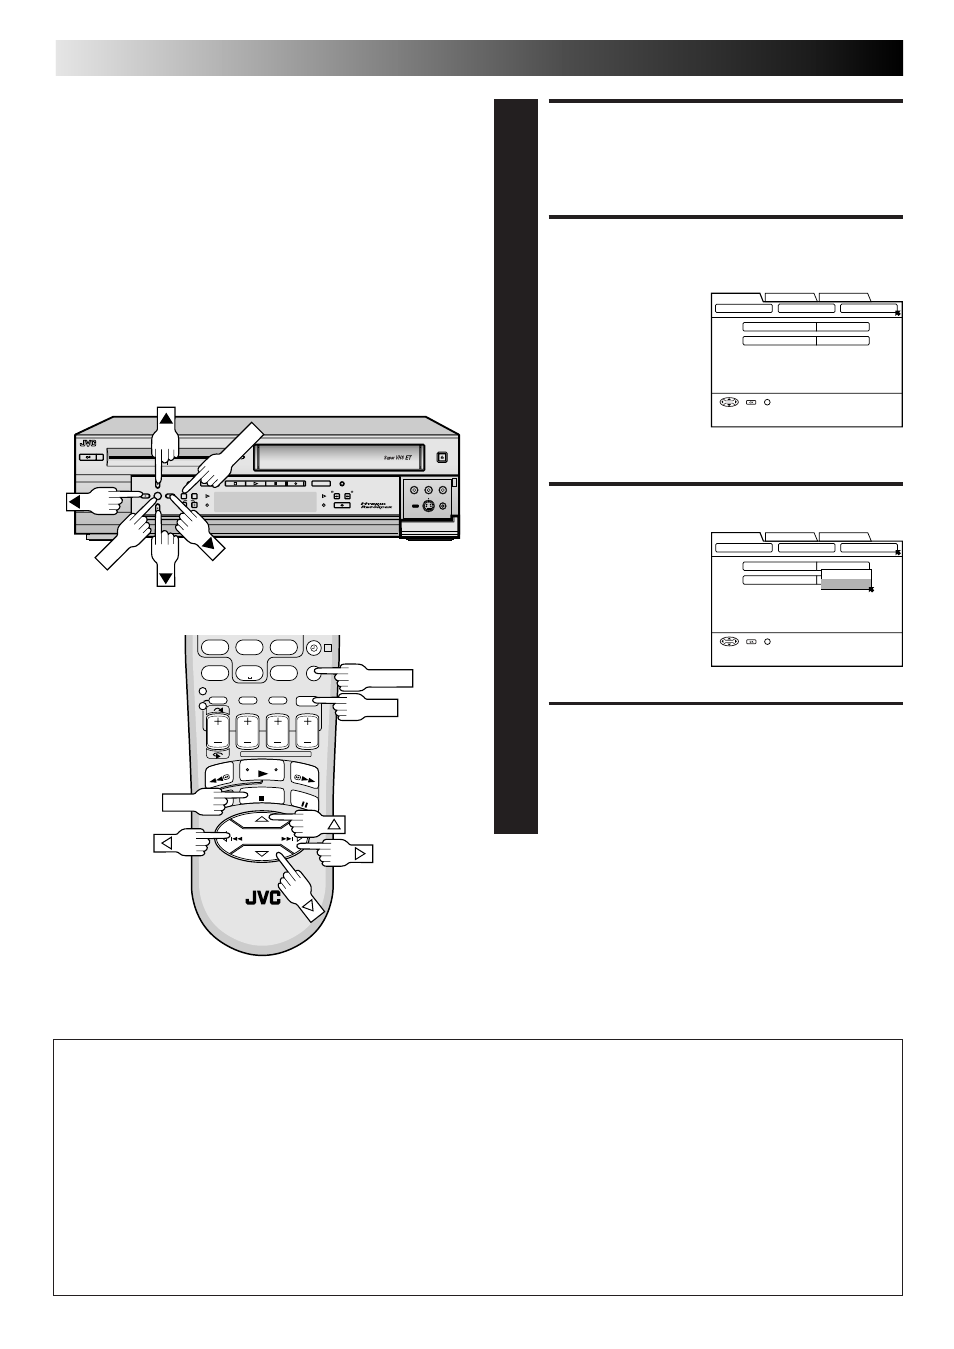
ACCESS MAIN MENU
SCREEN
1
Press MENU.
ACCESS VHS SET UP 2
SCREEN
2
1) At the top of the Main
Menu screen, move
the arrow to “HDD/
VHS SET UP” by
pressing
@# (or 23),
then press
fi (or ∞) or
OK.
2) On the HDD/VHS Set
Up screen, move the
arrow to “VHS SET UP 2” by pressing
@# (or 23),
then press
fi (or ∞) or OK.
SELECT S-VHS MODE
3
1) On the VHS Set Up
2 screen, move the
arrow to “S-VHS
MODE” by pressing
%fi (or 5∞), then
press OK.
2) Pressing
%fi (or 5∞)
to select the desired
mode, then press
OK.
RETURN TO NORMAL
SCREEN
4
Press MENU.
NOTE:
When playing back a tape that has been recorded in S-VHS or
S-VHS ET, the S-VHS indicator lights on the display panel
regardless of the “S-VHS MODE” setting.
S-VHS MODE
ON
AUTO SP
=EP TIMER
OFF
HDD/VHS SET UP
INITIAL SET UP
FUNCTION SET UP
VHS SET UP 1
VHS SET UP 2
HDD SET UP
SELECT OK END
SELECT WITH [
∞523]
THEN PRESS [OK]
INDEX
MENU
OFF
ON
NOTE:
Tapes recorded in S-VHS or S-VHS ET mode can not be played
back successfully on normal VHS VCRs.
To record in S-VHS;
● perform the steps 1 – 4 below to set the “S-VHS MODE” to
“ON”.
● then, insert a cassette marked “S-VHS”, the S-VHS indicator
will light on the display panel.
The S-VHS recording mode will be automatically selected.
To record in S-VHS ET on a VHS high grade cassette;
● press S-VHS ET and set to “ON”.
੬
“Super VHS ET” on the next page.
To record in VHS;
● insert a cassette marked “VHS”.
● press S-VHS ET and set to “OFF”.
The VHS recording mode will be automatically selected
regardless of the S-VHS mode setting.
To record in VHS on an S-VHS cassette;
● insert the cassette marked “S-VHS”, the S-VHS indicator will
light on the display panel.
● then, perform the steps 1 – 4 below to set the “S-VHS MODE”
to “OFF”; the S-VHS indicator will go out.
The VHS recording mode will be selected.
S-VHS MODE
ON
AUTO SP
=EP TIMER
OFF
HDD/VHS SET UP
INITIAL SET UP
FUNCTION SET UP
VHS SET UP 1
VHS SET UP 2
HDD SET UP
SELECT OK END
SELECT WITH [
∞523]
THEN PRESS [OK]
INDEX
MENU
;;;
;;;
yyy
yyy
DIGITPURE TECHNOLOGY
HM-HDS1
;;
;;
;;
yy
yy
yy
POWER
S-VHS ET
S-VHS
HDD
OK
MENU
REC LINK
CH
NAVI
STOP
PLAY
PAUSE
REC
REW
FEW
A. DUB
EJECT
VIDEO
PAUSE
S-VIDEO
(M) L – AUDIO – R
F - 1
7
8
9
0
4
>
<
1
2
–
+
MENU
OK
MENU
OK
OK