Access main menu screen, Access function screen, Select superimpose mode – JVC HM-HDS1U User Manual
Page 41: Return to normal screen, Superimpose
EN
41
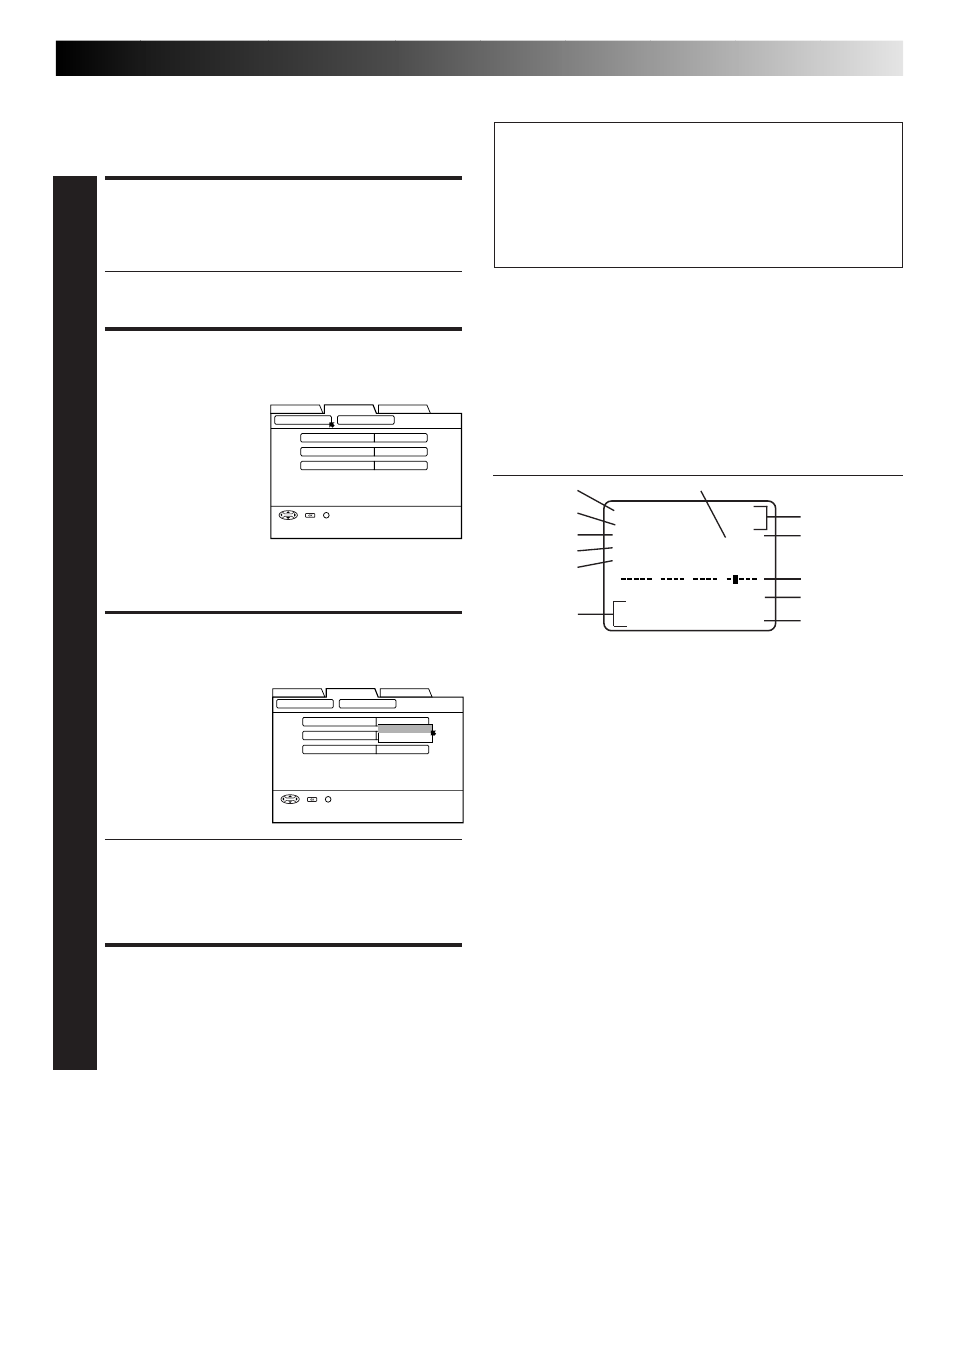
CH 125
RECORD
THU 12:00 AM
PAUSE
STEREO
]
SP
SAP
VHS
INDEX-1
NORM
HI–FI COUNT
–1:23:45
B
E
+
+
+
The superimposed indication on the TV screen tells you
what the recorder is doing.
NOTES:
●
If you engage the Record Pause mode, RECORD/PAUSE is
displayed regardless of the Superimpose mode setting.
●
If you select a channel on which no signal is received, the
channel number is displayed regardless of the Superimpose
mode setting.
To recall an indication
1
Press OSD.
Ⅲ All indications corresponding to the current status are
displayed for 5 seconds. After that, the counter
information and RECORD/PAUSE if in the Record Pause
mode, are left displayed on the screen.
2
Press OSD again to clear the display.
Ⅲ The RECORD/PAUSE indication is left displayed on the
screen.
1– Tuned-in channel or AUX(iliary) mode
When the channel is changed, the new channel is
displayed on the screen for 5 seconds.
2– Clock time
3– Stereo program indication
4– Second Audio Program indication
5– VHS indicator
6– Audio mode indications
7– “Cassette Loaded” mark
When a cassette is loaded, the mark is displayed for 5
seconds. It blinks when the recorder’s EJECT button is
pushed.
8– Operation mode
When the operation mode is changed, the new mode is
displayed — RECORD (5 sec.), PLAY (5 sec.), FF/REW (5
sec. when engaged from Stop mode), RECORD PAUSE (for
as long as Pause is engaged), and ITR *:** (5 sec.).
9– Tape speed indication
10– Tape position indicator
11– INDEX indication
12– Counter reading
Switchable to the tape remaining time display
7
8
9
11
12
1
4
6
2
3
VHS
5
10
Superimpose
This function, switchable between ON and OFF, determines
whether or not operational indicators will appear on screen.
ACCESS MAIN MENU
SCREEN
1
Press MENU.
● If you want to stop the following procedure on its
way, press MENU.
ACCESS FUNCTION
SCREEN
2
1) At the top of Main
Menu screen, move
the arrow to “FUNC-
TION SET UP” by
pressing
@# (or 23),
then press
fi (or ∞)
or OK.
2) On the Function Set
Up screen, move the
arrow to “FUNCTION” by pressing
@# (or 23),
then press
fi (or ∞) or OK.
SELECT SUPERIMPOSE
MODE
3
1) On the Function
screen, move the
arrow to “SUPERIM-
POSE” by pressing
%fi (or 5∞), then
press OK.
2) Press
%fi (or 5∞) to
select the desired
mode, then press OK.
a– Select “ON” if you want the superimposed opera-
tional indications on the screen about 5 seconds
when operating the recorder.
b– Select “OFF” if you do not want the superimposed
operational indications on the screen.
RETURN TO NORMAL
SCREEN
4
Press MENU.
HDD/VHS SET UP
INITIAL SET UP
FUNCTION SET UP
SUPERIMPOSE
OFF
BLUE BACK
ON
2ND AUDIO RECORD
OFF
VIDEO INPUTS
FUNCTION
SELECT OK END
SELECT WITH [
∞523]
THEN PRESS [OK]
INDEX
MENU
HDD/VHS SET UP
INITIAL SET UP
FUNCTION SET UP
SUPERIMPOSE
OFF
BLUE BACK
ON
2ND AUDIO RECORD
OFF
VIDEO INPUTS
FUNCTION
SELECT OK END
SELECT WITH [
∞523]
THEN PRESS [OK]
INDEX
MENU
OFF
ON