Replacing the control panel, Replacing the system board – Gateway E-9425R User Manual
Page 60
CHAPTER 4: Installing Components
54
Replacing the control panel
To replace the control panel:
1
Follow the instructions in
“Preventing static electricity discharge” on page 28
. Make sure
that you turn off the server, then unplug the power cord(s) and all other cables connected
to the server.
2
Follow the instructions in
“Opening the server case” on page 29
.
3
Unlock the bezel (if necessary) and remove it by pulling it straight out from the front of
the chassis.
4
Disconnect the cables from the control panel.
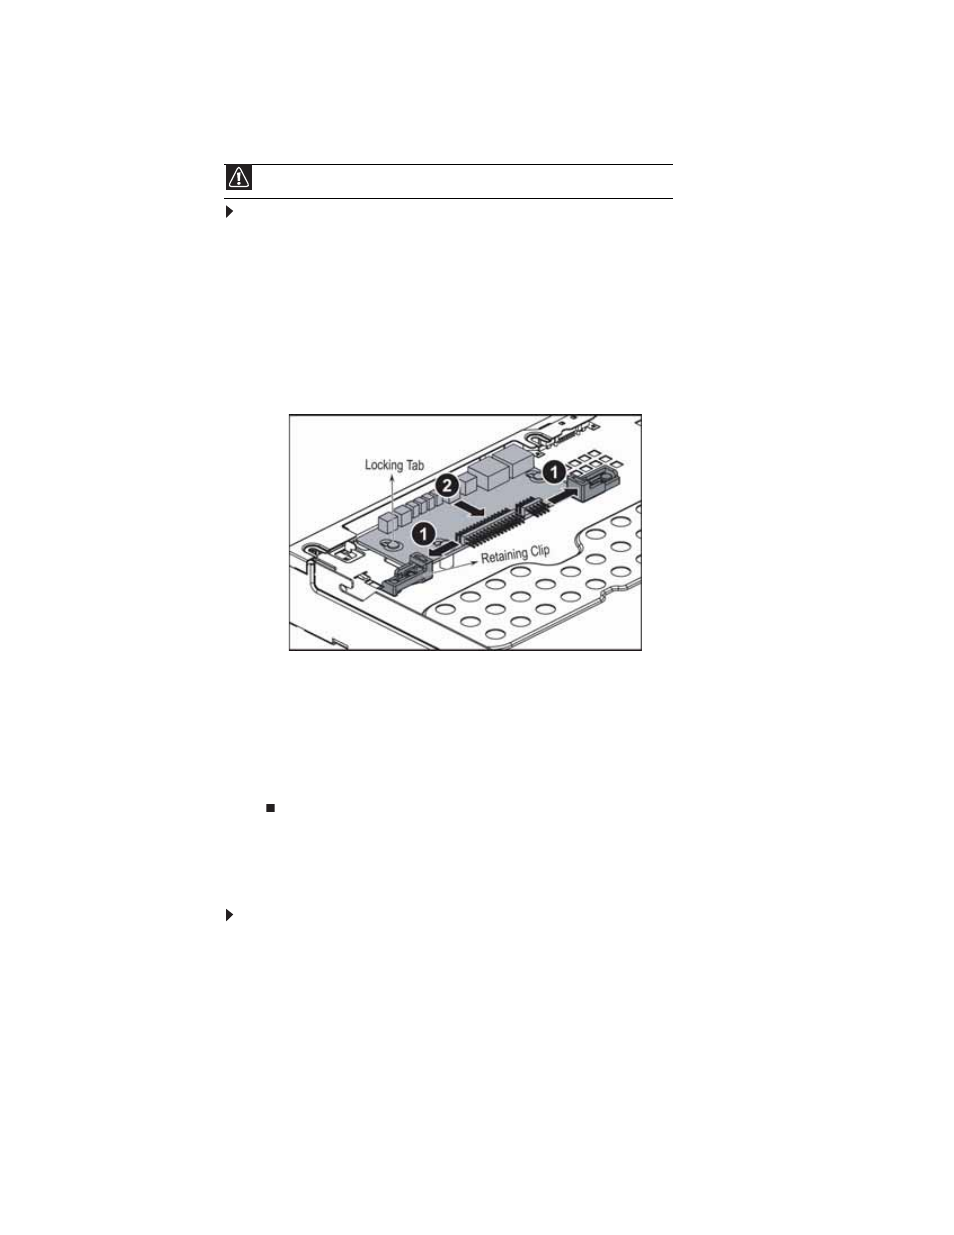
5
Push the retaining clips (1) to the open position, then slide the control panel (2) back from
the front of the server to disengage it from the locking tabs and remove it.
6
Holding the new control panel by the edges, align it with the locking tabs, then place it
on the tabs and slide it toward the front of the chassis.
7
Push the retaining tabs to the closed position to hold the control panel in place in the
chassis.
8
Connect the cables that you previously removed.
9
Follow the instructions in
“Closing the server case” on page 30
10
Replace the bezel by snapping it into place on the front of the server.
Replacing the system board
To replace the system board:
1
Follow the instructions in
“Preventing static electricity discharge” on page 28
. Make sure
that you turn off the server, then unplug the power cord(s) and all other cables connected
to the server.
2
Follow the instructions in
“Opening the server case” on page 29
.
3
Remove the system fans and fan cage by following the instructions in
.
4
Remove the PCI riser assembly by following the instructions in
PCI expansion cards” on page 39
.
5
Remove the memory modules by following the instructions in
Caution
Your server must be operated with a control panel module in place.