Gateway E-9425R User Manual
Page 18
CHAPTER 2: Setting Up Your Server
12
3
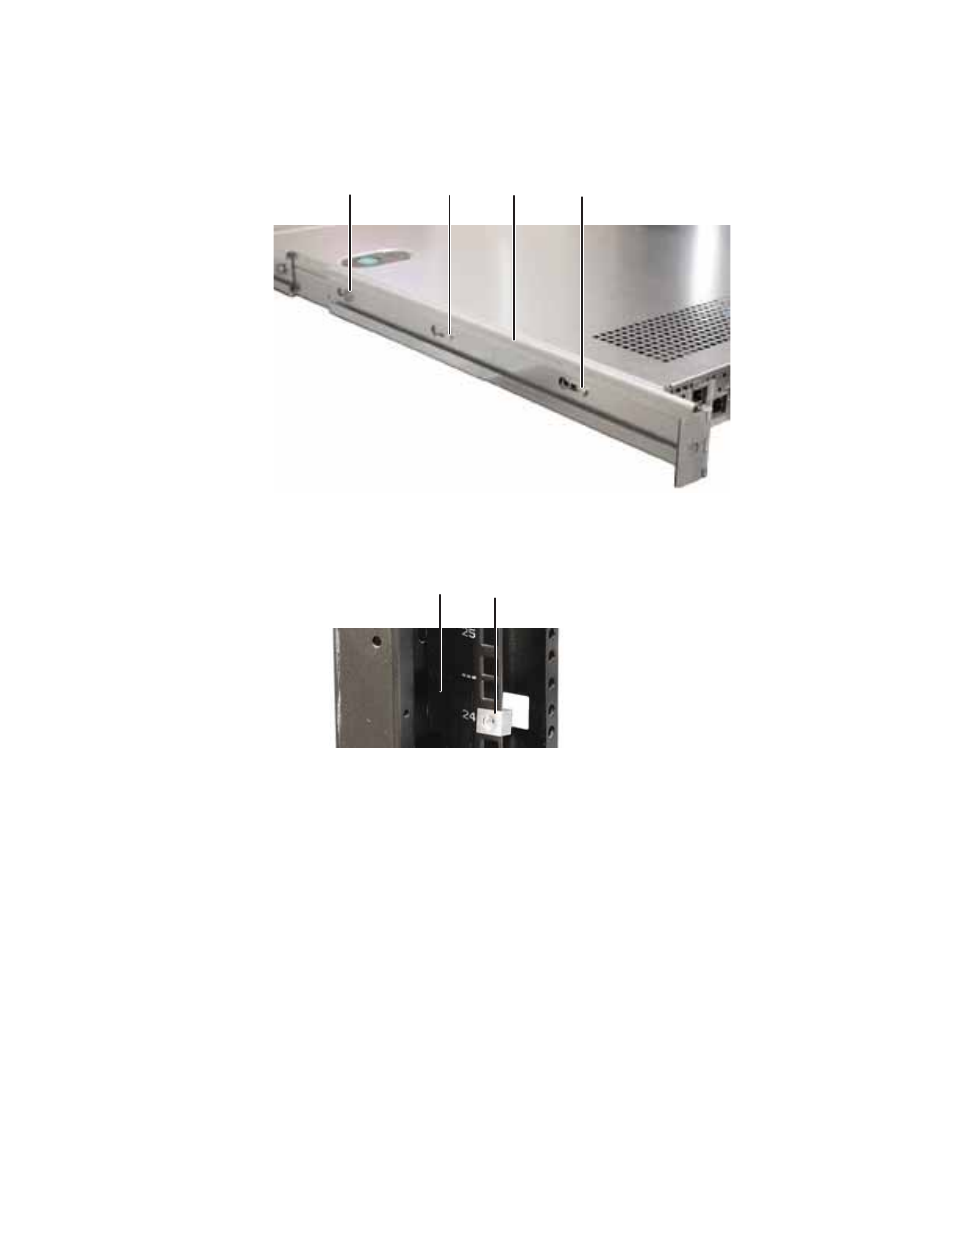
Align the slots in the back server rails with the studs on the side of the server, then engage
the slots with the studs and slide the rail forward until it stops.
4
Align the locking screw holes in the rails with the threaded screw holes in the server, then
install one locking screw through the each back server rail.
5
Attach mounting nuts to the two front cabinet posts where you plan to install the server.
Stud
Stud
Locking screw (installed)
Back server rail
(installed)
Front cabinet post
Mounting nut
See also other documents in the category Gateway Computers:
- E-2300 (134 pages)
- E-4100 (144 pages)
- ALR 7300 (138 pages)
- E-4650 (134 pages)
- E-6300 (136 pages)
- E-9232T (96 pages)
- 610 (108 pages)
- ProfileTM 5 (292 pages)
- Profile 6 (130 pages)
- E SERIES E-6000 (190 pages)
- SZSL95IN0XXXXXXXX (132 pages)
- 8400 (34 pages)
- DX4800 (94 pages)
- GR380 F1 (17 pages)
- MAN FX510 (150 pages)
- GM5688E (140 pages)
- GR585 F1 (14 pages)
- 6400 (148 pages)
- GM5478 (2 pages)
- 7400 (156 pages)
- E-5250 (46 pages)
- FX6710 (1 page)
- ALR 7200 (134 pages)
- FX542X (154 pages)
- 7250R (135 pages)
- 7250R (26 pages)
- DX430X (96 pages)
- 8450R (4 pages)
- 8450R (172 pages)
- 7450R (124 pages)
- E-5400 (130 pages)
- E-5200 (46 pages)
- PC (110 pages)
- GR160 F1 (14 pages)
- ALR 8300 (128 pages)
- eMachine 3 (96 pages)
- 9415 (188 pages)
- 980 (131 pages)
- 9210 (106 pages)
- E1400 (136 pages)
- FX542XT (94 pages)
- E3400 (126 pages)
- Media Center (28 pages)
- MT-6733 (3 pages)