Gateway E-9425R User Manual
Page 48
CHAPTER 4: Installing Components
42
6
Insert the replacement fan group into the fan cage.
7
Connect the 6-pin fan tach cable from the fan to the fan board.
8
Follow the instructions in
“Closing the server case” on page 30
To replace the system fans and the fan board:
1
Follow the instructions in
“Preventing static electricity discharge” on page 28
. Make sure
that you turn off the server, then unplug the power cord(s) and all other cables connected
to the server.
2
Follow the instructions in
“Opening the server case” on page 29
.
3
Disconnect the 6-pin fan tach cables from the fan board.
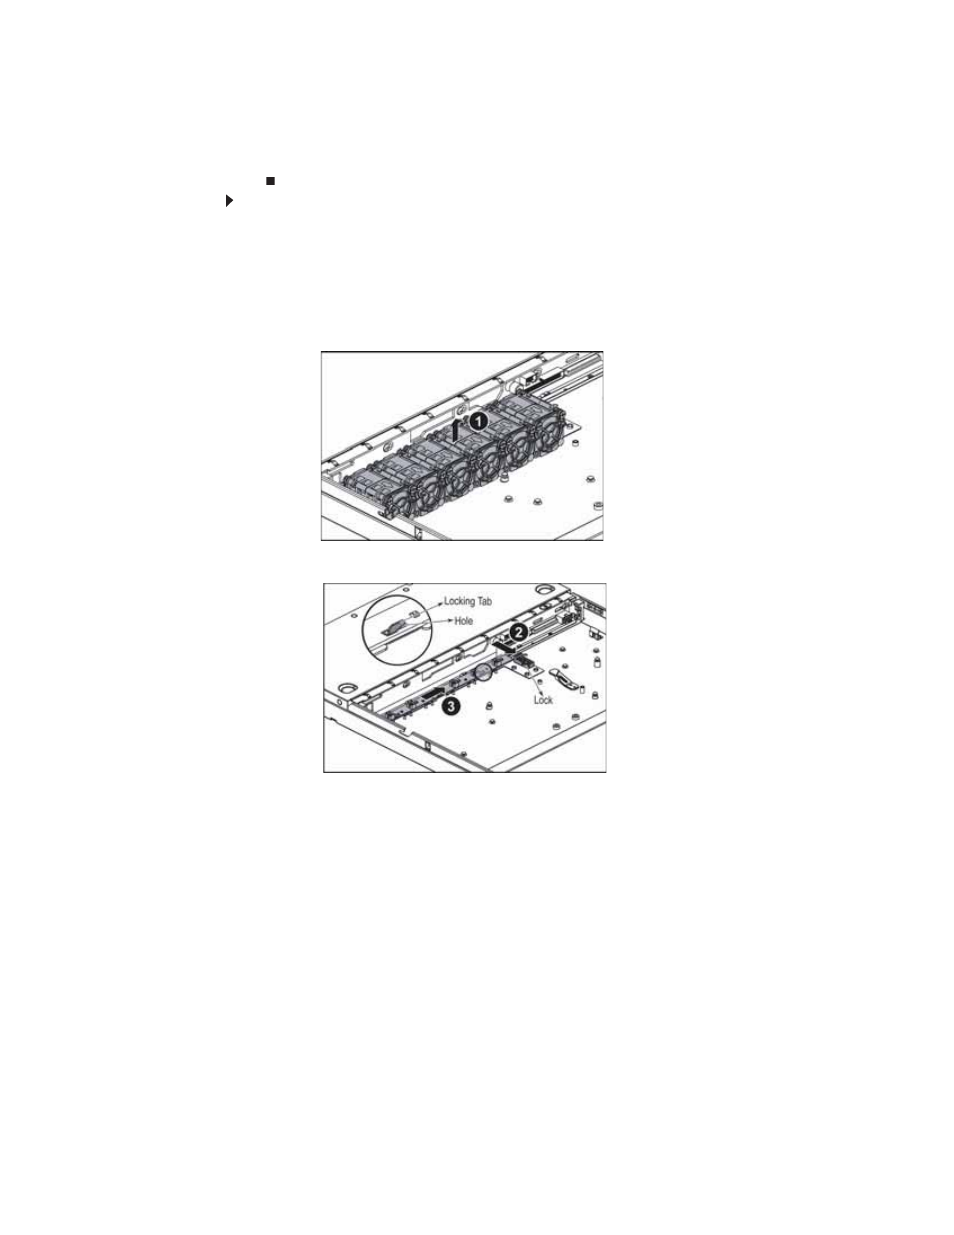
4
Lift the fan cage and fans (1) out of the server.
5
Push the fan board lock (2) toward the back of the server case to release the fan board.
6
Push the fan board toward the fan board lock to disengage it from the locking tabs (3),
then lift the fan board out of the server case.
7
Insert the replacement fan board into the server case, aligning the locking slots in the board
with the locking tabs in the case.
8
Push the fan board away from the fan board lock, then move the lock into position to
hold the fan board in place.
9
Place the system fan cage and fans onto the fan board, making sure to engage the fan
cage with the locking tabs on the chassis.