Gateway E-9425R User Manual
Page 38
CHAPTER 4: Installing Components
32
5
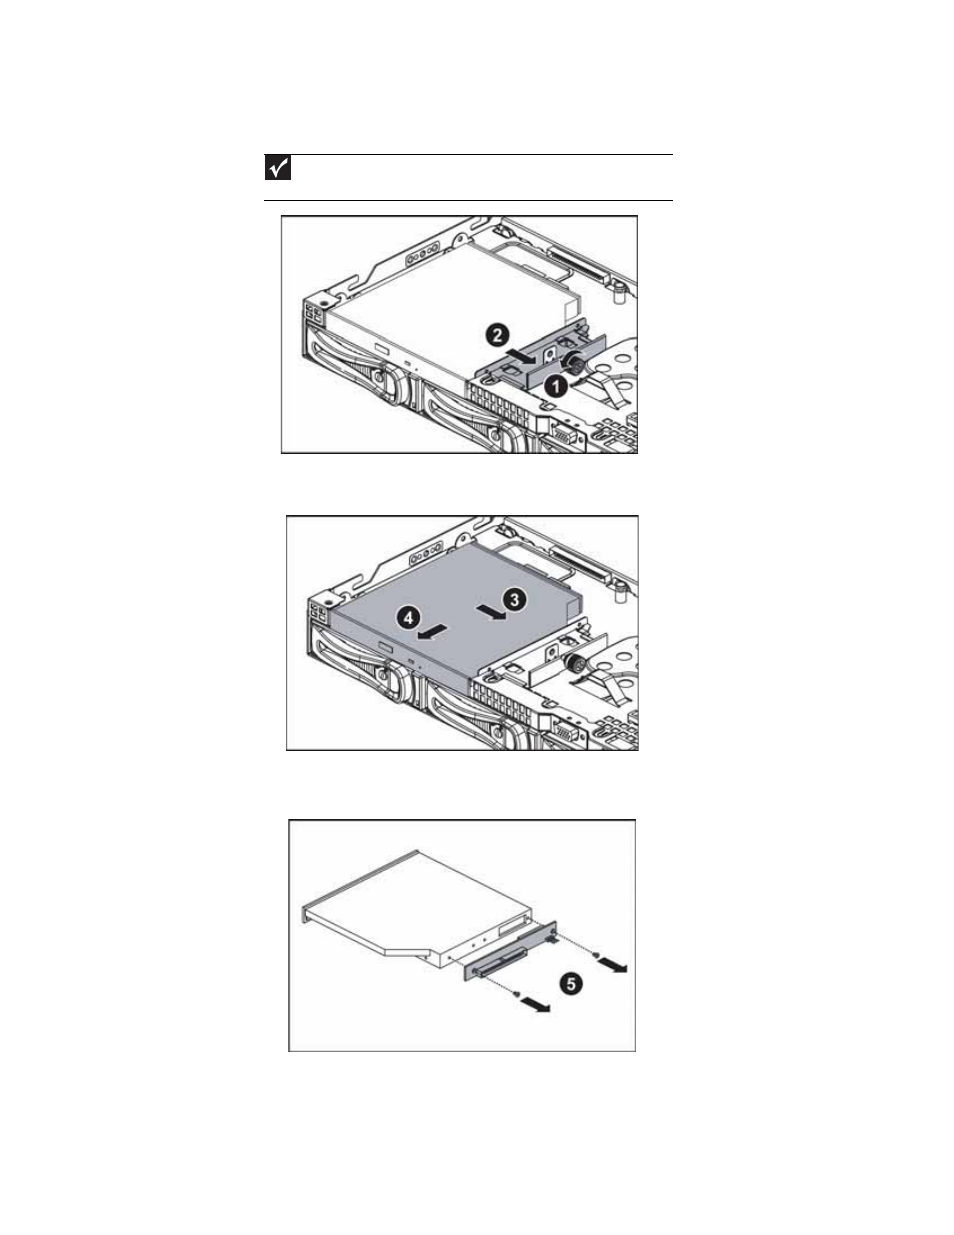
Loosen the thumbscrew (1) holding the retaining clip (2) against the side of the optical drive,
then move the retaining clip away from the drive.
6
Push the optical drive to the right to release the drive from the drive bay, then pull the
drive out of the bay.
7
Unscrew the two screws holding the optical drive interface board on the back of the optical
drive, then remove it.
8
Using the two screws you just removed, attach the optical drive interface board to the
back of the new optical drive.
Important
The hard drive carriers shown in these illustrations may look different than
the actual hard drive carriers in your server.
See also other documents in the category Gateway Computers:
- E-2300 (134 pages)
- E-4100 (144 pages)
- ALR 7300 (138 pages)
- E-4650 (134 pages)
- E-6300 (136 pages)
- E-9232T (96 pages)
- 610 (108 pages)
- ProfileTM 5 (292 pages)
- Profile 6 (130 pages)
- E SERIES E-6000 (190 pages)
- SZSL95IN0XXXXXXXX (132 pages)
- 8400 (34 pages)
- DX4800 (94 pages)
- GR380 F1 (17 pages)
- MAN FX510 (150 pages)
- GM5688E (140 pages)
- GR585 F1 (14 pages)
- 6400 (148 pages)
- GM5478 (2 pages)
- 7400 (156 pages)
- E-5250 (46 pages)
- FX6710 (1 page)
- ALR 7200 (134 pages)
- FX542X (154 pages)
- 7250R (135 pages)
- 7250R (26 pages)
- DX430X (96 pages)
- 8450R (172 pages)
- 8450R (4 pages)
- 7450R (124 pages)
- E-5400 (130 pages)
- E-5200 (46 pages)
- PC (110 pages)
- GR160 F1 (14 pages)
- ALR 8300 (128 pages)
- eMachine 3 (96 pages)
- 9415 (188 pages)
- 980 (131 pages)
- 9210 (106 pages)
- E1400 (136 pages)
- FX542XT (94 pages)
- E3400 (126 pages)
- Media Center (28 pages)
- MT-6733 (3 pages)