Replacing the power cage – Gateway E-9425R User Manual
Page 54
CHAPTER 4: Installing Components
48
7
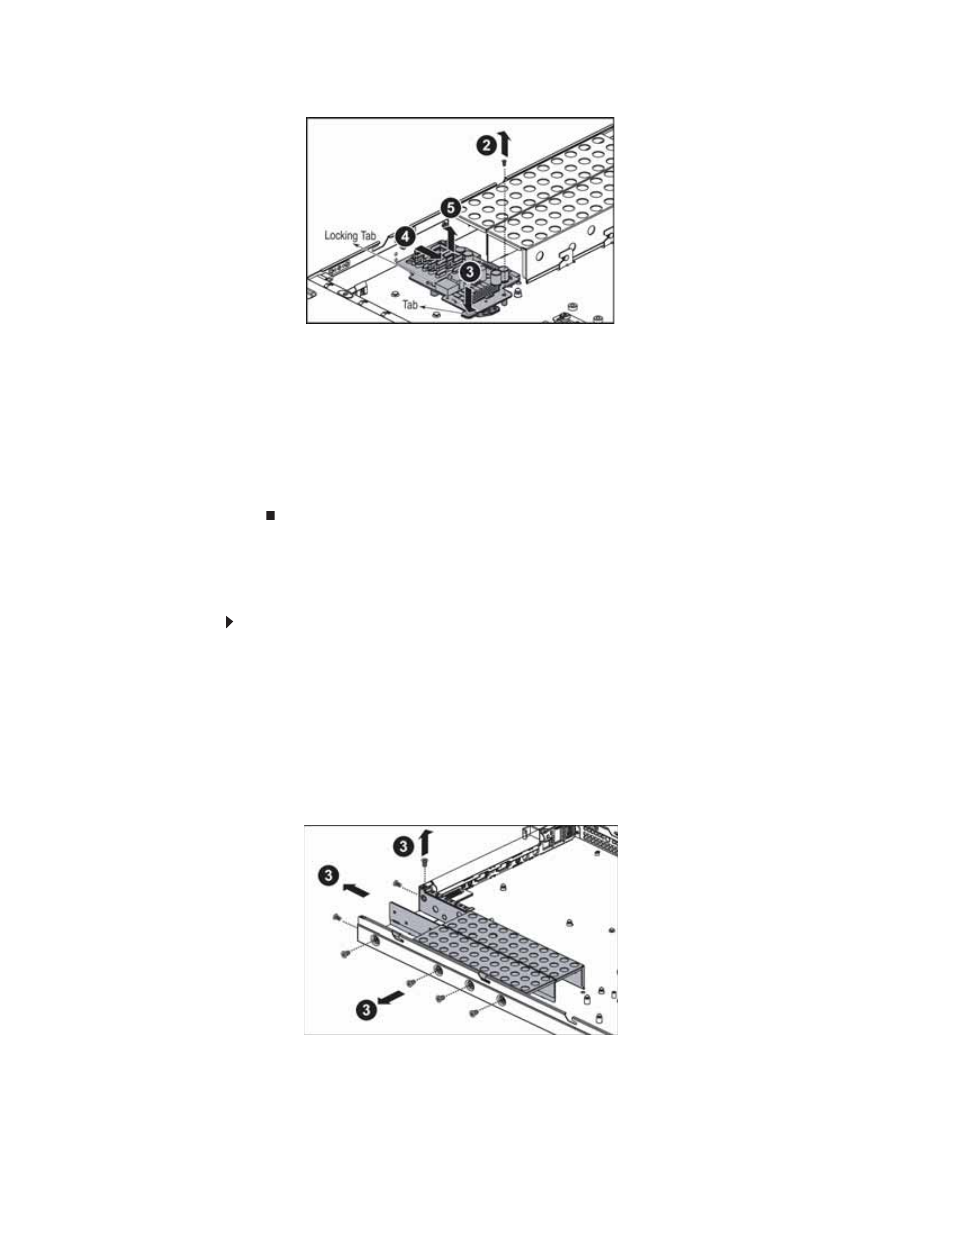
Align the new power distribution board with the stand-off and locking tabs on the chassis,
then place it on the stand-offs and slide it toward the side of the chassis until the tab clicks
into place.
8
Replace the screw you previously removed.
9
Reconnect the power cables. See
for the location of the
connectors on the system board.
10
Reinstall the power supply modules by following the instructions in
.
11
Follow the instructions in
“Closing the server case” on page 30
Replacing the power cage
To replace the power cage:
1
Follow the instructions in
“Preventing static electricity discharge” on page 28
. Make sure
that you turn off the server, then unplug the power cord(s) and all other cables connected
to the server.
2
Follow the instructions in
“Opening the server case” on page 29
.
3
Remove the power supply modules by following the instructions in
.
4
Remove the power distribution board by following the instructions in
hot-swap backplanes” on page 49
5
Loosen the screws (3) holding the power cage in the chassis.