FUJITSU 32 User Manual
Page 26
19
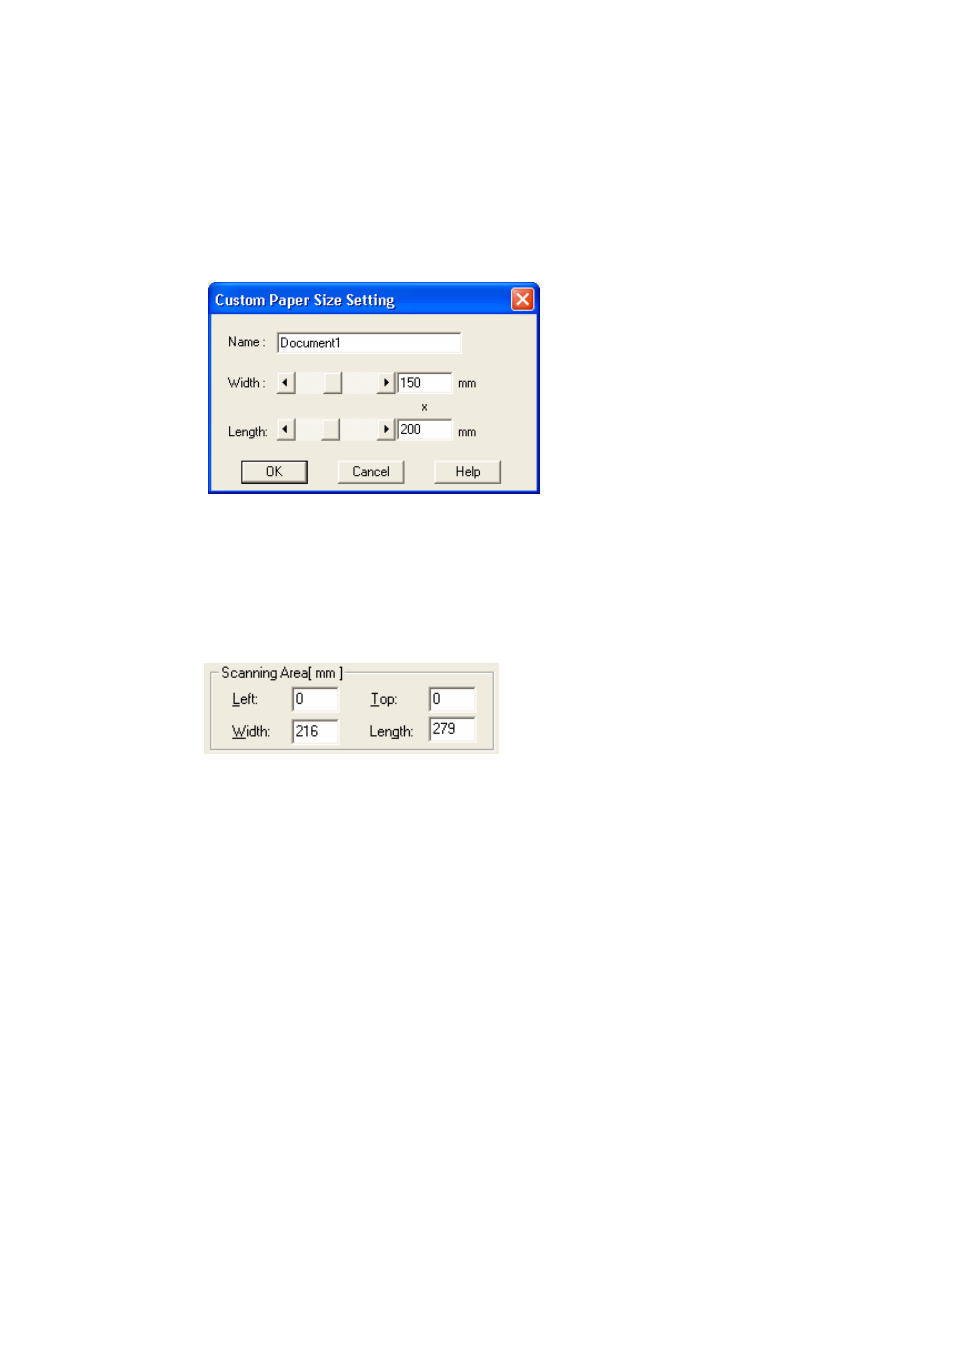
[Custom Paper Size Setting] window will appear when you click the [Custom] button. Enter
the size of the document to be scanned. (When entering the size, specify the paper size by
width x length to the scanning direction.)
Some paper sizes may not be accepted by your device. Refer to "Relevant Image Scanner
Specification" in Appendix.
Name :
Enter the name of the customized setting to be displayed in the list.
Width, Length
:
To specify a custom paper size, use the scroll bar or enter the paper
size directly. The unit specified in [Option]-[Generic]-[Unit/Scaling]
will be applied to the unit in this window.
♦ Scanning Area
Specifies the start position, width and length for the image scan. The maximum allowable
size is the paper size selected previously.
In addition, the minimum size is 1.000 inch, 26 millimeters, or pixels (number of dots per
inch) according to the unit that has been set.
"Left":
The left end of the scan area on the scanned document (X coordinate)
"Top":
The top end of the scan area or the scanned document (Y coordinate)
"Width":
The width of the scan area
"Length":
The length of the scan area
These values are related to one another in the following way:
0
≤ left end coordinate < (paper width - minimum scan area size)
0
≤ top end coordinate < (paper length - minimum scan area size)
Minimum value
≤ width ≤ (paper width - left end coordinate)
Minimum value
≤ length ≤ (paper length - top end coordinate)