Testhead & patchboard p/s replacement – HP 2040D User Manual
Page 54
Series 2040 Test System
Series 2040 Maintenance Manual V2.00
Module Repair and Replacement
53
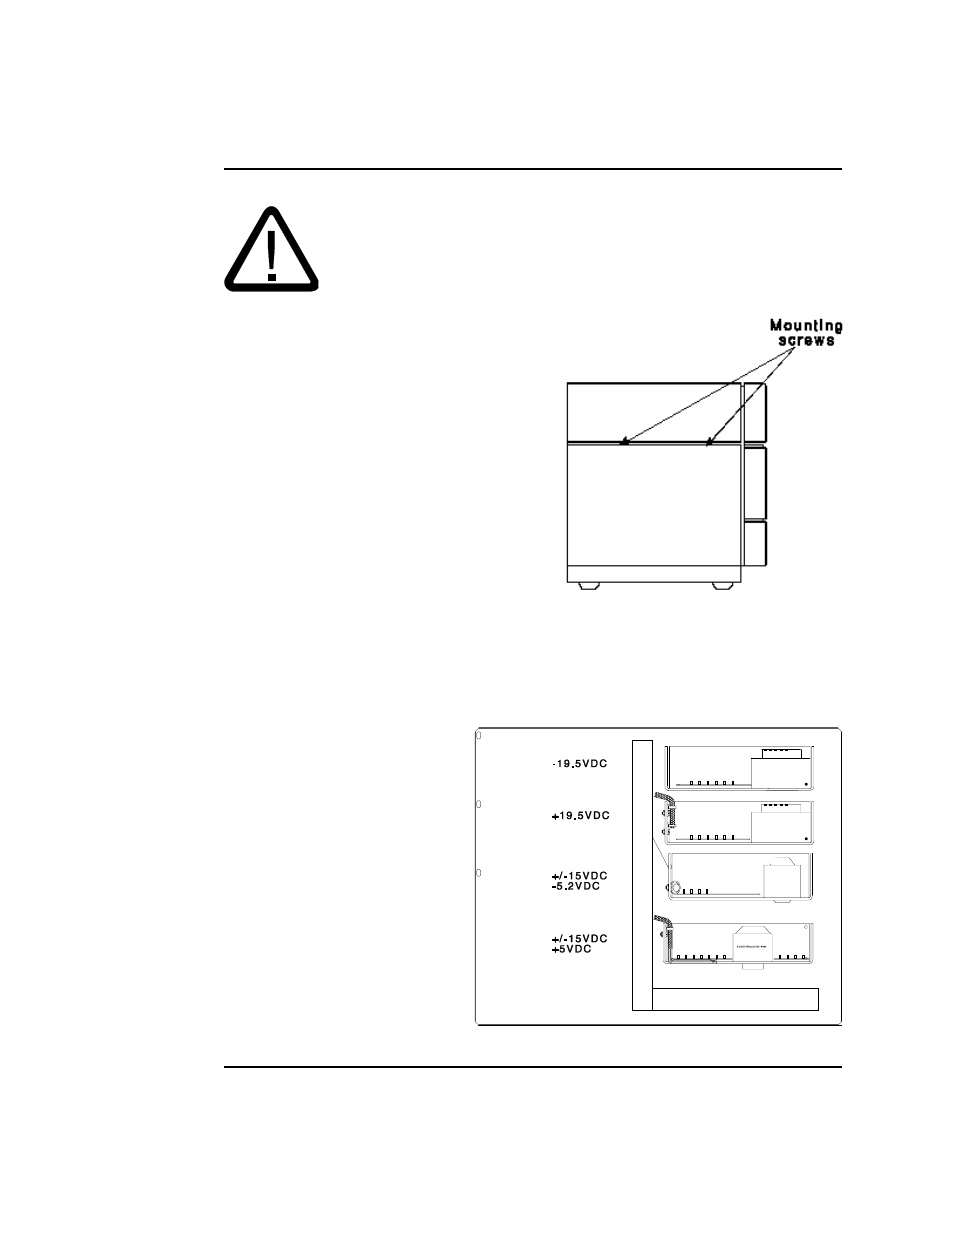
TESTHEAD & PATCHBOARD POWER SUPPLY REPLACEMENT
1) Ensure that the main power cord is
unplugged from the wall outlet.
2) Remove the two side panel
mounting screws from the console as
shown to the right.
3) Lift up on the side panel and
remove it.
4) Remove the two screws from the
front edge of the inner panel and swing
it out to reveal the four power supplies.
5) Locate the proper Testhead or Patchboard power supply connector for the
supply to be replaced and disconnect it from the Testhead Power Supply
Controller. Use the legend below.
6) Remove and replace the
faulty power supply, taking
care to route the new cable
exactly the same as the old
one.
J7
- +5VDC, +15VDC
J8
- -5.2VDC, +15VDC
J9
- +19VDC
J13
- +5VDC
WARNING! Remove main power from tester before proceeding.
- NRM42 (61 pages)
- ProLiant ML370 (50 pages)
- ProLiant ML370 (49 pages)
- ProLiant ML110 G5 (32 pages)
- PC Comm Station Pro 304251-008 (North America) (5 pages)
- 100B-TX (32 pages)
- 3C905B-TX (110 pages)
- EK-STWCT-UG. E01 (45 pages)
- 3800ux (13 pages)
- 5991-6764 (8 pages)
- LTO 4 FC (46 pages)
- StorageWorks Network Attached Storage X3000 (16 pages)
- Ultrium Drive (30 pages)
- ProLiant DL360 (49 pages)
- CD Leycom CFL-512 (5 pages)
- RDX160 (12 pages)
- 345524-B21 (54 pages)
- DT-20 (20 pages)
- SureStore 7115w (136 pages)
- HD1600 (2 pages)
- ProLiant DL160 (38 pages)
- Vectra XW (16 pages)
- D2D4004i (20 pages)
- F1588A (4 pages)
- 94500 (1 page)
- Computer Parts (21 pages)
- MSA50 (8 pages)
- 7750 (32 pages)
- Media Gateways G350 (76 pages)
- P400 Serial (9 pages)
- MSL4048 (4 pages)
- 3C590-TPO (40 pages)
- mv2040 (2 pages)
- AHA-8940 (82 pages)
- ProLiant DL385 (47 pages)
- ProLiant DL385 (174 pages)
- 5300A (19 pages)
- AMD Geode E2047551001R (111 pages)
- 1100d (102 pages)
- Reliable Transaction Router (100 pages)
- xp1024 (2 pages)
- 180 Degree Turn (24 pages)
- procurve J8165A (32 pages)
- 04H8095 (28 pages)
- 744 (154 pages)