Computer assembly – HP 2040D User Manual
Page 52
Series 2040 Test System
Series 2040 Maintenance Manual V2.00
Module Repair and Replacement
51
COMPUTER ASSEMBLY
When it is determined that a problem exists in the computer assembly itself,
the entire assembly must be sent back for repair. To remove the computer
assembly, proceed as follows:
1) Ensure that the main power cord is
unplugged from the wall outlet.
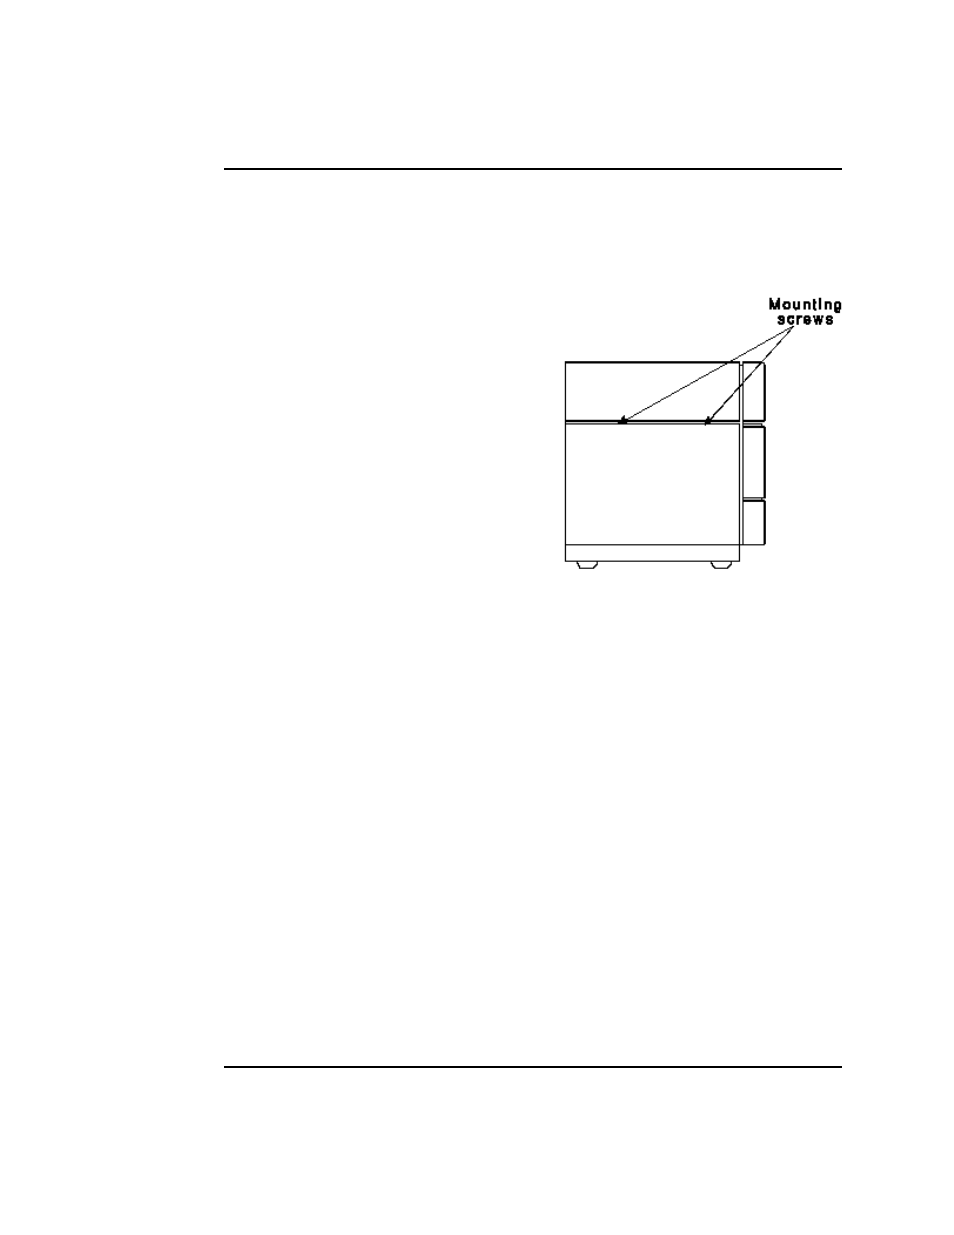
2) Remove the two side panel
mounting screws from the console as
shown to the right.
3) Lift up the side panel and remove it.
4) Remove the two screws from the
front edge of the inner panel and swing
it out to expose the computer
assembly.
5) Carefully remove all of the cables from the rear of the computer assembly
noting where each individual cable was connected.
6) The computer assembly is held in place by four bolt assemblies with rubber
bumpers on them. Relieve the tension on all four bolt assemblies until the
computer moves easily forward and backward.
7) Remove the computer assembly from the front of the tester and send it to
Digalog for repair.
To reinstall the computer assembly, reverse this procedure.